Projecta LCD Control Screen Not Working PM335J – Fixed
Trouble with your Projecta LCD Control Screen not working in your caravan? Follow this easy guide to diagnose, replace and get it working. Projecta LCD Control Screens are the primary interface between users and their power management units in Australian caravans and motorhomes. Like any electronic device, these screens can develop faults over time.
Is your Projecta LCD Control Screen not working properly?
When your Projecta LCD Control Screen develops faults like unresponsive power buttons or display issues the solution is usually a replacement screen. We sourced ours through Projecta’s excellent warranty service. From my research Projecta LCD Control Screen problems are generally fixed by replacement rather than DIY repairs.
Table Of Contents
- Common Symptoms & Causes Of A Faulty Projecta LCD Control Screen
- Contact Methods
- Required Information
- Communication Problems
- Display Or Button Malfunctions
- Regular Cleaning
- Environmental Protection
- My Thoughts On Projecta Customer Service
- Projecta LCD Control Screen Photo Gallery
- Frequently Asked Questions: Projecta LCD Control Screen Not Working
- Why has my Projecta LCD Control Screen stopped working?
- Can I still use my caravan if the LCD screen isn’t working?
- How do I get a replacement Projecta LCD Control Screen?
- Is it safe to replace the screen myself?
- Do I need to reconnect the new screen to the Projecta app?
- What should I do if the new screen still doesn’t work?
Understanding Projecta LCD Control Screen Issues
One of the most common issue involves unresponsive power buttons – that’s what happened to ours. Some users may experience display problems, communication errors, or complete screen failures. Understanding these problems helps caravanners identify when their Projecta LCD Control Screen requires attention.
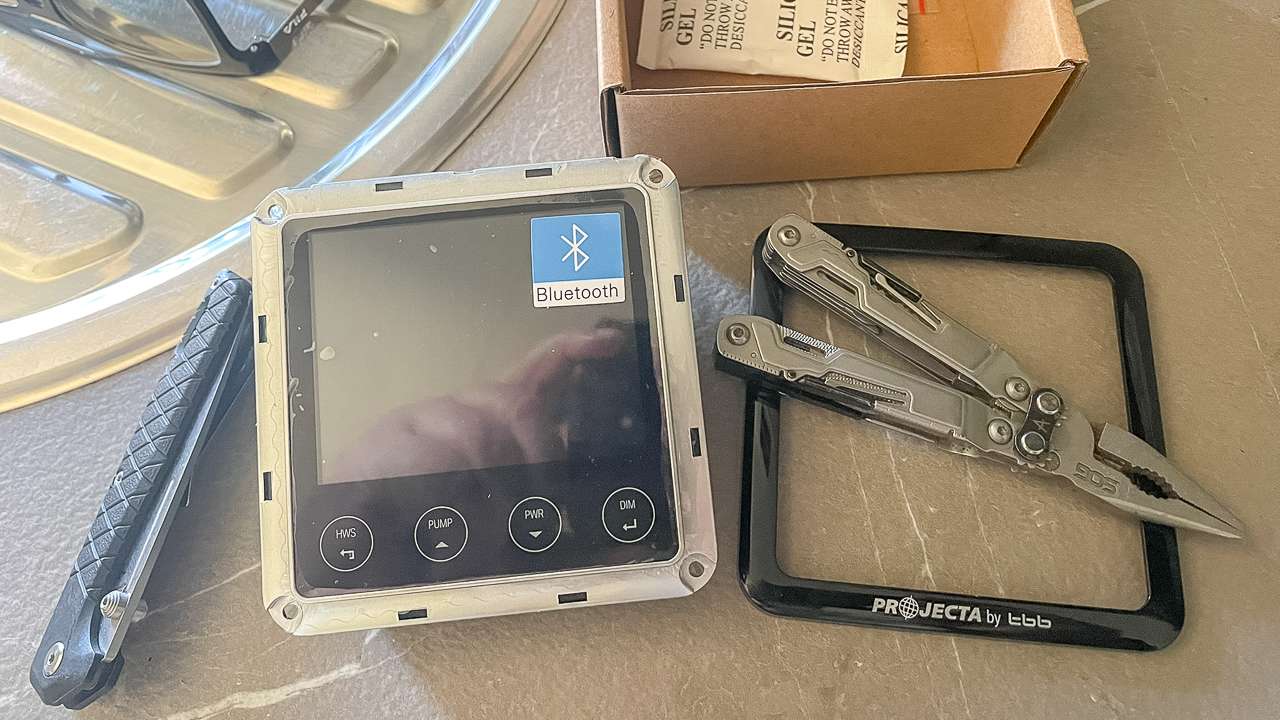
Removing Dress Ring From New Projecta LCD Screen
Common Symptoms & Causes Of A Faulty Projecta LCD Control Screen
- Power buttons become unresponsive despite the system functioning through mobile apps
- Screen displays show distorted information or fail to illuminate
- Communication errors between the screen and BMS unit appear as error codes
- Temperature related issues from extreme Australian heat conditions
- Vibration during travel causes internal component failures – we’ve done lots of dirt roads that could have been the cause of our problem
Getting Help From The Community
Before contacting Projecta directly, the Projecta Switched On Tech Talk Facebook group provides excellent support for troubleshooting issues. This private group contains well over 10,000 members who share experiences and solutions.
Post detailed descriptions of your problem to help community members provide targeted assistance. Include photos of error messages or screen displays to aid in accurate diagnosis. Group recommendations often guide users toward appropriate solutions or direct contact with Projecta support.
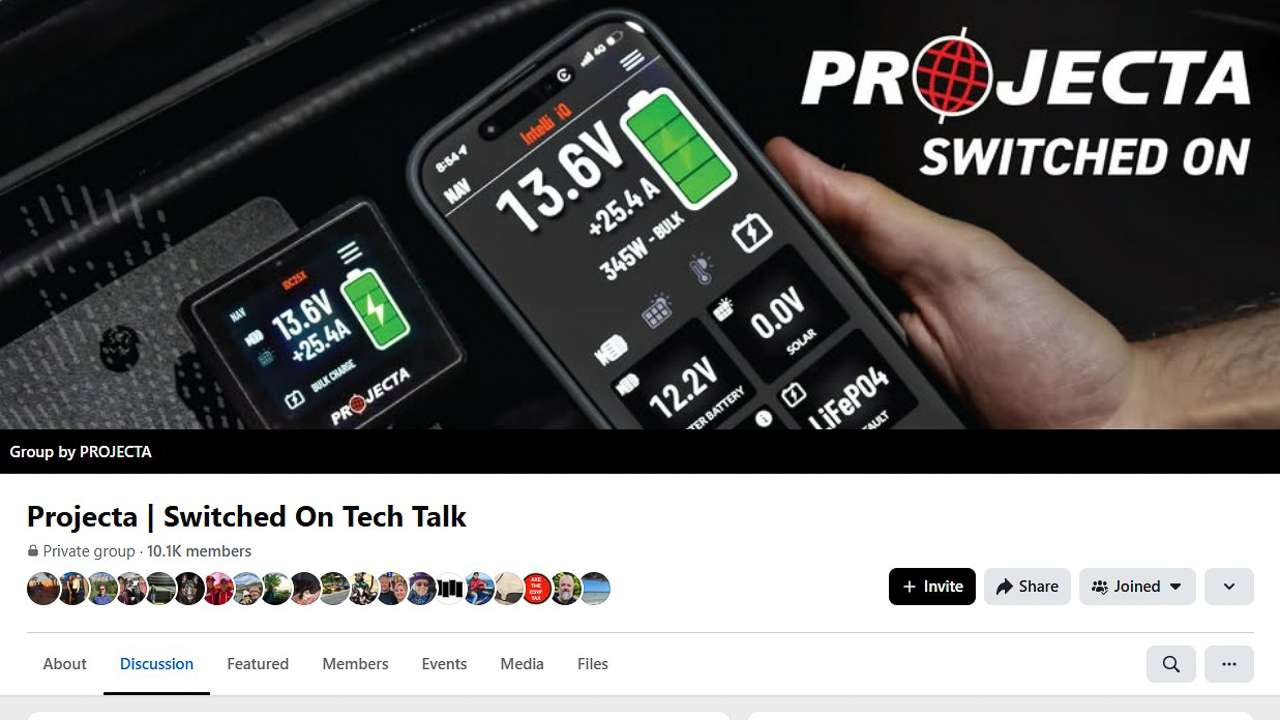
Projecta Switched On Tech Talk Facebook Group
Documenting Your Problem
Thorough documentation assists both community members and Projecta support staff:
- Record specific symptoms affecting your screen functionality
- Note environmental conditions when problems occur
- Document error codes displayed on your PM335J unit
- Record when problems first appeared
The PM335J manual contains comprehensive error code explanations for troubleshooting reference.
Contacting Projecta For Replacement
Projecta’s customer service department handles warranty claims efficiently. Their technical support team operates Monday through Friday, 8:30 AM to 5:00 PM AEST.
Contact Methods
- Toll-free number: 1800 294 294 for direct technical specialist access
- Email support through their official website for documented communication
Required Information
- Your caravan’s chassis number for warranty verification
- Complete postal address for accurate shipping
- Detailed problem descriptions
- Any associated error codes
The Warranty Process
Projecta’s warranty coverage extends three years from original purchase dates for manufacturing defects. This protection covers failures resulting from normal usage. Warranty assessments typically conclude within business days of initial contact.
Projecta typically responds to inquiries within one business day. Replacement screen shipments generally occur within 24-48 hours of approval. Australian postal services typically deliver replacement units within 2-3 business days.
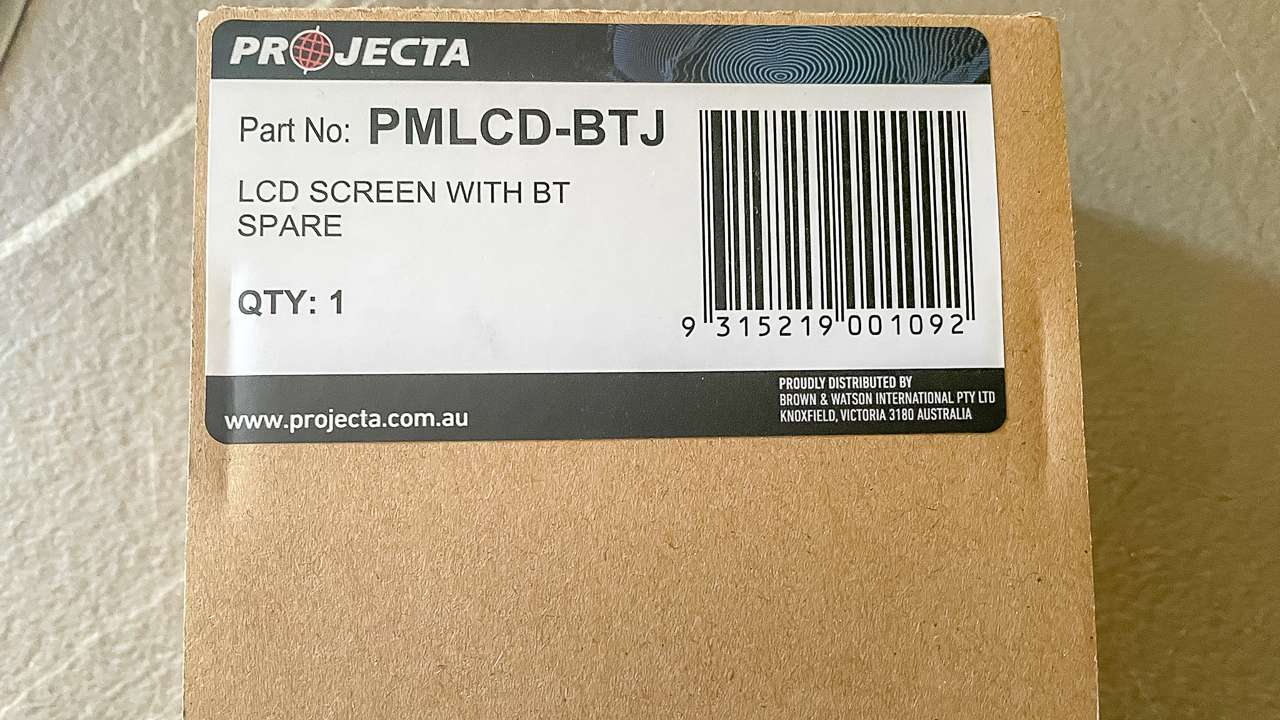
PMLCD BTJ Replaced By Projecta Under Warranty
Safety Precautions
Before replacing your Projecta LCD control screen we need to make sure we’re doing it safely. Working with caravan electrical systems, even 12v ones like I did requires careful attention to safety:
- Disconnect all power sources before beginning replacement work
- Ensure battery isolation switches if installed are OFF throughout the process – otherwise disconnect the battery or batteries from the system
- Use appropriate personal protective equipment
- Ensure completely dry conditions before handling the new screen
- Avoid working during rainy conditions or high humidity
Power Isolation Procedures
Proper power isolation prevents damage to both old and new units:
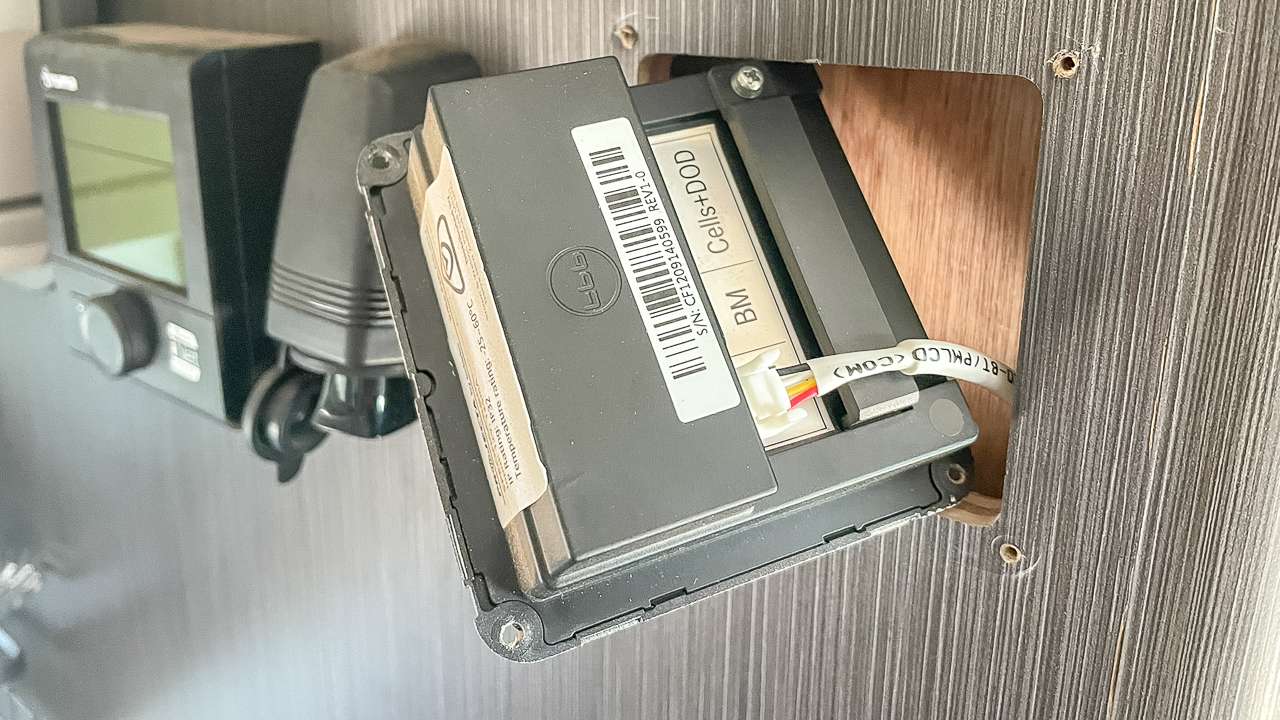
- Locate the main power switch on your BMS transformer unit
- Switch off the unit completely
- Disconnect battery power using isolation switches
- Wait several minutes for capacitors to discharge safely
- Test circuits with multimeters to confirm complete power isolation
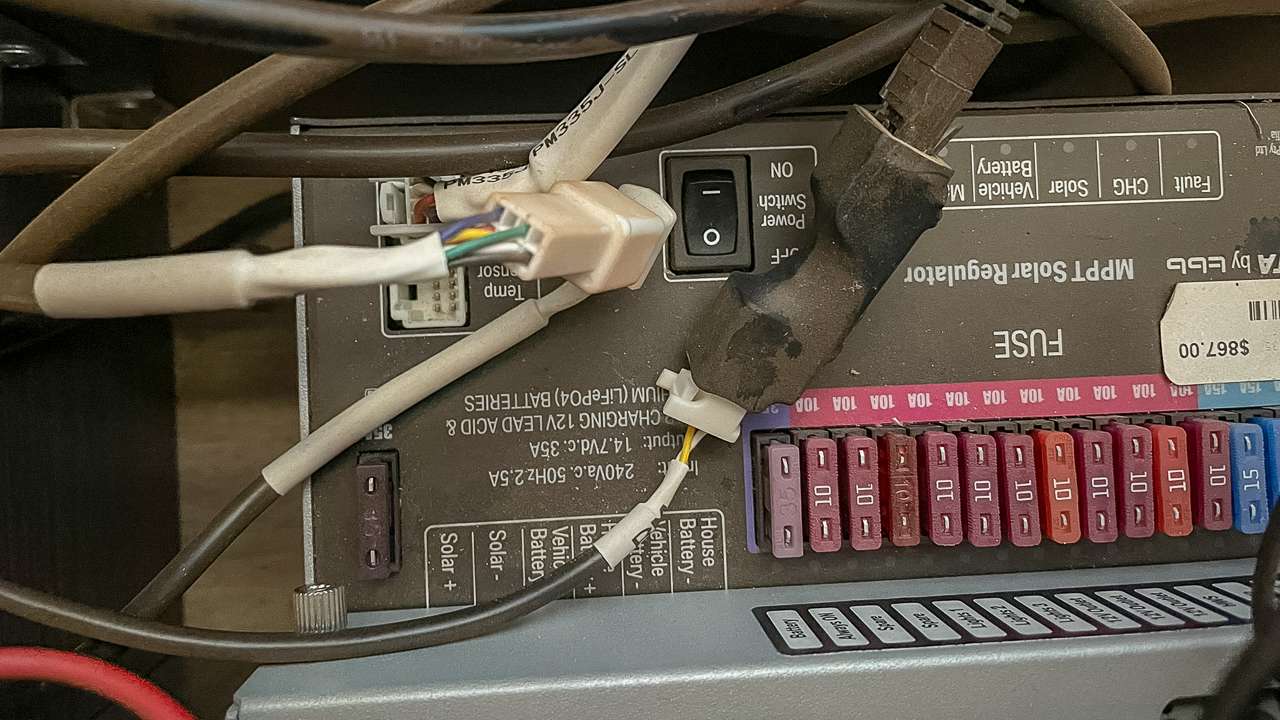
Turning Power Off At The BMS
Tools Required
- Small flathead screwdriver for removing dress rings
- Phillips head screwdrivers for mounting screws
- Clean workspace
- Proper lighting
- Anti-static precautions
Removing The Faulty Screen
- Ensure complete power isolation
- Locate the dress ring surrounding your existing screen
- Carefully insert a thin blade behind the dress ring
- Apply gentle pressure to release retaining clips
- Remove the dress ring to expose mounting screws
- Unscrew the four mounting screws
- Carefully disconnect the communication cable by grasping connectors (not wires)
- Note cable orientations for proper reconnection
- Remove the faulty screen from its mounting position
Installing The Replacement Screen
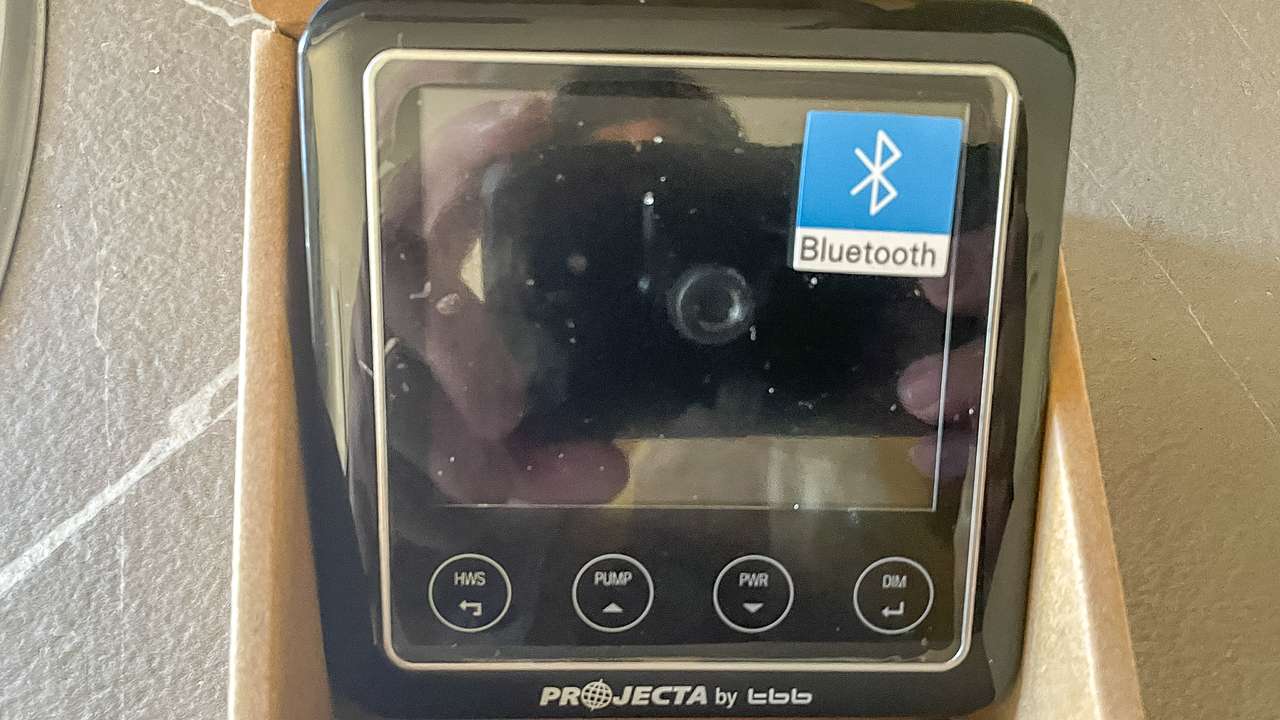
- Remove all packaging materials from the new screen
- Remove protective films from the replacement unit
- Inspect the new screen for shipping damage
- Remove the dress ring from the replacement unit
- Position the new screen to align mounting holes
- Connect the communication cable securely
- Install the four mounting screws using diagonal pattern tightening
- Ensure the screen sits flush against mounting surfaces
- Install the dress ring by clicking it back in place
Reconnecting Power And Testing
- Reconnect battery power using isolation switches in ON position or reconnect the battery or batteries
- Activate the BMS unit’s main power switch
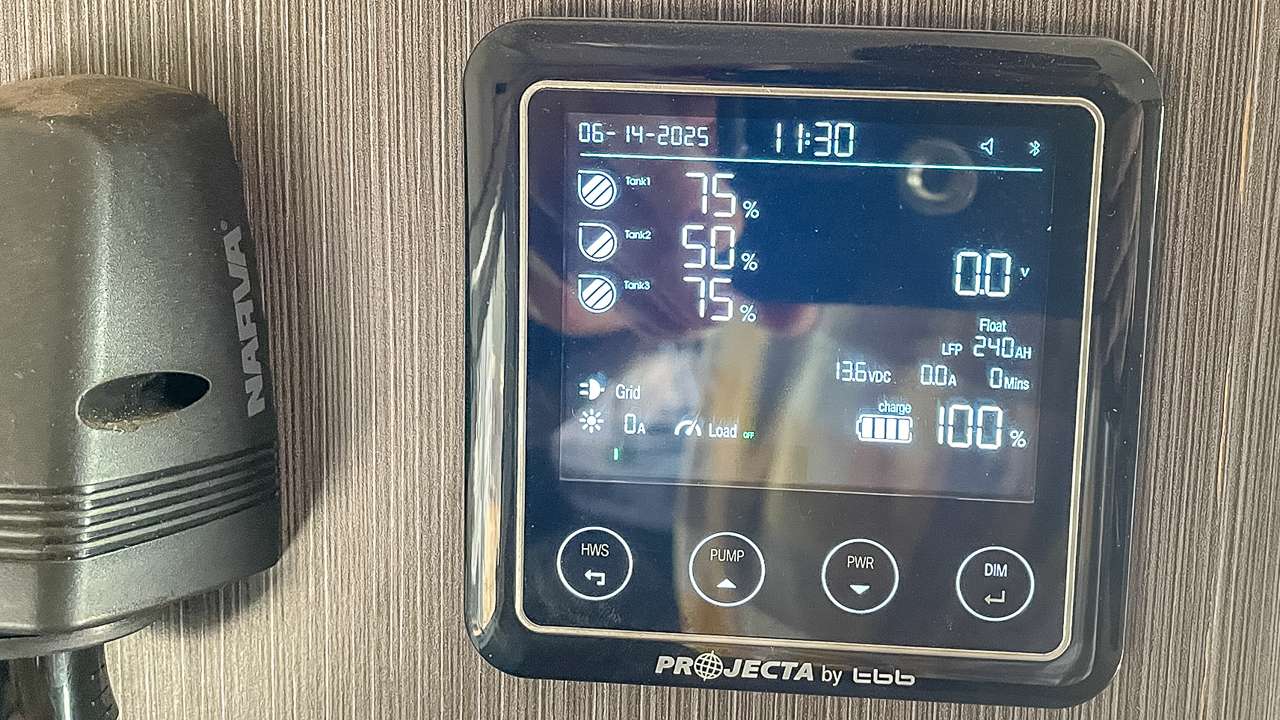
- Your replacement screen should illuminate immediately
- Test all button functions to confirm proper operation
- Verify power button works correctly (press for on, press again for off)
Reconnecting To Mobile Apps
New screens require fresh Bluetooth pairing with mobile devices:
- Download the latest PM200 & 300BTJ Remote App from your app store if you don’t have it already
- Ensure Bluetooth is enabled on your device
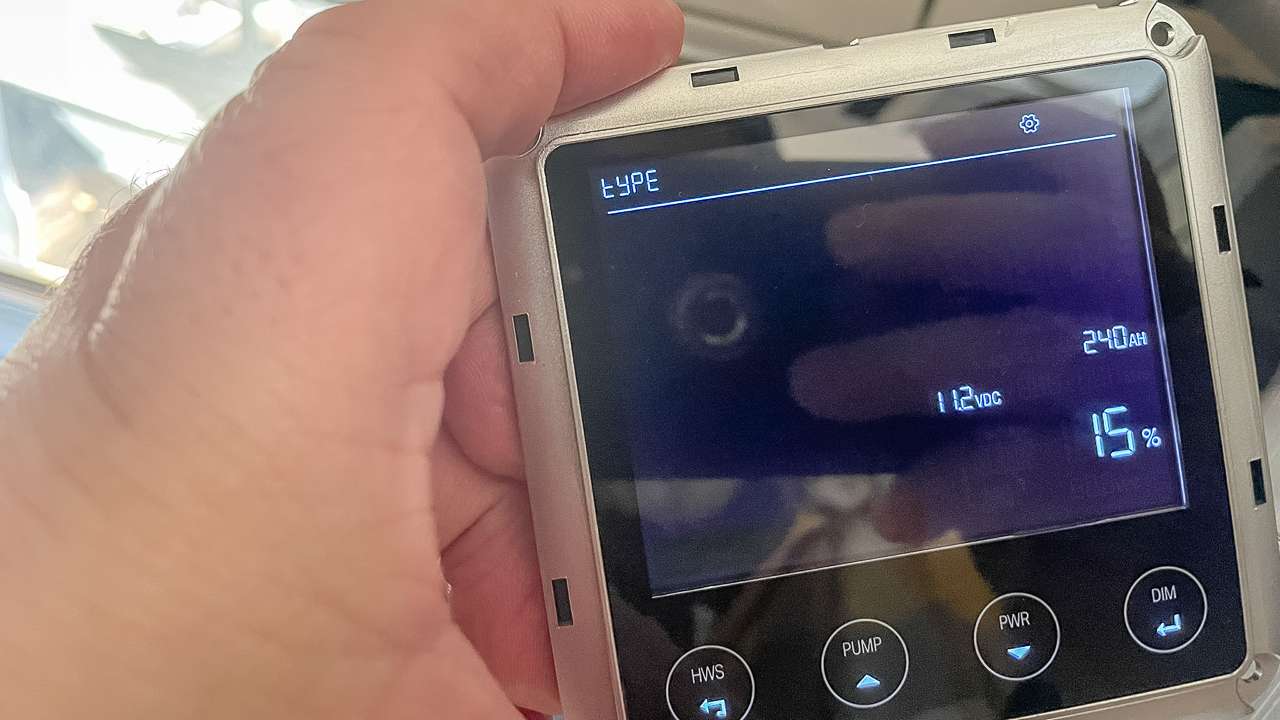
- Look for the pairing code in the top-left corner of your new screen
- Enter this code into your phone app (not the serial number on the back)
- Verify battery type and capacity settings match your specifications
- Update system firmware if prompted
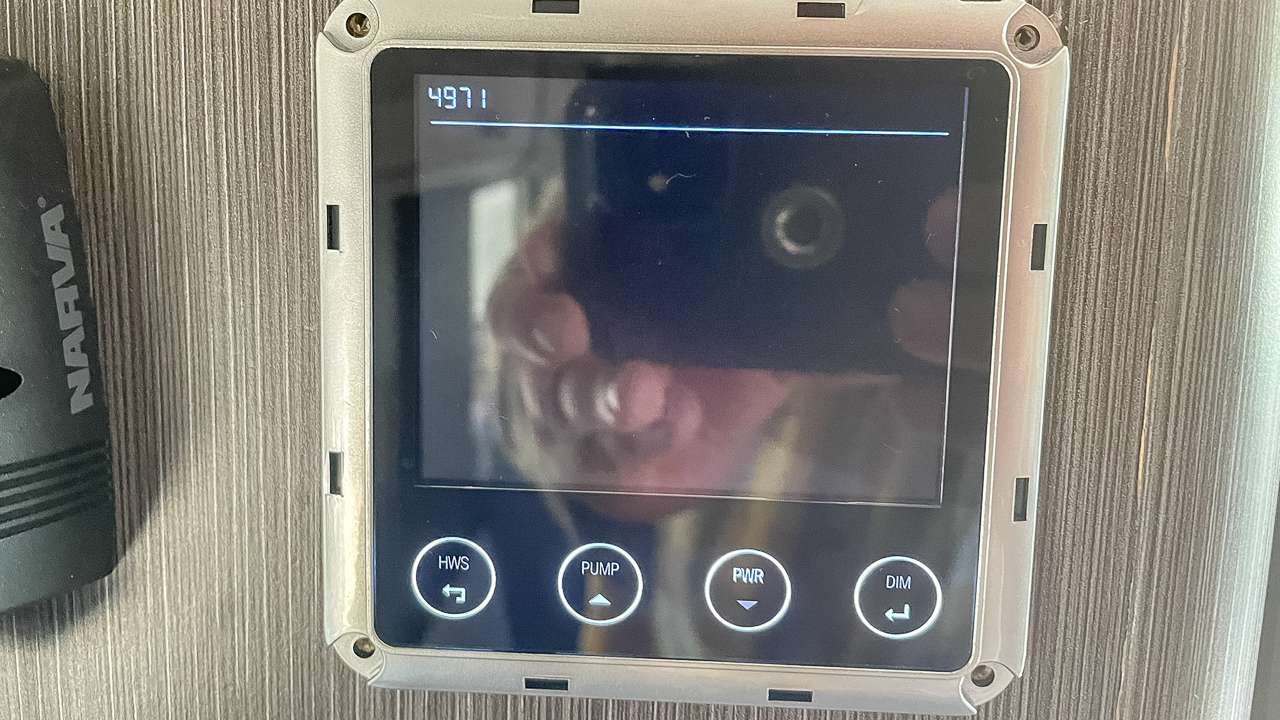
Top Left Is The Number You Need To Enter Into Your Phone App (Yours Will Be Different)
Troubleshooting Installation Issues
Communication Problems
- Verify communication cable connections are secure
- Inspect cables for installation damage
- Check error codes 8001 or 8003 which indicate communication failures
- Ensure cables follow proper routing paths
- Verify complete power cycling by disconnecting and reconnecting power
- Confirm mounting screws are properly tightened without over-compression
- Allow 24 hours of normal operation for calibration
- Contact Projecta if problems persist
Maintenance Tips
Regular Cleaning
- Use only soft, lint-free cloths for screen cleaning
- Avoid harsh chemicals that might damage coatings
- Clean monthly to prevent dust accumulation
- Maintain screen visibility for optimal experience
Environmental Protection
- Protect screens from extreme temperatures
- Ensure adequate ventilation around mounting areas
- Check seals and gaskets annually for weather resistance
- Maintain moisture protection to prevent corrosion
When To Contact Support Again
- Manufacturing defects appear within warranty periods
- Problems recur despite proper installation
- Error codes appear on your BMS unit or Projecta LCD control screen
- You need comprehensive system diagnostics
Maintain detailed records including correspondence with support, installation photos, serial numbers, and installation dates for future warranty claims.
Mounting Screws Removed
Conclusion
Successfully replacing a faulty Projecta LCD Control Screen demonstrates both Projecta’s excellent customer service and the accessibility of DIY repairs for Australian caravanners. This guide outlines every step necessary to diagnose, obtain, and install replacement screens safely. Projecta’s responsive warranty service ensures minimal downtime when your screen requires attention. Their technical support team’s expertise guides customers through troubleshooting procedures. The supportive community within Projecta’s Facebook group provides valuable peer assistance. The replacement process proves straightforward for most caravan owners with basic technical skills. Proper safety precautions ensure installation proceeds without complications. Regular maintenance and environmental protection will maximise your new screen’s service life, demonstrating the reliability that makes Projecta products a preferred choice for Australian caravan enthusiasts.
My Thoughts On Projecta Customer Service
Projecta customer service is awesome. Ours would have been one of the very early Jayco All-Terrains with these in them. When I contacted Projecta with a couple of previous problems they helped me out and got the problem sorted very quickly.
So once again Projecta have been very good to deal with. Fantastic customer service. I recommend them to everyone. Quentin and Ben Blood are both absolute legends. Great service and a big “thanks mate” to you both.
Projecta LCD Control Screen Photo Gallery
Unboxing Replacement Projecta Screen
Unboxing Replacement Projecta Screen
Removing Dress Ring From New Projecta LCD Screen
Removing Dress Ring From New Projecta LCD Screen
Top Left Is The Number You Need To Enter Into Your Phone App (Yours Will Be Different)
Top Left Is The Number You Need To Enter Into Your Phone App (Yours Will Be Different)
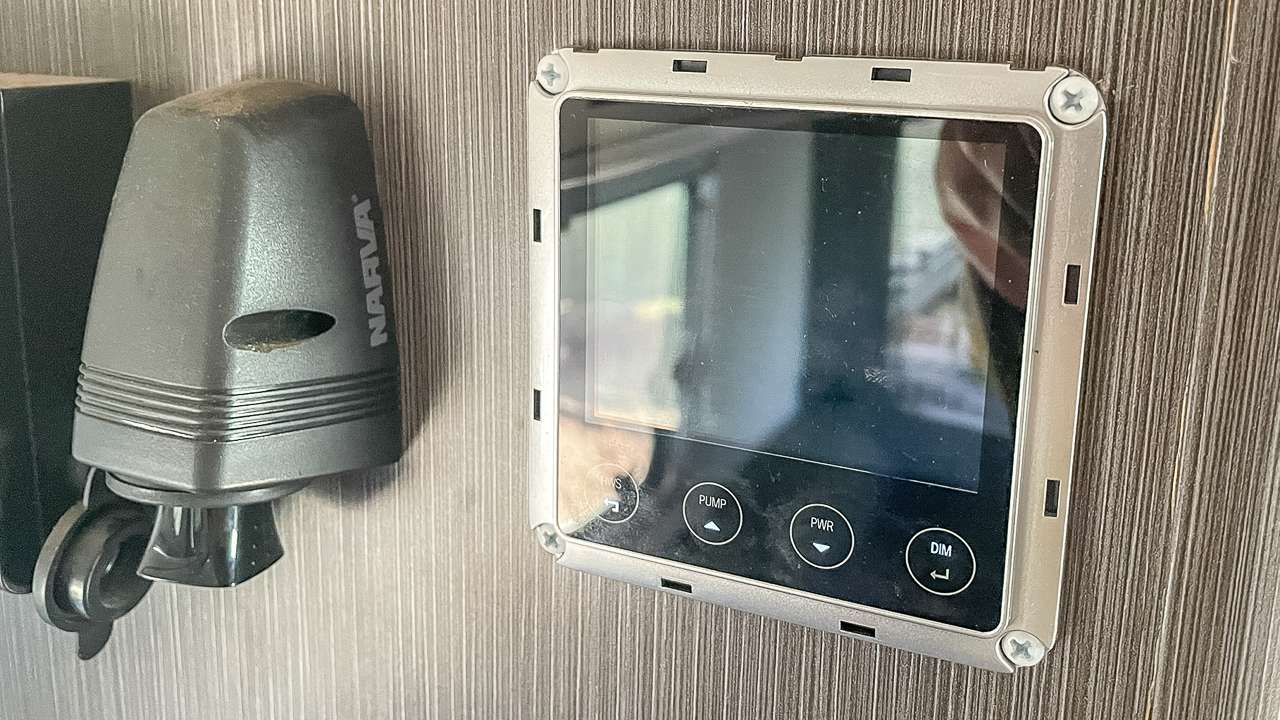
Projecta LCD Screen With Faulty Power Button
Projecta LCD Screen With Faulty Power Button
Turning Power Off At The BMS
Turning Power Off At The BMS
PMLCD BTJ Replaced By Projecta Under Warranty
PMLCD BTJ Replaced By Projecta Under Warranty
Projecta Switched On Tech Talk Facebook Group
Projecta Switched On Tech Talk Facebook Group
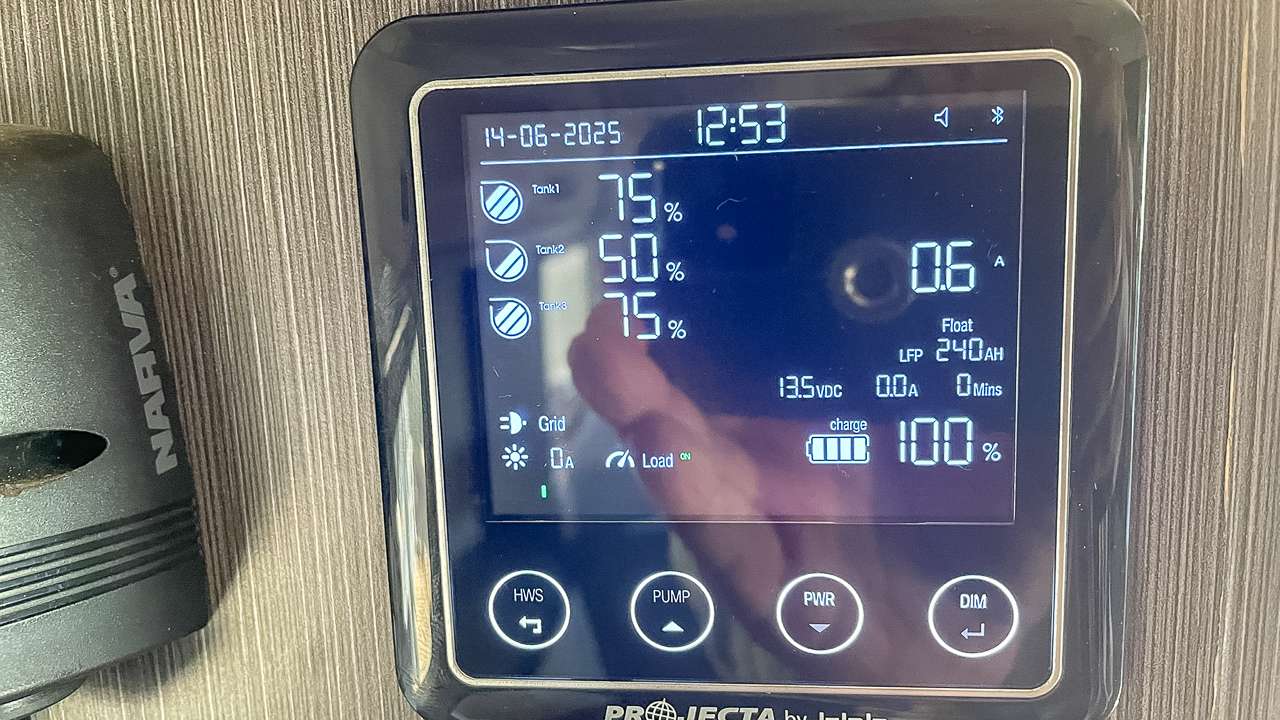
New Unit Fired Up First Go
New Unit Fired Up First Go
Dress Ring Removed From Faulty Projecta Screen
Dress Ring Removed From Faulty Projecta Screen
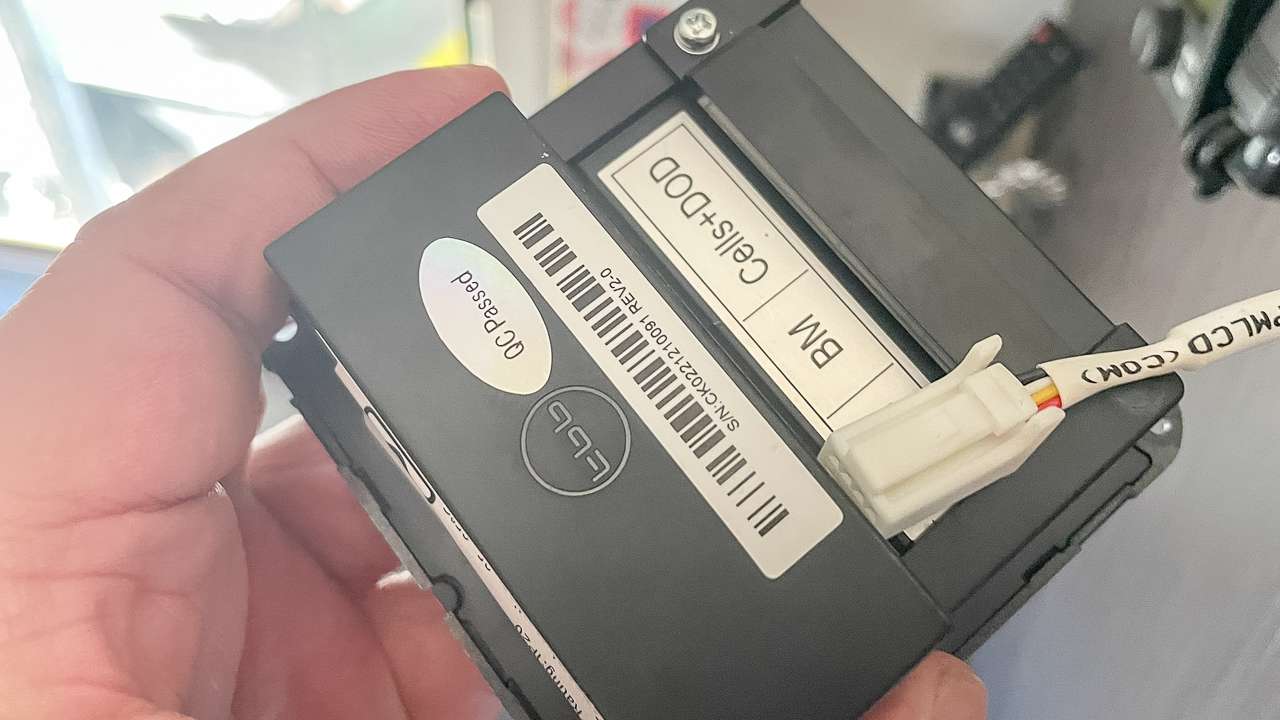
Projecta LCD Screen With Comms Cable Removed
Projecta LCD Screen With Comms Cable Removed
Mounting Screws Removed
Mounting Screws Removed
Projecta LCD Control Screen Successfully Replaced
Projecta LCD Control Screen Successfully Replaced
Frequently Asked Questions: Projecta LCD Control Screen Not Working
If you’re having trouble with your Projecta LCD Control Screen not working, you’re not alone. Many Aussie caravanners run into similar problems, especially with the PM335J unit. Here are some of the most common questions and straightforward answers to help you get back on the road.
Why has my Projecta LCD Control Screen stopped working?
Can I still use my caravan if the LCD screen isn’t working?
How do I get a replacement Projecta LCD Control Screen?
Is it safe to replace the screen myself?
Do I need to reconnect the new screen to the Projecta app?
What should I do if the new screen still doesn’t work?