Using A Jerry Can In Australia: Safety & Storage
Jerry cans are one of those things people overlook until they need one. Whether you’re camping, driving long distances across the outback or storing fuel at home. A jerry can is as practical as it gets. But there’s more to these containers than first meets the eye. Here’s everything you should know about jerries in Australia.
Table Of Contents
- What Are Jerry Cans?
- The Different Types Of Jerry Cans
- Common Uses
- Jerry Can Colour Coding And Identification
- Jerry Can Standards And Compliance
- Selecting The Right Jerry Can
- Filling Jerry Cans Safely
- Storing Jerry Cans Safely
- Transporting Jerry Cans In Vehicles
- Using Spouts, Funnels And Taps
- Inspection, Cleaning And Replacement
- Basic Planning For Trips
What Are Jerry Cans?
Jerry cans are portable containers used to store and transport fuel, water and other liquids. Common sizes are 20 litres, 10 litres and 5 litres. They are designed for easy carrying, stacking and controlled pouring.
Typical features include a rectangular body, one or more handles and a screw or cam cap with a seal to reduce leaks and vapour loss.
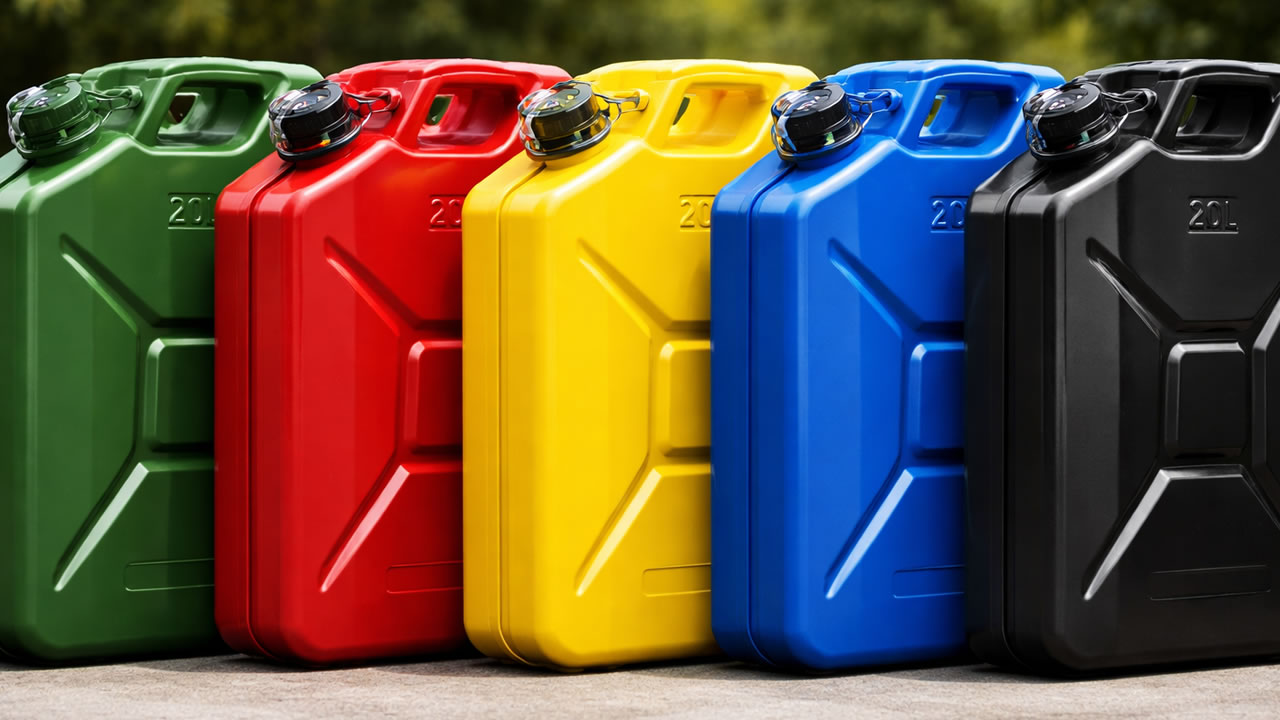
Typical Jerry Can Colour Identification For Australia
The Different Types Of Jerry Cans
The main types are steel, plastic and composite.
- Steel jerry cans: high impact resistance, suitable for rough conditions and long-term storage, can rust if coatings are damaged.
- Plastic jerry cans: lightweight, corrosion resistant, common for camping and general vehicle use, can deform with heat or impact.
- Composite or specialised cans: built for specific industrial or military uses, often lighter with high strength-to-weight ratio.
For most general Australian vehicle and camping certified plastic fuel jerry cans are the best option.
Common Uses
Jerry cans are used for petrol, diesel, water and other automotive or camping liquids.
- Fuel for vehicles, generators, mowers and small engines.
- Water storage for camping and remote travel.
- Oils, coolants and similar liquids.
- AdBlue and other additives for modern diesel engines.
Do not use the same jerry can for both fuel and drinking water – duh! Assign each container to a single liquid type and keep it that way.

Transferring Water From Jerry Can To Caravan Water Tank
Jerry Can Colour Coding And Identification
Use colour and labelling to prevent mistakes.
Typical jerry can colour convention:
- Red: petrol.
- Yellow: diesel.
- Blue: water.
- Black: oil or waste liquids.
- Green: mixed or special fuels, confirm by label.
Always read the moulded or printed label on the can. Add your own clear, permanent label with contents and fill date. Do not rely on colour alone if there is any doubt.
Jerry Can Standards And Compliance
When buying jerry cans for fuel check that they:
- Comply with relevant Australian or Australian/New Zealand standards (for example, AS/NZS 2906 for portable fuel containers).
- Are clearly marked for the fuel type they are intended to hold.
- Show manufacturer details and capacity on the body.
Avoid unmarked containers, repurposed bottles or tins and any container not designed for flammable liquids. For larger quantities of fuel check specific state and territory rules for limits and extra requirements.
Selecting The Right Jerry Can
When choosing a jerry can work through these points:
- Liquid type: fuel, water, oil, coolant, AdBlue, etc. Only use food-grade water containers for drinking water.
- Material: steel for higher durability but more weight; plastic for lighter handling. Match material to environment and handling conditions.
- Capacity: 20 litres for bulk transport; 5–10 litres where lifting weight is a concern.
- Compatibility: ensure caps and spouts match the can, and dimensions suit your vehicle mounts or holders.
Filling Jerry Cans Safely
Use this process when filling jerry cans with fuel:
- Place the jerry can on the ground – not in a vehicle during filling.
- Turn off the engine and remove ignition sources nearby.
- Remove the cap and open any vent if fitted.
- Insert the nozzle fully into the opening.
- Fill slowly to reduce static, splashing and vapour build-up.
- Stop filling before the brim and leave space for expansion.
- For example if it’s a 20 litre jerry watch the bowser while filling and only put in 20 litres. A 20 litre jerry can will likely hold around 23 litres however the last 3 litres needs to be left empty to allow for expansion of the contents.
- Replace the cap firmly and close any vent.
- Wipe up spills and wash hands after filling.
Do not smoke while filling and do not fill damaged or deformed containers.

Drawbar Jerry Can Holders Jayco All Terrain
Storing Jerry Cans Safely
For home or shed storage:
- Store in a cool, dry, well ventilated area.
- Keep away from flames, heaters and electrical switchgear.
- Minimise direct sunlight exposure.
- Store upright on a stable surface.
- Keep fuel jerry cans out of living spaces.
For fuel, rotate stock, avoid long storage times especially for petrol and mark each can with fill date. Inspect regularly for cracks, corrosion and seal damage.
For water, rinse after trips and allow to dry fully before long term storage and disinfect periodically using a suitable cleaning method.
Transporting Jerry Cans In Vehicles
When transporting jerry cans:
- Use dedicated holders, roof racks, rear carriers or tray mounts.
- Keep containers upright and restrained so they cannot move or tip.
- Avoid carrying fuel jerry cans inside passenger cabins.
- Keep them away from sharp edges and hot exhaust components.
- Check caps and vents are fully closed before driving.
On rough roads, re-check tie-downs and holders at rest stops and inspect for rubbing or wear points. Do not overload the vehicle or trailer with loose containers. Ensure total fuel carried remains within legal limits.
Using Spouts, Funnels And Taps
To transfer liquid safely and accurately:
- Use a spout or funnel designed for your jerry can type.
- Check seals and threads before use.
- Position the container so you can pour steadily without strain.
For fuel, use flexible or rigid spouts that match the filler neck and avoid spills on hot engine parts. Stop pouring before the tank is completely full.
For water, use tap style fittings on water jerry cans for controlled flow at camp and keep outlets clean.
After use, drain and clean spouts and funnels as appropriate and store them with the matching jerry can to avoid mix ups.
Inspection, Cleaning And Replacement
Before each trip or use:
- Check the body for cracks, dents, bulges and deep scratches.
- Inspect caps, seals and vents for damage or wear.
- Confirm labels are legible.
Cleaning fuel cans: do not wash with water if they will be reused for fuel. If contaminated follow safe disposal advice or retire the can.
Cleaning water cans: rinse with clean water, use a mild disinfectant or cleaning solution if required then rinse thoroughly before refilling with drinking water.
Replace any jerry can that leaks, has significant structural damage, has deformed from heat or impact, or no longer seals properly.
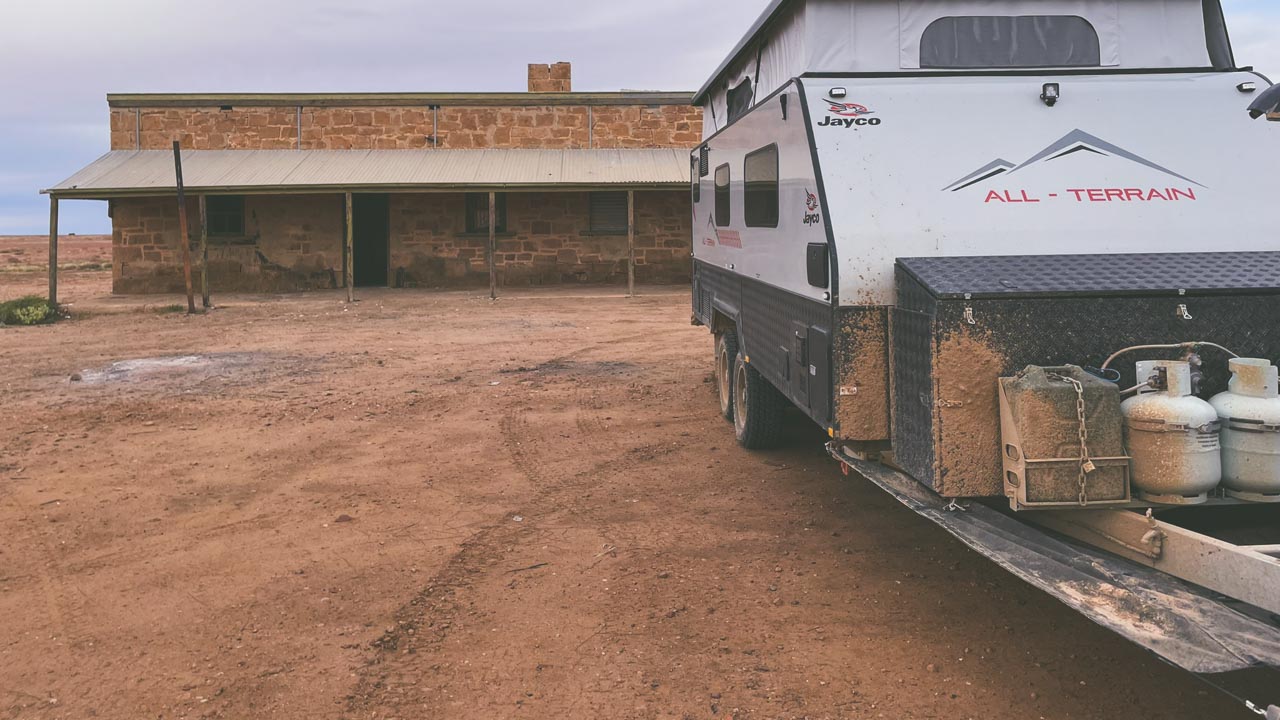
Stone Stomper On Jayco All Terrain At Beresford Siding On The Oodnadatta Track
Basic Planning For Trips
When planning fuel and water with jerry cans:
- Estimate expected consumption in litres per 100 km or per day.
- Add a safety margin for delays or detours.
- Match the number and capacity of jerry cans to that requirement.
- Check where you can legally carry and refill them on your route.
Record how many jerry cans you are carrying, their contents and fill dates and where they are mounted on the vehicle or trailer. This makes it easier to monitor usage and detect issues early.