Make a Cheap Offroad Window Protector
Make a Cheap Offroad Window Protector
When going offroad towing a caravan or camper trailer you need to have some sort of rear window protector fitted or you risk an expensive breakage.
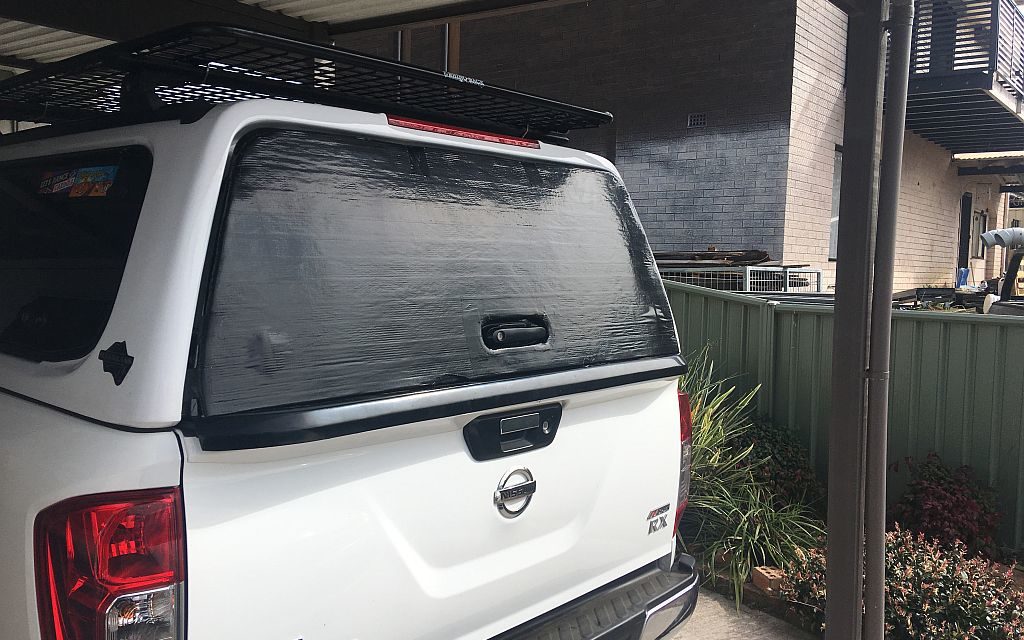
We made a cheap window protector for our ute canopy rear window. We travelled the Birdsville and Oodnadatta tracks and the Strzelecki Track plus a load of other outback gravel roads towing our van with this fitted and it worked well. At the end of each trip there were noticeable chunks out of the protector cause by flying rocks but nothing had damaged the canopy back window. These days we use a StoneStomper so the rear window doesn’t need the protector fitted, but this was a good very cheap option. Read on to find how to make a DIY rear window protector on a budget.
Making The Back Window Protector
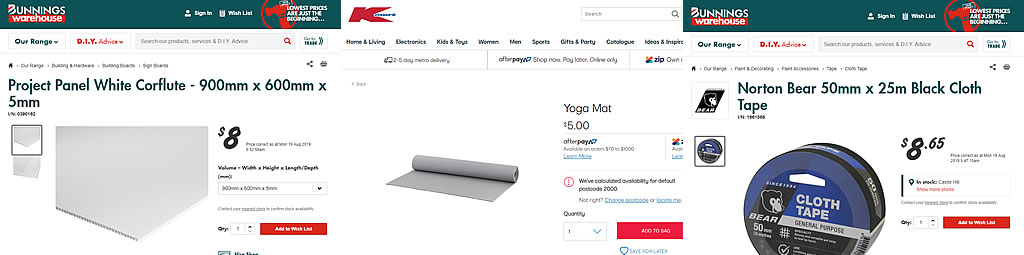
We used some corflute, a yoga mat, a bit of silicone and some gaffa tape. All up cost was about $30.
We made a template out of newspaper and traced the outline on to the corflute. We then cut it out of the corflute using a sharp stanley knife. It would have been an easier job if we hadn’t picked a windy day to trace the outline on to the newspaper!
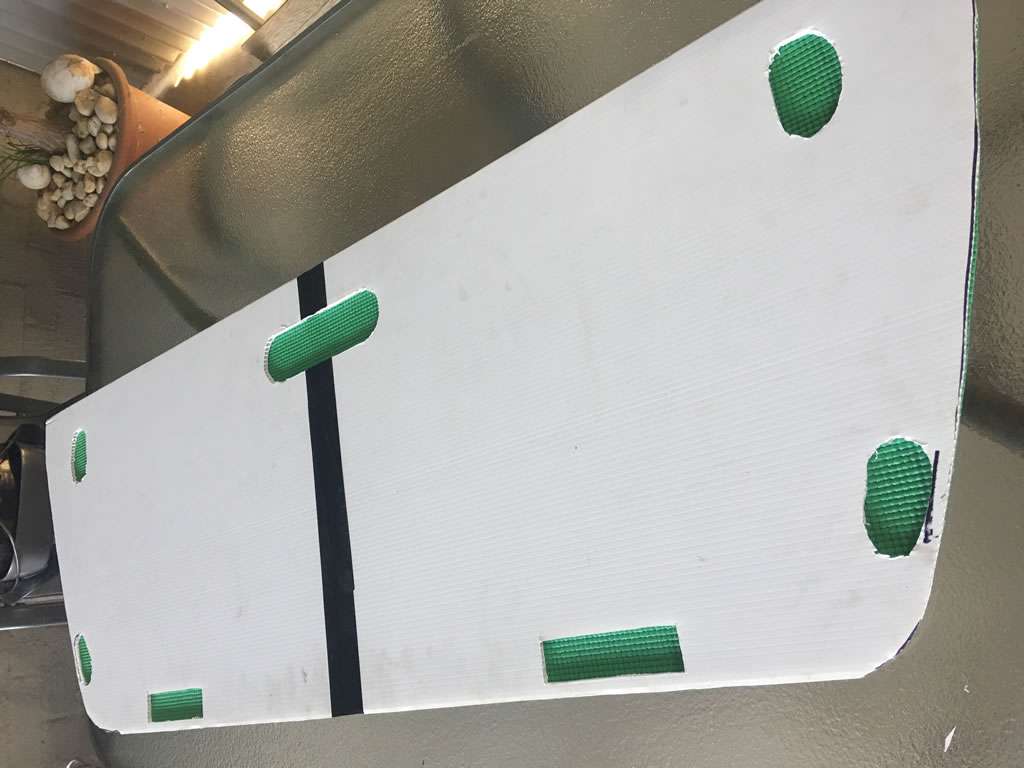
We had to cut a few holes in it to allow for the plastic bits on the window (used to fit the hinges etc) and for the lock handle. These were a bit tricky to get in the right place but we just kept doing back and forward with the newspaper template. The holes were cut out using a retractable thin bladed box cutter type knife. We used the thinner bladed knife as the wider blade on the stanley knife made it hard to cut out the round bits.
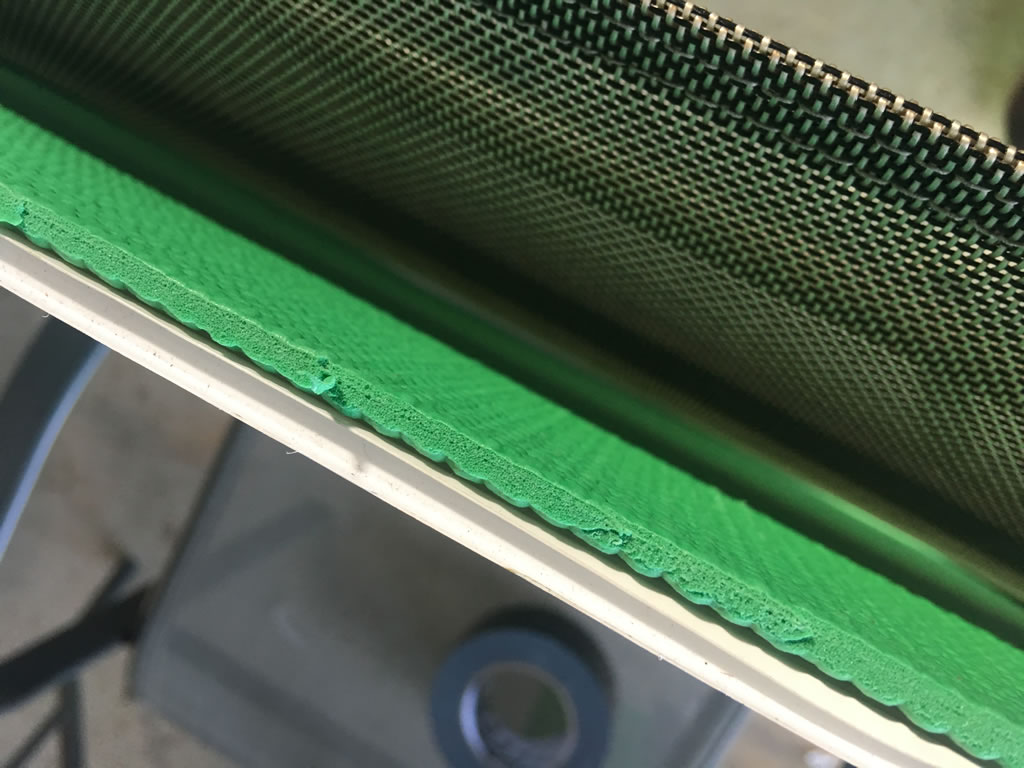
After cutting the corflute to shape we siliconed the yoga mat to it and left it to dry overnight. We placed a few weights on top to hold it flat. We used good old roof and gutter silicone.
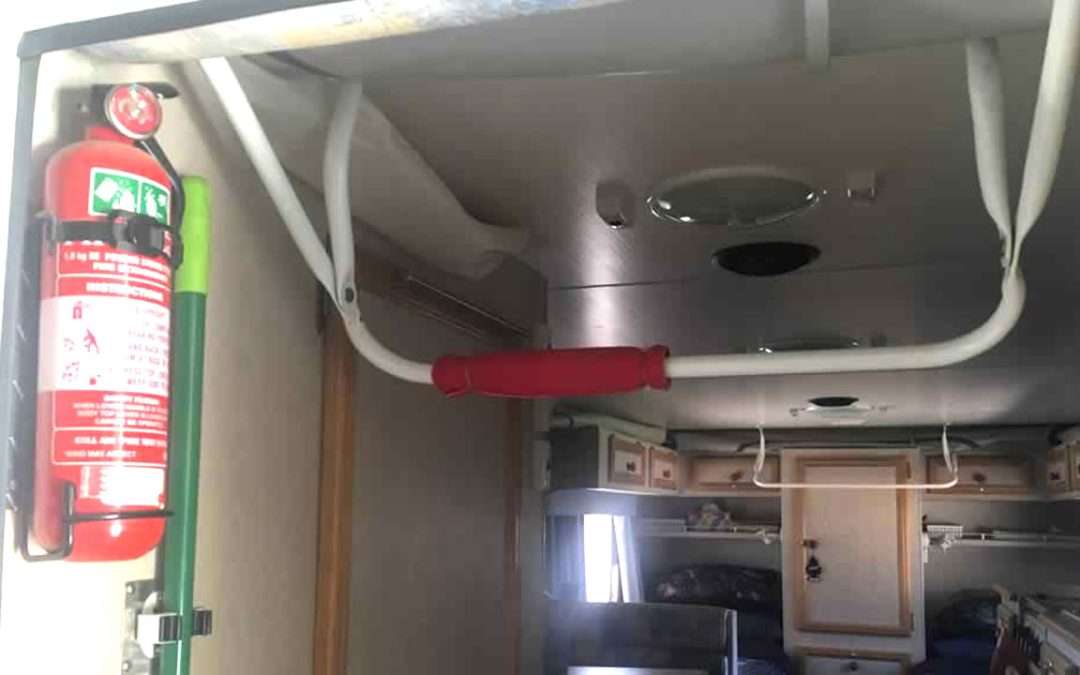
When the silicone was set we covered the whole lot in strips of gaffa (with cloth in it) tape to protect it. It fits to the back window with gaffa tape around the edges stuck to the glass. Here’s hoping it does the job. I reckon it should.
Update – Our DIY Window Protector Worked!
We completed many trips and the DIY window protector job actually worked really well. After getting home and having a good look at it after each trip I found a number of places where chunks had been taken out of it by flying rocks. I reckon if the rocks were going fast enough to take a chunk out of the window protector then they would been a fair chance of breaking the window. All up it was a good thing.

Convert Microwave Cupboard Space In A Supreme Getaway Caravan
Convert Microwave Cupboard Space In A Supreme Getaway Caravan
We are very rarely hooked up to power when we camp so for the past few years we have used the microwave in our van for a bread bin. Amanda came up with the idea of pulling the microwave out and replacing it with a door.

The Old Microwave In Our Supreme Getaway Caravan aka The Bread Bin
First thing to do was to remove the old microwave. It was screwed in from underneath. There was a screw in the bottom of each “foot”.

Removing The Old Microwave
After removal of the microwave we had a space that was much larger than we thought. Bonus! There was a load of wiring in the left side of the cupboard, it belongs to the solar controller, hot water switches, a CIG outlet and some light switches.

Wiring Inside of Microwave Cupboard
I tidied the wiring up with cable ties and then made up a cover to hide it all away inside the cupboard. On the bottom and top I mounted a bit of aluminium angle with sikaflex. The cover screws in to these angles so as to be removable in case the wiring ever needs to be accessed in future.

Wiring Tidied Up and Angles In Place
The cover is just a thin piece of MDF cut to size with a bit of angle on the corner to hide the join. It does an effective and neat job of hiding the wiring away.

Wiring Cover Fitted
The door is made from a piece of 4mm marine ply from making shelves in the van cut to size. There was no chance of matching the old door panelling so we didn’t even try. Amanda had a great idea to cover it up anyway. I couldn’t match up the trim profile in the rest of the van either so instead of buying something that wouldn’t match anyway I used an offcut of skirting that I had. It was all glued together with PVA wood glue and clamped up to dry.

Making a New Cupboard Door For Supreme Getaway Caravan
After the glue was dry I gave the door a light sand and put on two coats of Cabots clear floor finish. I purchased some hinges and a matching catch from www.caravansplus.com.au for about $15 delivered. I had an old door knob kicking around in the shed that matched the others in the van pretty well so that was fitted along with the hinges and catch. Then the door was fitted up to the cupboard in the van.

Hinge & Catch
Amanda made up a photo collage to fit inside the door panel and then laminated it. It was fitted to the door front with some velcro dots so it’s removable and can be swapped out in future.

Completed Door Replacing Microwave
All up it was a really easy project and we are happy with the result. We have a heap more storage space, the van is 10kg lighter without the microwave and if needed we can refit the microwave in about 20 minutes.

Heaps More Storage Space in the “Microwave” Cupboard
How To Use a 4wd Tyre Deflator
How To Use a 4wd Tyre Deflator
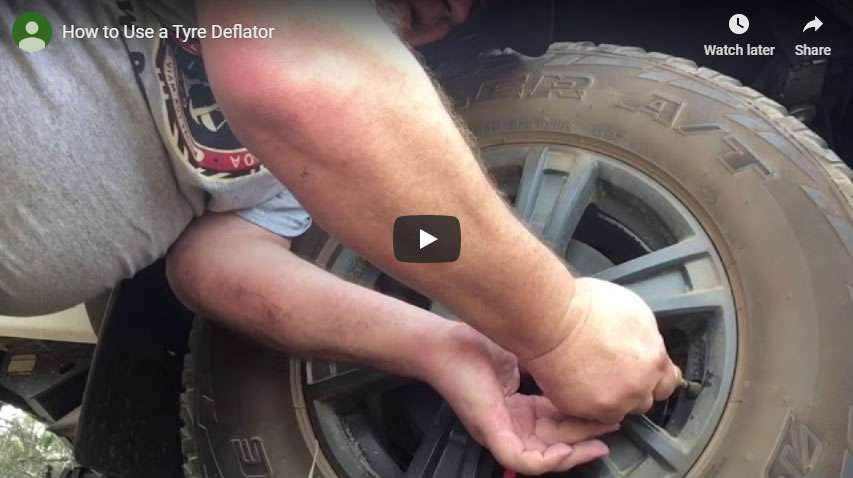
You need to know how to use a 4wd tyre deflator to lower your tyre pressure if you get out on dirt roads and sandy or muddy tracks. Watch my short video running through the basics of what you’ll need and how to get it done.
There is a technique to using a rapid tyre deflator. Here’s a quick how-to.
Identifying the Four Main Components of the Tyre Deflator

- The first component is the gauge, use this to you take your readings.
- The second component is the spindle. This is the bit that threads on to the outside of your tyre valve. This component allows the valve core to be captured and allows the air release valve to slide.
- The third component is the valve core armature. This is a long thin steel shaft with a knob on the end. It has a valve core removal mechanism to internally remove and fasten your tyres valve core. The valve is completely captured inside the tool so there is no chance of losing it.
- The fourth component is the air release valve. This part slides up over the top of the spindle. This is the part that allows you to quickly release air from your tyres.
Using the Tyre Deflator – 5 steps to deflating a tyre
Step 1
Thread the spindle section onto your tyres valve stem. Make sure the threads are spinning freely and it isn’t cross threaded and your release valve is set to the closed setting (pushed towards the bottom of the tool).
Step 2
Push the valve core armature section all the way in. Gently turn it clockwise whilst seating to make sure that it connects correctly to the valve core within the valve stem. When seated the gentle rotation should stop. Gently screw the armature section in a counter clockwise direction while maintaining pressure against the valve core. This will unscrew the valve core. When the core is fully unscrewed the armature will be free to extend out of the way of the airflow from the valve.
Step 3
Now that the valve core has been removed you can check your tyre pressure with the gauge. Now, slide the air release valve back towards the top of the tool to allow air to rapidly exit. Check the pressure of your tyre often by sliding the air release valve back down towards the front to close it off.
Step 4
When the desired pressure has been reached depress the valve core armature section back in all the way. Now we just need to do the reverse of what we have done already to finish up. Turn the valve core armature counter-clockwise to reseat the valve core within the valve stem.
Step 5
Once you have tightened the valve core (don’t overtighten – just snug is ideal), check the air release valve to make sure the valve core has been put back properly. If no air escapes you can remove the spindle by unthreading it. Replace your valve caps to protect the seal from dust, sand and dirt.
Note
It’s a good idea to carry a few spare valves and dust caps. Removing and replacing the valves with the rapid tyre deflator does run the risk of damaging the valve. I have used the deflator hundreds of times and never damaged a valve, but there will always be that one time. You can get them very cheaply off eBay. Spare dust caps are a good idea, I have lost quite a few over the years. Again, they’re cheap on eBay so don’t go stealing them in your workplaces carpark!
Replacing Suburban Hot Water Anode In A Supreme Getaway
Replacing Suburban Hot Water Anode In A Supreme Getaway
The Suburban Hot Water Anode in your caravan is a replaceable item. I will show you how to inspect and replace step by step. It’s an easy thing to do and it has to be done regularly.
What Is The Anode For Anyway?
The anode in the hot water heater in your caravan is actually meant to corrode away over time. Anodes are made from magnesium and they protect steel by a sacrificial electrochemical action. Magnesium is electro-negative relative to steel. When a magnesium rod is fitted to a steel tank filled with fresh water, a current will constantly flow through the water between the rod and any exposed steel area on the tank wall. The circuit is completed through the tank back to the magnesium rod. This protective current is produced by the magnesium releasing ions and this results in corrosion in the anodic area. A magnesium (the anode) corrodes instead of the steel tank (the cathode). This principle of electrolytic corrosion control is called cathodic protection. Because cathodic surfaces cannot rust, the steel tank is protected.
So now that we know a bit about anodes, let’s replace one. I generally check the anode every six months or so. It won’t usually need replacing this often, but it’s easy to check so I do.
Step 1 – Tools & Replacement Anode
The photo below shows all of the bits and pieces you will need to do the job. You don’t necessarily need the tank rinser, a hose with a decent nozzle will do an ok job but I reckon the rinser gets in to the corners and top front of the tank better. Same with the multi-fit tube spanner, if you have the correct size socket (11/16″) you can use that instead. Replacement anodes, the rinser and removal tool can all be bought online from any of the caravan spares places or sourced from any caravan shop.

Items Needed To Replace Suburban Hot Water Heater Anode
Step 2 – Disconnect Water & Open A Hot Water Tap
Before you get started you need to do a few things. Make sure your van isn’t connected to mains water, turn off your water pump and open the hot water tap to relieve any pressure in the system. If you haven’t got a pump isolater switch then just disconnect the 12v system.
Step 3 – Open The Cover To Your Suburban Hot Water Heater
Next you want to open the cover that protects your hot water heater. They’re pretty much all the same. Pull on the little toggle then turn it until it lines up with the slot and then simply lower the flap.

Replacing A Suburban Hot Water Anode Open The Cover
Step 4 – Place A Bucket To Catch The Water That Will Drain From Your Tank
A couple of tips. Make sure the water in the tank is cold as it is going to all run out. Put a bucket underneath it, about 50% of the water will go in to the bucket, the rest will just go everywhere. It’s a good idea to do it in your driveway rather than inside of your garage.
Step 5 – Remove The Anode
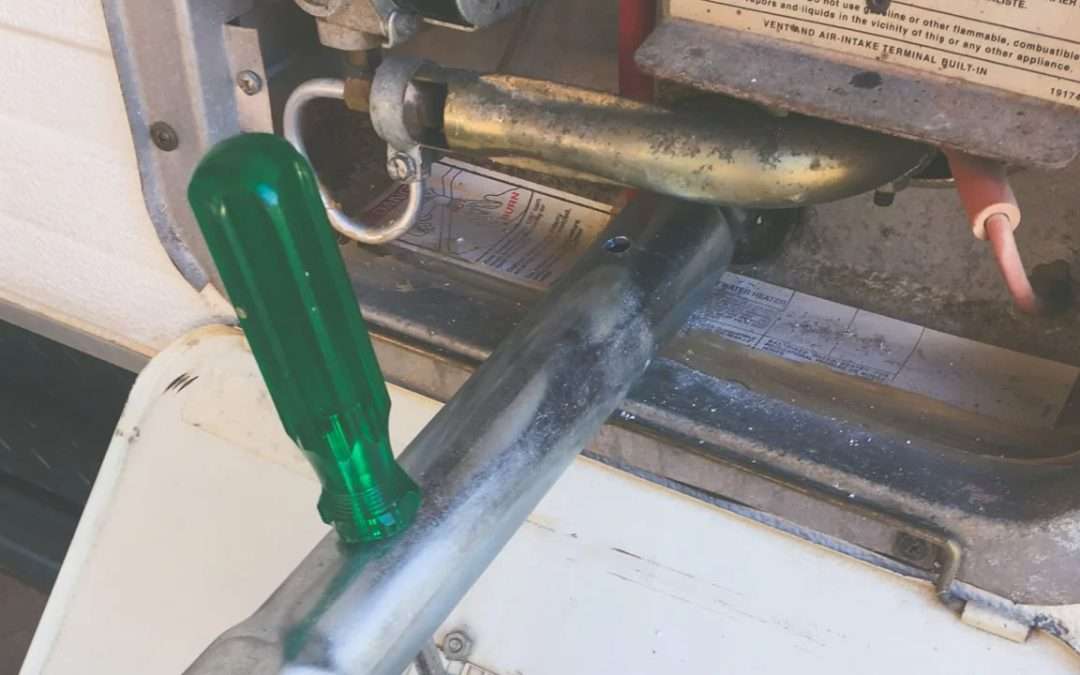
With the cover open you should be able to see the end of the anode. It will be down towards the bottom of the unit. Fit the multi-fit tube spanner and put a screwdriver or something similar through the holes in the tool to give you a bit of leverage. Turn the tool counter-clockwise and the anode will unscrew.

Closeup Of Anode And Removal Tool
Step 6 – Inspect Removed Anode & Determine If It Needs Replacement
Once you have removed the anode have a good look at it. If it’s in pretty good condition like mine was it’s perfectly ok to re-use it. I replace mine if they are more than about 50% gone. The life you get out of them depends a bit on the quality of the water you have been using. If you are mostly using city tap water then they seem to last for well over 12 months. If you are using bore water from out bush they can be gone inside of three months. If you are using poor quality water it pays to check your anode more often.
Note the new anode is longer than the old one in the photo below. The replacement is a multi fit one – not specific to the 20 litre Suburban hot water heater. It fits fine, you just need to trim about 3cm off the end of it with a hacksaw before installing.

Old And New Anodes For Comparison
Step 7 – Rinse The Tank Out
Now you need to rinse all of the old bits and pieces of anode out of the tank. I use a rinsing tool as I find it does a better job than just a hose nozzle. That being said I used the hose nozzle for ages before buying the rinser thing. Work it in and out and turn it around to get up in the corners both front and back and top and bottom. Keep on going until the water runs perfectly clear. When the water is running clear squirt a bit of water around to clean up the bottom of the tank recess and also the tank cover. Wash down the side of your van while you are at it.

Rinsing Out The Tank With Rinsing Tool
Step 8 – Thread Tape
Before refitting the old anode you need to remove the old thread tape. I just use a small screwdriver to lift it then unwind it with my fingers. Do this on the anode and also inside the thread on the tank. Remove as much of the old tape as you can without spending all day on it. After removing the old tape put on some fresh tape. About three or four winds around will be ample. Usually new anodes will come with tape already on them.

Remove Old Thread Tape And Replace With New
Step 9 – Install Suburban Hot Water Anode & Turn The Water Back On
Now you just need to insert the anode and using the multi-fit tube spanner tighten it up. Just nip it up tight, there’s no need to go overboard with the amount of torque you apply to it. After that you can close the cover. Turn off any taps that you have opened to relieve pressure in the tank and turn your water pump back on. You will hear the tank refilling. Wait until your tank has completely filled before turning the heater on to test.
John Guest Caravan Fittings Replacement
John Guest Caravan Fittings Replacement
Last time we were away in the van one of the John Guest Caravan Fittings sprung a leak inside the cupboard underneath the sink. Luckily it was on the last morning just as we were getting ready to pack up and go home. I have installed a water pump isolating switch underneath one of the seats so I just turned it off before too much leaked out. It’s a good thing it didn’t happen during the night as quite a bit came out.
It was a pretty good leak. We dried everything up with some towels and once back home we put a couple of those moisture camel things in the van. Luckily no damage was done and it all dried out well.
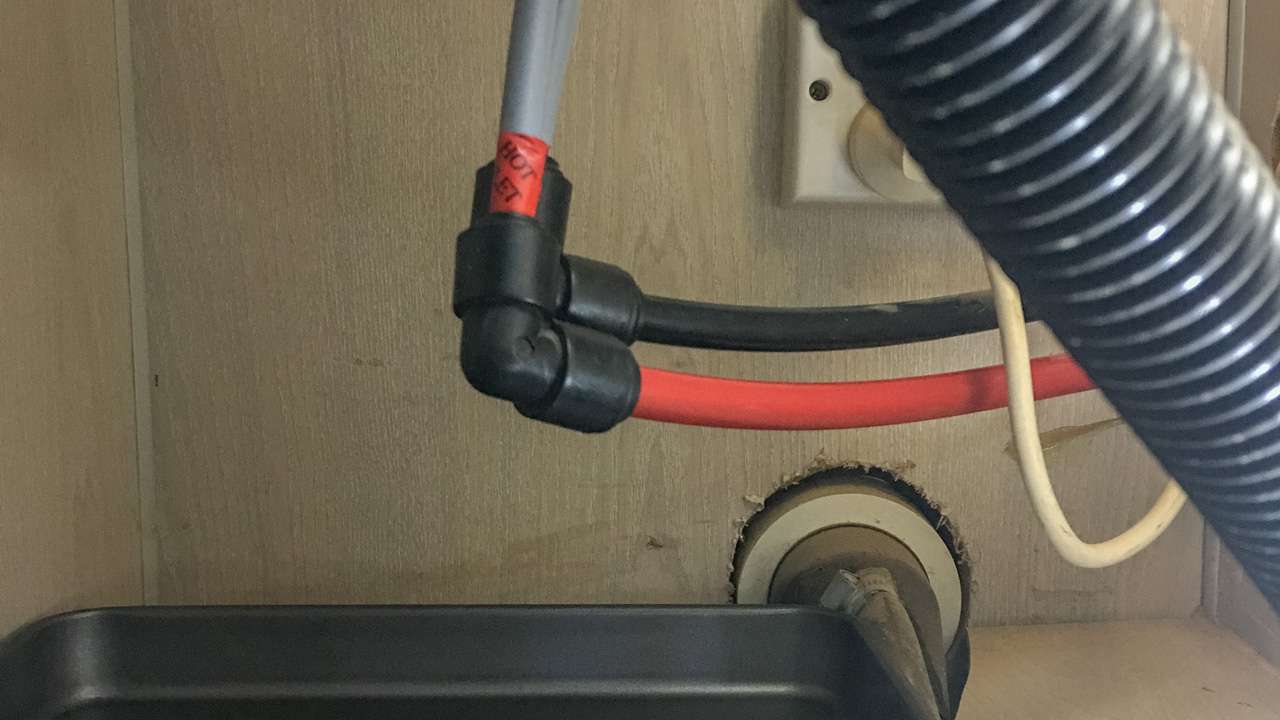
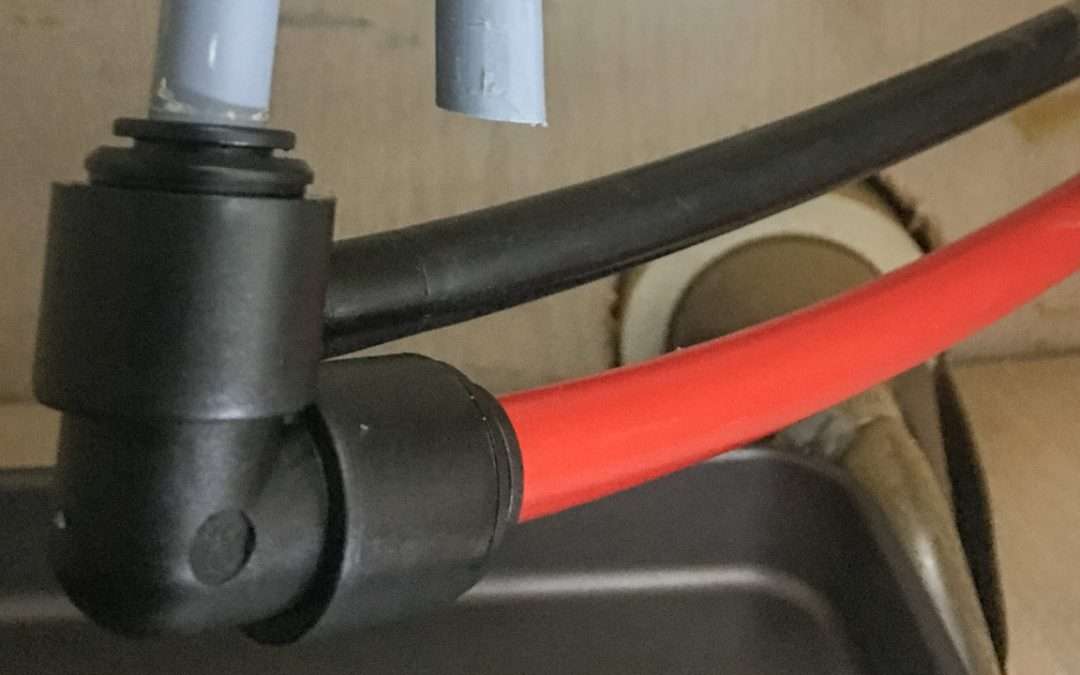
It Was The Fitting On The Hot Water Pipe To The Sink That Failed
To test if the fitting had just come loose or if the fitting had failed I removed both the hot and cold water fittings and swapped them around and then turned the water back on. This time it was the cold water pipe that had water squirting out of it so it was definitely the fitting with the problem.
Spare John Guest Plumbing Caravan
I had been meaning to get some spare fittings as I had one let go underneath the van previously so I got online and ordered up some spare elbows, tees and some straight joiners along with a few metres of pipe. I ordered all 12mm fittings after I had put my vernier callipers on one of the pipes underneath the sink to check the size. The John Guest caravan fittings come in 10mm, 12mm and 15mm sizes. It turned out I had to order a few more spare elbows as the ones I was replacing were actually 12mm on one side and 10mm on the other. Bit of a pain in the arse but not the end of the world. The fittings work out to about $5 each if you order them online. I did buy a tee from a caravan place one time because I was in a hurry for it and that cost me $15 so it’s worthwhile getting them online if you can.

Kit of John Guest Plumbing Fitting Spares
After the fittings arrived I grabbed a couple of elbows and went out to the van. To remove the fittings it’s very easy. You just need to press down on the little collar while pulling firmly on the pipe.

Removing John Guest Fitting
After removing the fitting I noticed that one of the pipes had been cut crookedly. The pipe has to seat firmly and squarely inside of the fitting so I trimmed it to be square. I have a tubing cutter to use for this, they cost about $10 from the plumbing section in Bunnings and make getting a square cut foolproof. Failing this a good sharp Stanley knife will also do the trick provided you take more care than whoever did the original installation did! Mind you the van is eighteen year old and probably hadn’t leaked up until now so I can’t complain too much about the original installer now can I?

Pipe Needs To Be Square On The End Not Crooked Like This One
To install the fittings it’s as easy as pushing it on to the pipe firmly until you feel it seat home. There’s no ‘click” or anything, it just won’t go on any further. If you want to check put a pencil mark on the pipe when it’s fitted around the collar then remove the pipe and you can visually see and measure how far it is inserted.
Why Do I Think The John Guest Caravan Fitting Failed?
The fittings underneath the sink are in the cupboard where we stored a frying pan. I reckon that travelling down the road especially on some of the corrugated stuff we have been on has bounced the frying pan up in to the fittings causing damage to one of them. I am going to install a piece of 4mm marine ply underneath the fittings in the cupboard, effectively like a little shelf to prevent the frying pan being able to bounce in to the fitting again. But then again it all could have been down to the fittings being eighteen years old!