Installing A Stone Stomper On Our Offroad Caravan
Installing A Stone Stomper On Our Offroad Caravan
We do a lot off offroad and dirt road travel so we’ve installed an aussie made Stone Stomper® to protect our tow vehicle and offroad caravan. It’s a bit of an investment but in the long run we reckon it’ll be money well spent.
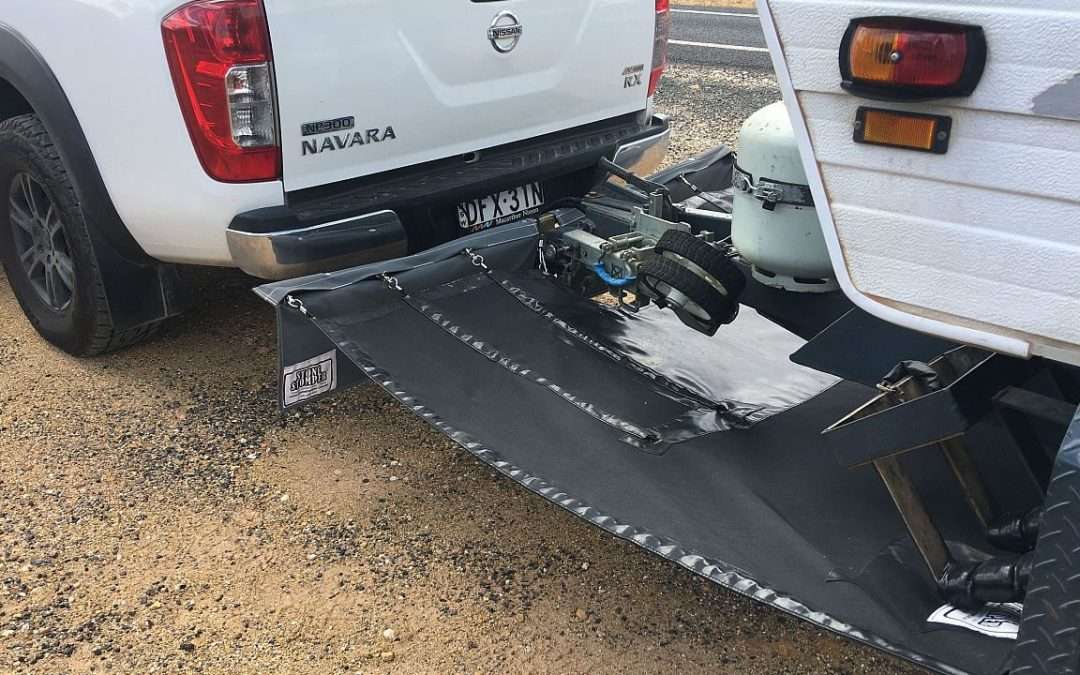
The Stone Stomper® protects your tow vehicle as well as the complete drawbar, gas bottles, gas and brake cables, coupling and the front of the van. The mesh isn’t made from crappy old shade cloth like a lot of el cheapo home made jobs, it’s made from one piece truck mesah that is manufactured by professional canvas makers. They make each order to custom fit your tow vehicle, tow hitch setup and carvan/camper trailer. All provided metal work is laser cut and electroplated for durability.

Stone Stomper Fitted To Nissan Navara NP300 And Supreme Getaway Offroad Caravan
Ordering Our Stone Stomper
I sent them an email and they got back to me quickly with an info pack outlining what measurements they needed to custom manufacture our Stone Stomper as well as questions about our tow vehicle and hitch. I took a photo of the van a frame from both front on and side on and took the measurements, made up a diagram and emailed it through to them. After ordering the Stone Stomper was delivered to us in under a week, this was in August 2020. They reckon it can take longer than this at times depanding upon demand which varies at different times of the year.
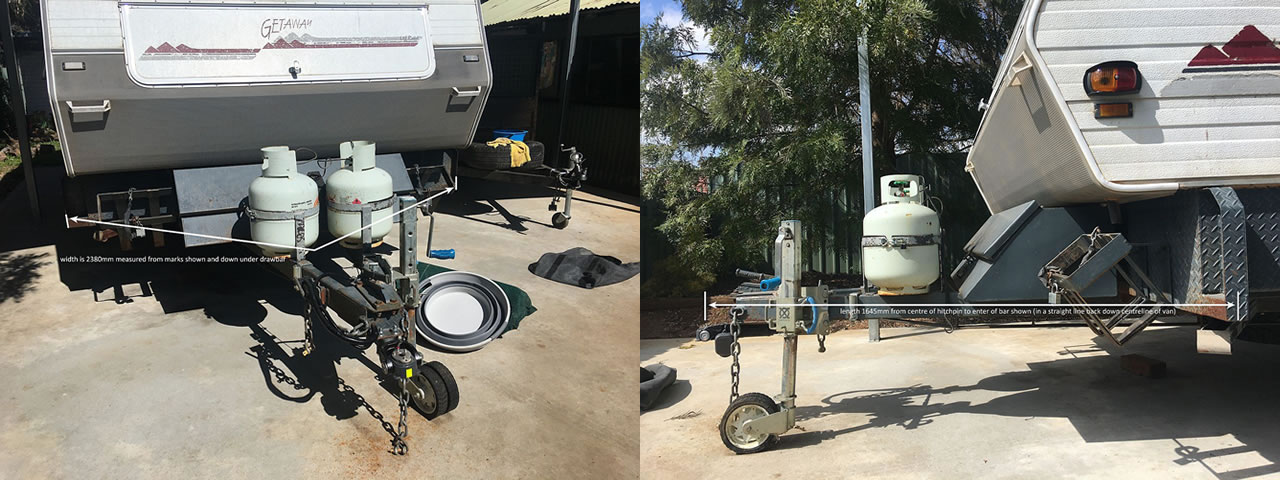
Stone Stomper Drawbar Measurements
Installing Our Stone Stomper
It took me less than 30 minutes to install The Stone Stomper®. Connecting and disconnecting takes us less than 10 seconds. The kit comes complete with everything you need to install it. I had to do drill a few holes and then use the provided tek screws to mount the mounting points on the van, I used some silicone underneath the bracket to prevent any water ever getting in.
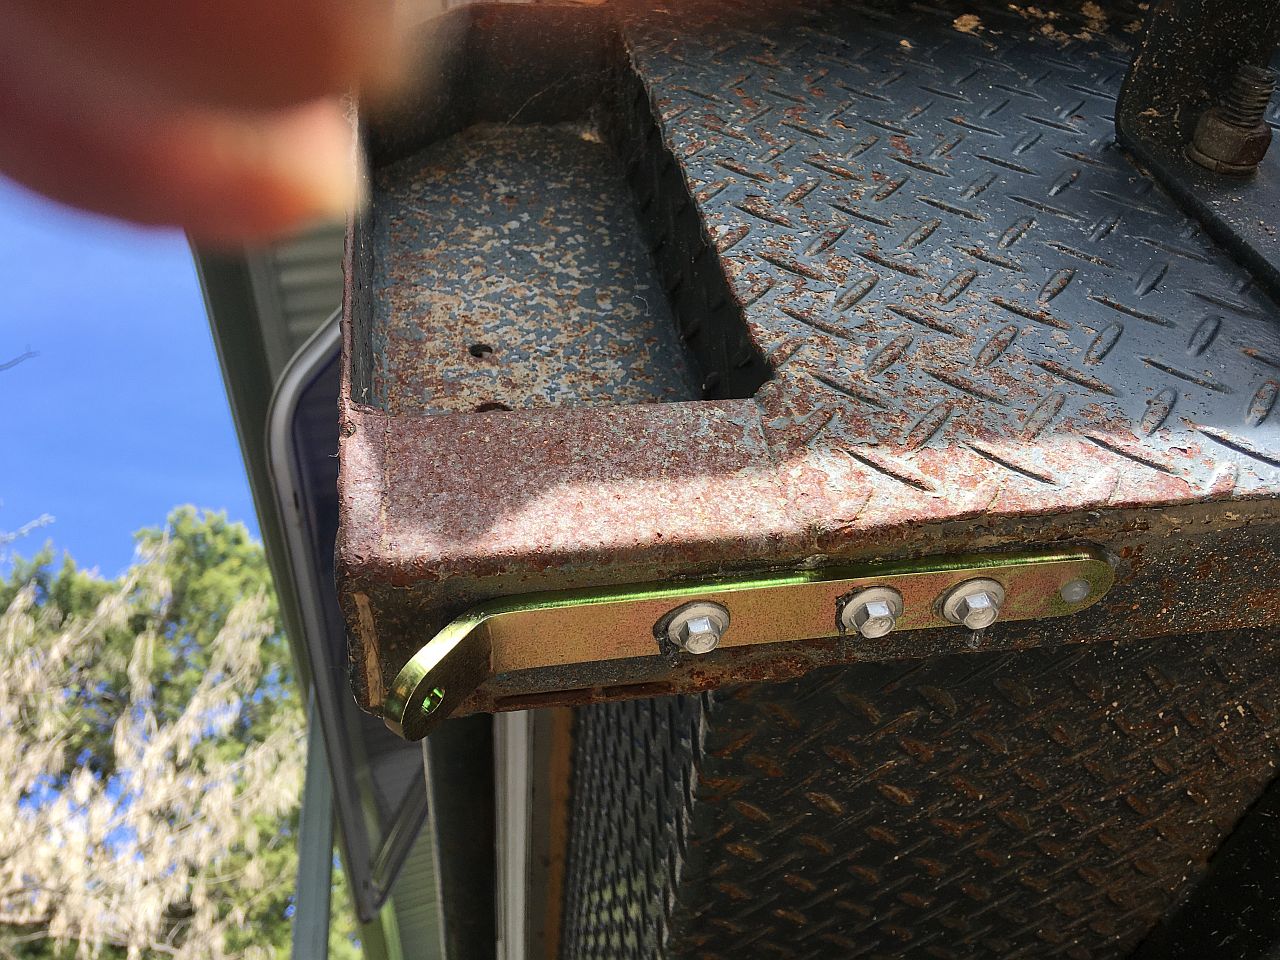
Stone Stomper Mounting Bracket Installation
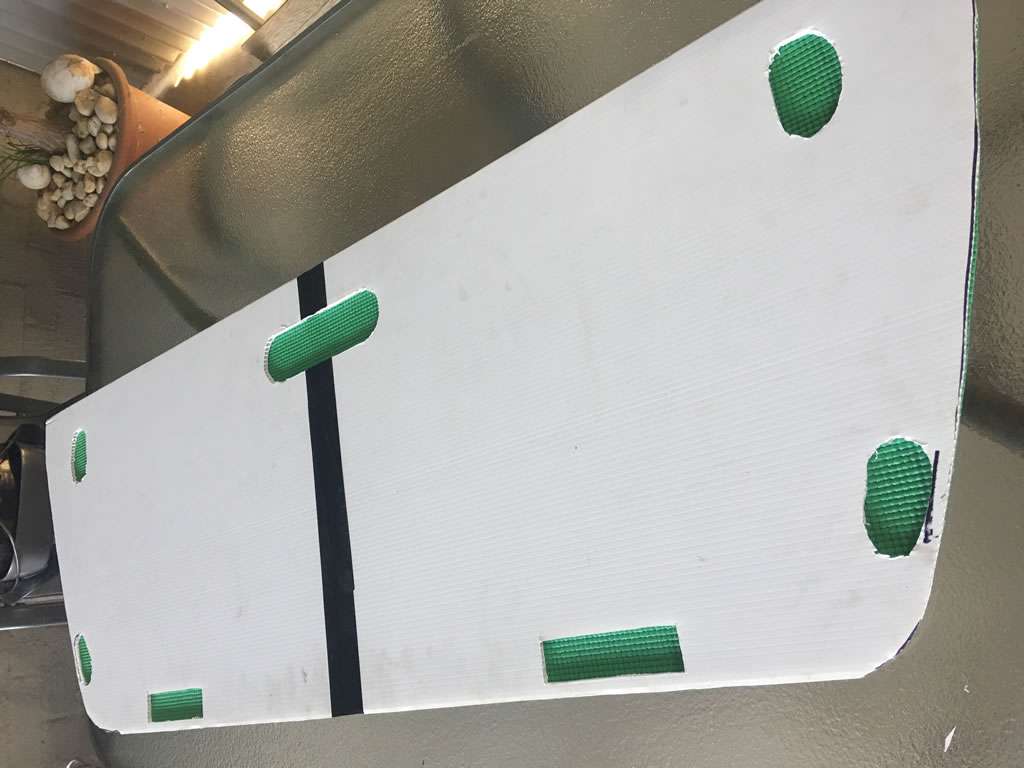
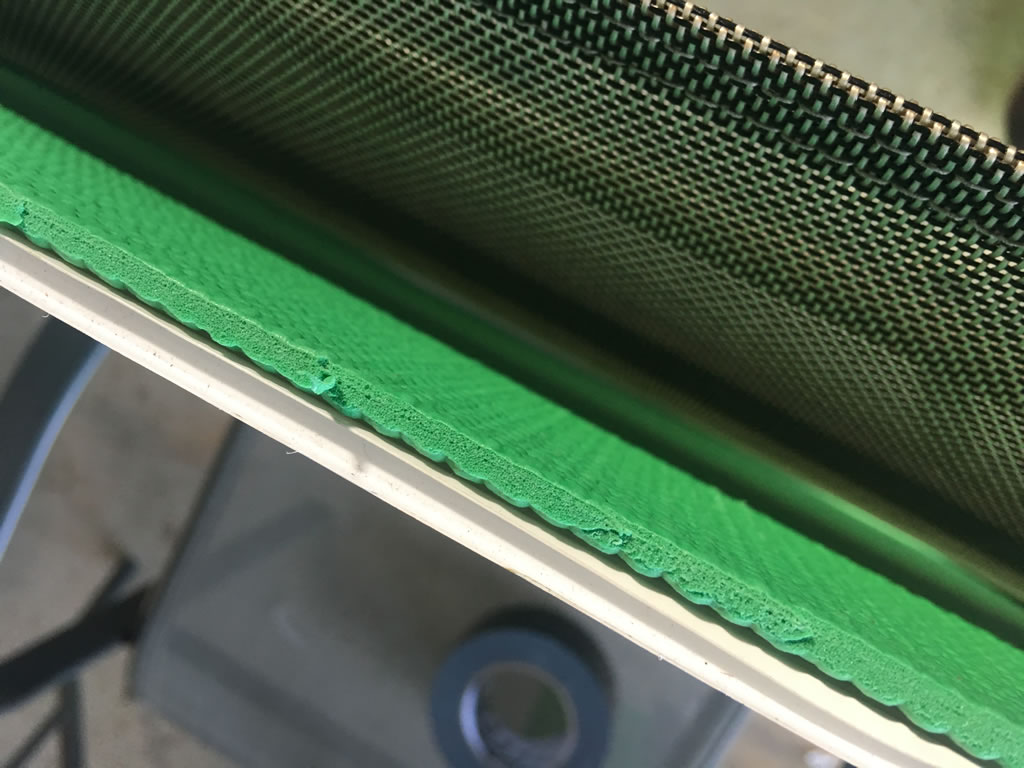
I then wrapped the provided foam around potential rub points and cable tied it in place, it didn’t say to in the instuctions however I then wrapped the foam in insulation tape to make it look nice and neat. Finally I had to fit the rear bar section to the ute. We use a DO35 hitch so I ordered the correct bar section and flaps to suit.
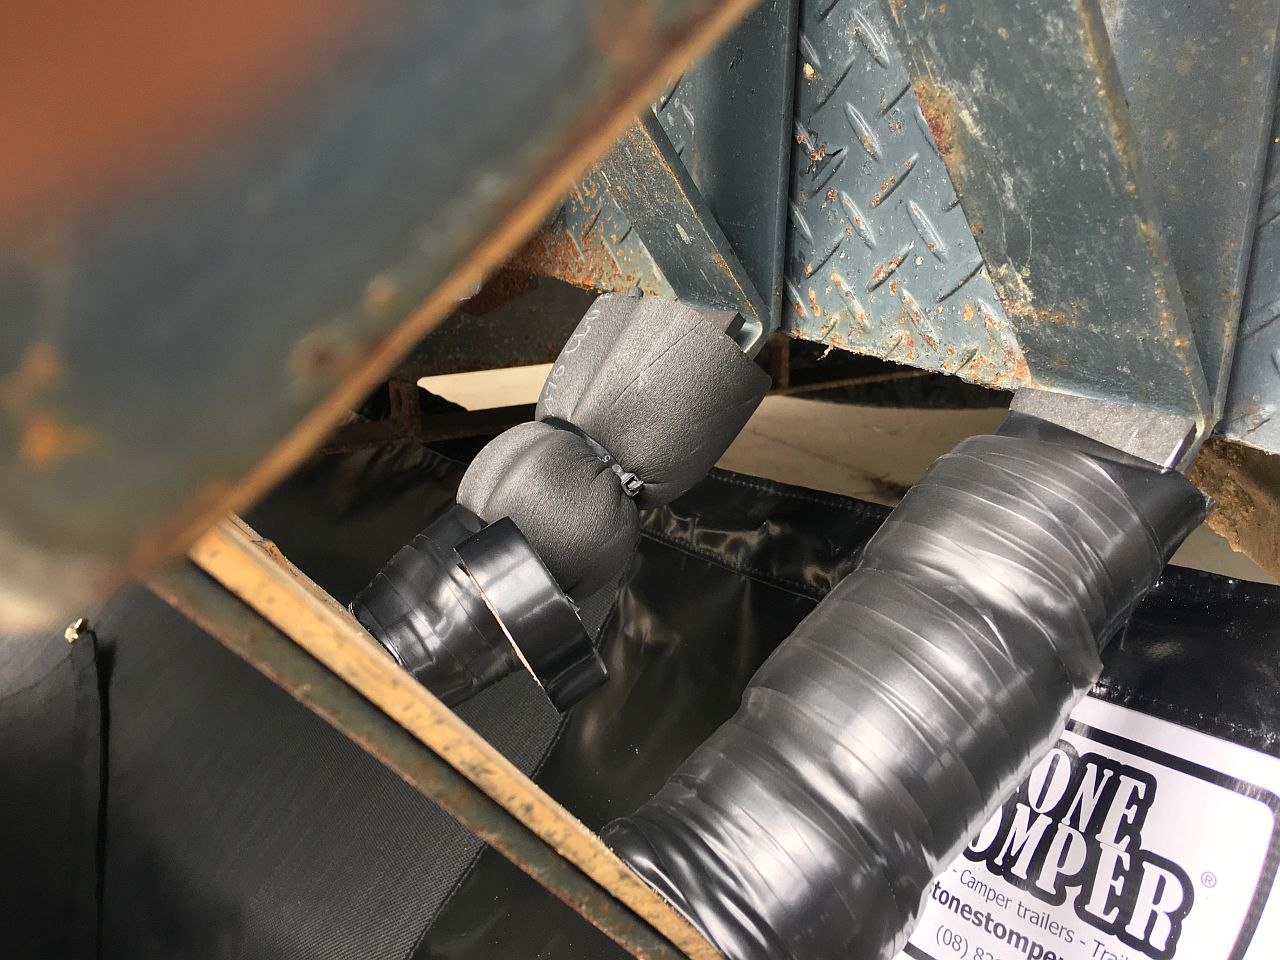
Stone Stomper Foam Wrapping Potential Rub Points
Conclusion
We’ve already done a few offroad trips with the Stone Stomper installed and the sound of stones pinging in to the back of the ute has completely stopped. We should have installed one a few years ago!


 An OBD2 Diagnostic Scanner is a Great Addition