Travel the Great Central Road (GCR) with our comprehensive planning guide. Learn about key stops, preparation tips and cultural significance. Are you ready for an adventure that takes you through the heart of Australia’s outback?
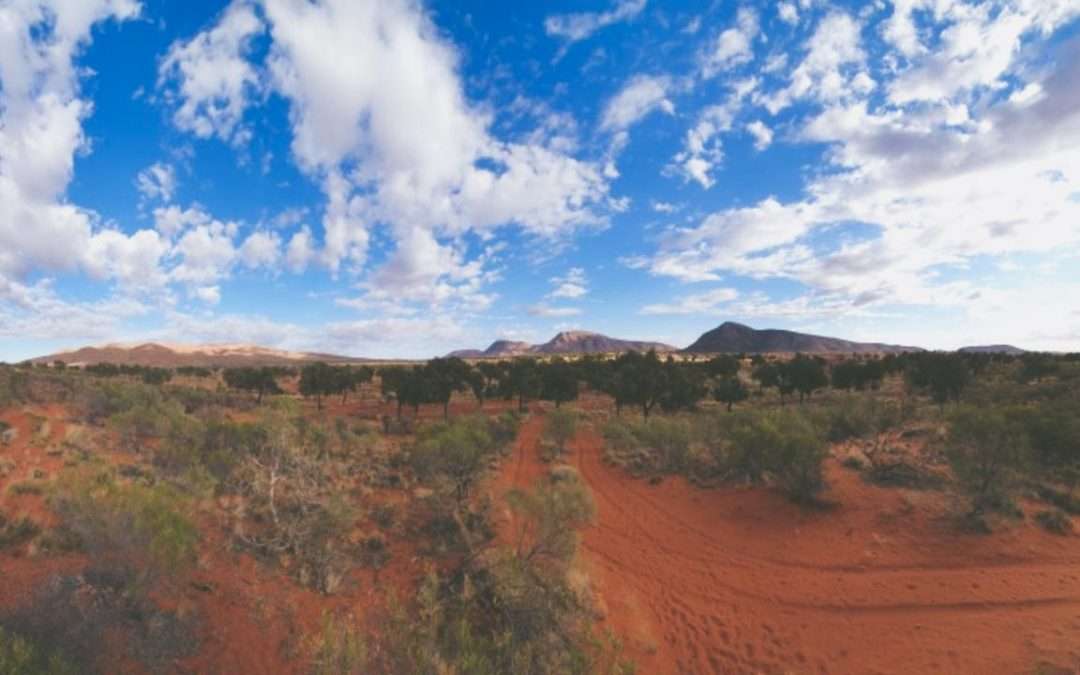
The Great Central Road runs from Laverton in Western Australia to Uluru in the Northern Territory. This outback road trip adventure takes you through awesome wide open deep red landscapes. It leaves you with the feeling of a deep connection to country. If you are a well experienced outback adventurer or planning your first outback trip. This guide will equip you with everything you need to know for an unforgettable experience.
History And Background
Origins Of The Great Central Road
The Great Central Road was initially developed as a series of tracks used by Aboriginal communities for trade and travel. Over the years it has been transformed into a defined route to facilitate mining operations and connect remote communities. The Great Central Road is now an important link between Western Australia and the Northern Territory. It is an adventurous path through some of the most remote parts outback Australia has to offer.
Historical Significance Of The Great Central Road
The Great Central Road is more than just a highway; it’s a journey through history. The road passes through lands inhabited by First Nation people for millennia. Their communities have rich traditions and a deep connection to country. This trip is not only a physical journey but it’s a cultural and very historic one as well.
Route Overview
Starting Point: Laverton, WA
Laverton marks the beginning of the Great Central Road. Laverton is steeped in gold mining history and offers travellers a last chance to stock up on essential supplies and services.
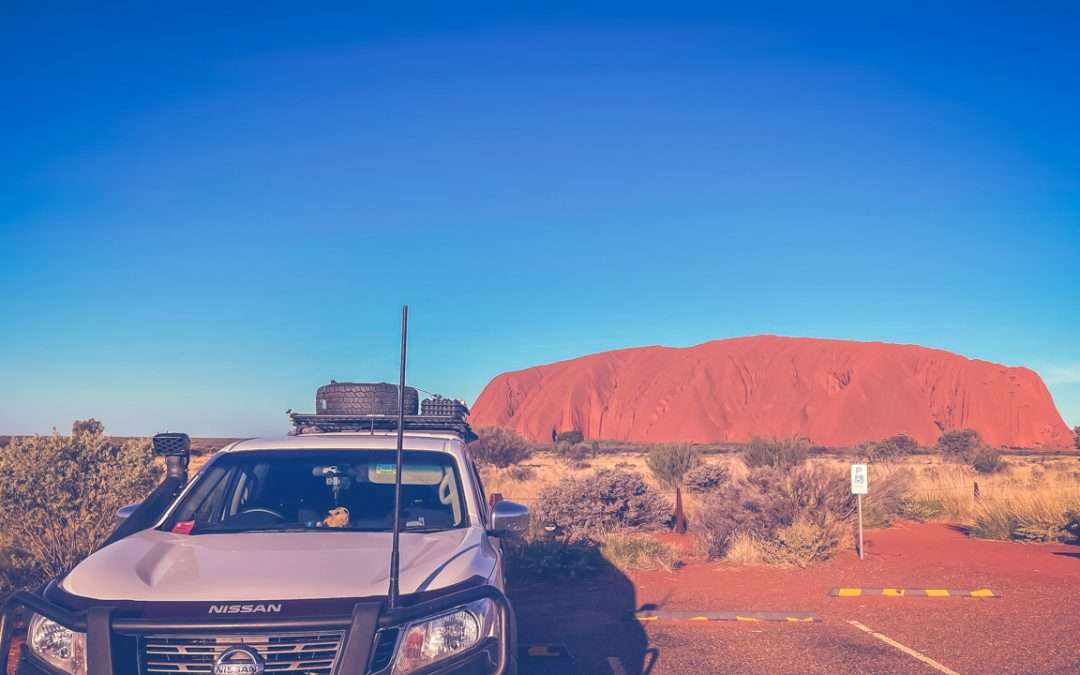
Ending Point: Uluru, NT
The route ends (or begins) at Uluru, one of Australia’s most iconic landmarks. This monolith stands as a pertinent example of the natural beauty and spiritual significance of the outback.

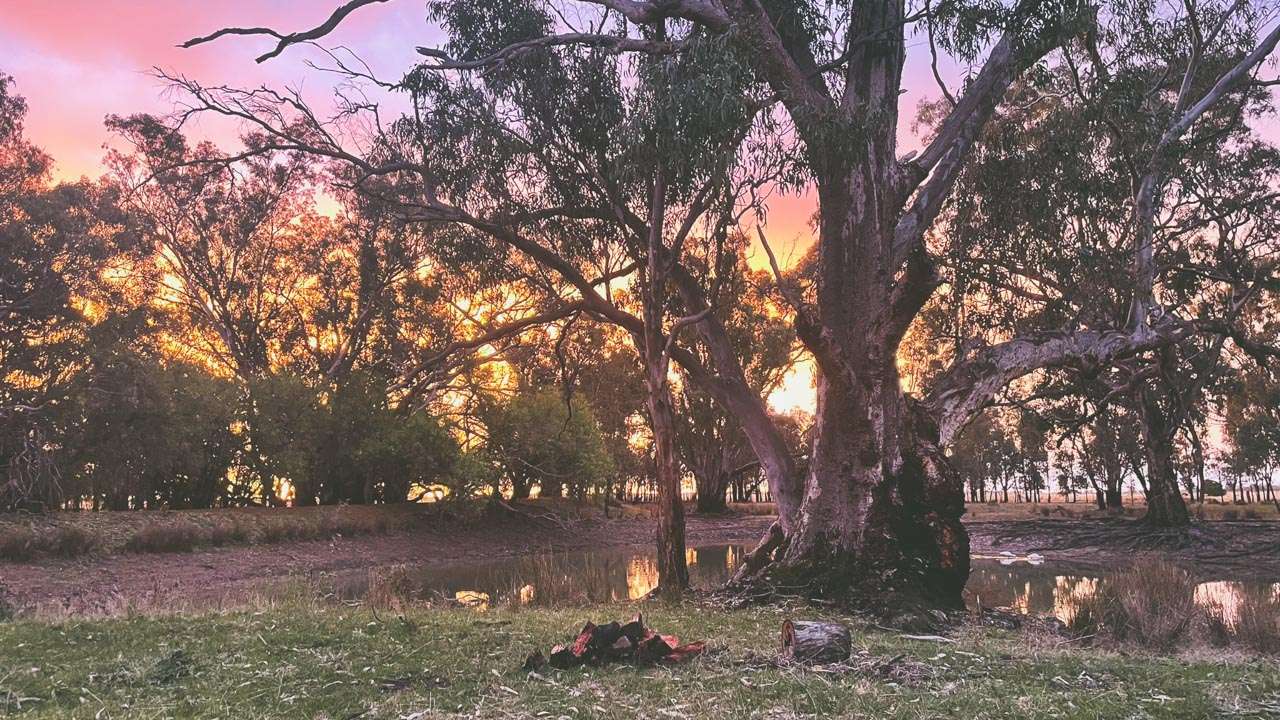
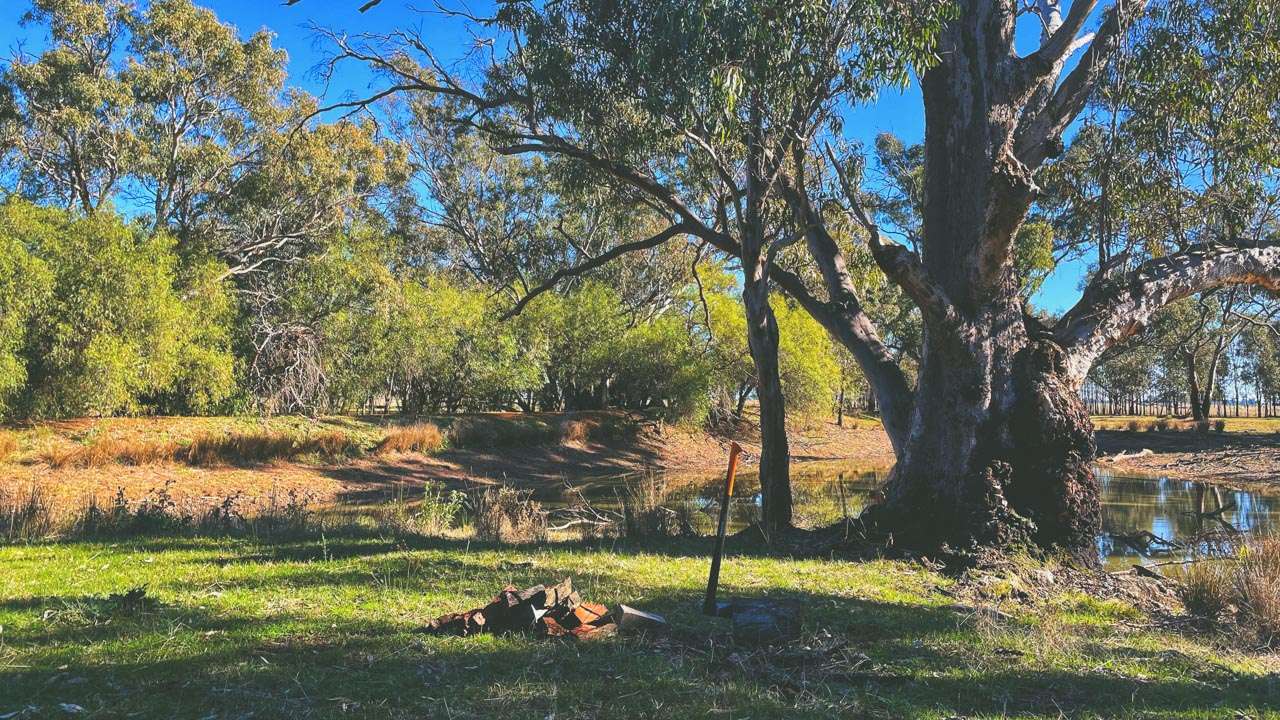
Docker River Camping On The Great Central Road
53 Camping Sites On The Great Central Road
There are numerous designated camping sites along the Great Central Road. These sites provide basic facilities and a safe place to rest.
1. Camp Sandalwood
This is a free campground accessible to camper trailers.
Cost: Free
Type: Bush Camping
Location: White Cliffs Rd, Laverton, Western Australia
GPS: -28.560606°, 122.584711°
Distance From Laverton WA: 20km
Distance From Uluru NT: 1,119km
2. Camp Brakesway
This is a free campground. It is dog friendly. It is accessible to camper trailers, off road caravans and four wheel drives. Camping in tents is allowed.
Cost: Free
Type: Bush Camping
Location: White Cliffs Road, Laverton, Western Australia
GPS: -28.480701°, 122.803377°
Distance From Laverton WA: 45km
Distance From Uluru NT: 1,143km
Pet Friendly: Yes
3. Road Side Stop With Telstra Coverage
This is a free campground. It is accessible to RVs, camper trailers and off road caravans.
Cost: Free
Type: Bush Camping
Location: White Cliffs-Yamarna Rd, Laverton, Western Australia
GPS: -28.400870°, 122.968969°
Distance From Laverton WA: 64km
Distance From Uluru NT: 1,067km
4. Condon Well Camp
This is a free campground. It is accessible to RVs, camper trailers and off road caravans.
Cost: Free
Type: Bush Camping
Location: White Cliffs-Yamarna Road, Laverton, Western Australia
GPS: -28.416255°, 123.099128°
Distance From Laverton WA: 77km
Distance From Uluru NT: 1,074km
5. New Rest Area
This is a new rest area replacing the old one 300m SW of here. Access to old site and Gnamma hole has been blocked with large rocks.
Cost: Free
Type: Bush Camping
Location: Laverton, Western Australia
GPS: -28.366170°, 122.598123°
Distance From Laverton WA: 37km
Distance From Uluru NT: 1,065km
Pet Friendly: Yes
6. Giles Breakaway
This is a free campground. It is accessible to RVs, camper trailers, caravans and big rigs. Camping in tents is allowed. We stayed at Giles Breakaway in August 2024 – click here to read our full rundown.
Cost: Free
Type: Bush Camping
Location: Great Central Rd, Laverton, Western Australia
GPS: -28.279715°, 122.702441°
Distance From Laverton WA: 51km
Distance From Uluru NT: 1,052km
Pet Friendly: Yes
7. Salt Lake Campsite
This is a free campground. It is dog friendly.
Cost: Free
Type: Bush Camping
Location: Great Central Rd, Cosmo Newbery, Western Australia
GPS: -28.208077°, 122.746484°
Distance From Laverton WA: 60km
Distance From Uluru NT: 1,042km
Pet Friendly: Yes
8. Overnight Stop
This is a free campground. It is dog friendly.
Cost: Free
Type: Bush Camping
Location: Great Central Road, Laverton, Western Australia
GPS: -28.045097°, 122.855767°
Distance From Laverton WA: 82km
Distance From Uluru NT: 1,021km
Pet Friendly: Yes
9. The Pines Rest Area
This is a free campground. It is dog friendly. It is accessible to RVs, camper trailers and caravans. Camping in tents is allowed. You must be fully self-contained.
Cost: Free
Type: Bush Camping
Location: Great Central Rd, Cosmo Newbery, Western Australia
GPS: -27.915623°, 123.178602°
Distance From Laverton WA: 119km
Distance From Uluru NT: 983km
Pet Friendly: Yes
10. Under The Southern Cross Windmill
This is a campground. It is accessible to motorbikes, camper trailers and off road caravans.
Cost: Free
Type: Bush Camping
Location: -27.92123, 123.378667 Is Entrance From GCR, Western Australia
GPS: -27.874536°, 123.342216°
Distance From Laverton WA: 152km
Distance From Uluru NT: 969km
11. Gravel Pit
This is a free campground. It is accessible to RVs, camper trailers, caravans and big rigs.
Cost: Free
Type: Bush Camping
Location: Great Central Road, Cosmo Newbery, Western Australia
GPS: -27.924011°, 123.430979°
Distance From Laverton WA: 144km
Distance From Uluru NT: 952km
12. Nankers Spot
This is a free campground. It is accessible to motorbikes, RVs, camper trailers and caravans. Camping in tents is allowed. You must be fully self-contained.
Cost: Free
Type: Bush Camping
Location: Great Central Road, Cosmo Newbery, Western Australia
GPS: -27.918001°, 123.617686°
Distance From Laverton WA: 163km
Distance From Uluru NT: 940km
13. Karl’s Campspot
This is a free bush campground with room for small the medium size rigs. Smaller units can navigate their rig a fair distance from the road into the bush. Larger units might be better off utilising the area closer to the road (hard to turn and sandy). All spots are sheltered from road and sun by trees and bushes. Campfires are being lit but check with shire regulations.
Cost: Free
Type: Bush Camping
Location: Great Central Road, Western Australia
GPS: -27.916891°, 123.619880°
Distance From Laverton WA: 163km
Distance From Uluru NT: 939km
14. Minnie Creek Road Rest Area
Accessible to motorbikes, camper trailers and off road caravans.
Cost: Free
Type: Bush Camping
Location: Great Central Road, Western Australia
GPS: -27.843846°, 123.917977°
Distance From Laverton WA: 196km
Distance From Uluru NT: 901km
Pet Friendly: Yes
15. Sandrifters Gravel Pit
This is a free campground. It is accessible to motorbikes, RVs, camper trailers and caravans. Camping in tents is allowed.
Cost: Free
Type: Bush Camping
Location: Lake Wells, Great Central Road, Western Australia
GPS: -27.758328°, 124.028482°
Distance From Laverton WA: 210km
Distance From Uluru NT: 886km
Pet Friendly: Yes
16. Rest Stop
This is a free campground.
Cost: Free
Type: Bush Camping / Rest Area
Location: Neale, Great Central Road, Western Australia
GPS: -27.742630°, 124.060603°
Distance From Laverton WA: 214km
Distance From Uluru NT: 889km
17. Shady Gum Camp
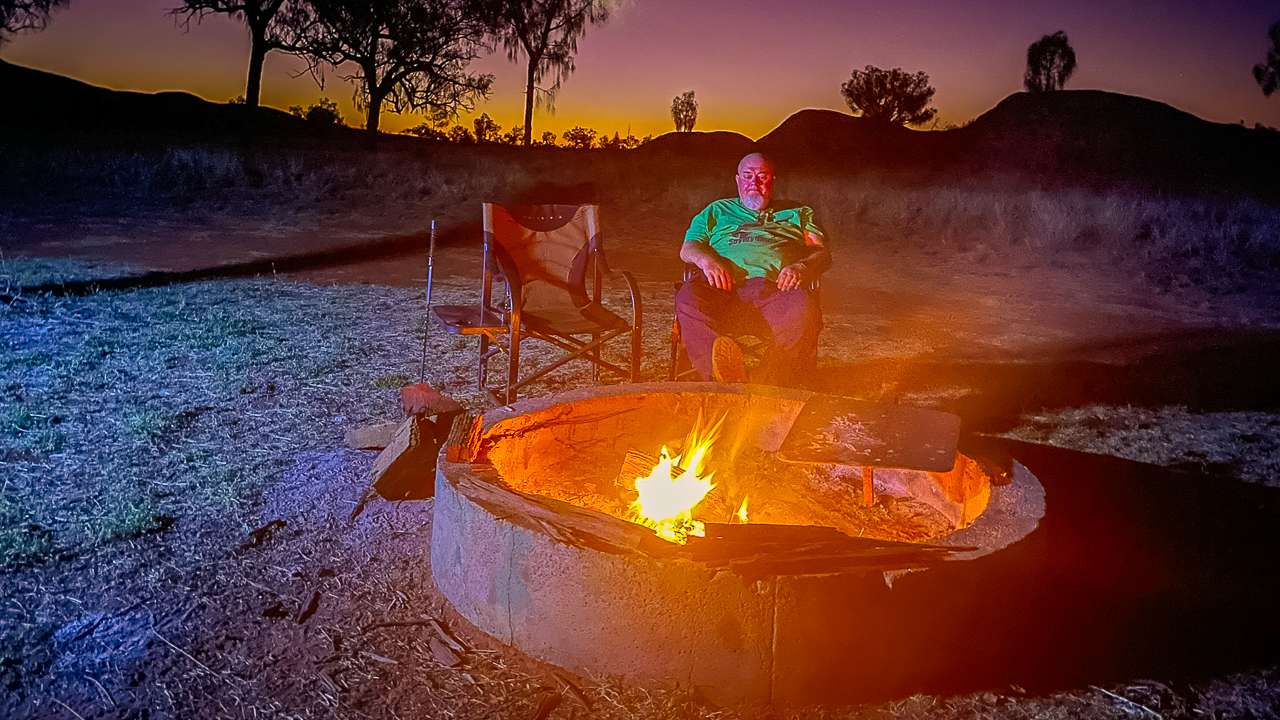
Unofficial small site – one car only, no room to turn caravan around if site already in use. Not far from the Hwy, no facilities. Lovely spot to spend the night round a fire.
Cost: Free
Type: Bush Camping
Location: Great Central Rd, Neale, Western Australia
GPS: -27.713851°, 124.140968°
Distance From Laverton WA: 223km
Distance From Uluru NT: 880km
Pet Friendly: Yes
GCR Camping Near Warburton WA
18. Eulalia’s Rest Spot
Turn off the road approximately 1km east of Shady Pines. The entrance is a dirt track south of the road. It may not be suitable for caravans. The spot is off the road, has plenty of firewood and is elevated. It’s obviously not used too much but is less exposed. There are numerous other tracks once you get to the spot.
Cost: Free
Type: Bush Camping
Location: Great Central Rd, Neale, Western Australia
GPS: -27.712349°, 124.157787°
Distance From Laverton WA: 225km
Distance From Uluru NT: 878km
19. Parking Diversion
Unofficial free camping in a long parking diversion off of the Great Central Road. There are no facilities. Campers must be self-sufficient. Take all rubbish with you and leave no trace. Pets are permitted.
Cost: Free
Type: Bush Camping
Location: Great Central Rd, Neale, Western Australia
GPS: -27.548748°, 124.297423°
Distance From Laverton WA: 249km
Distance From Uluru NT: 855km
Pet Friendly: Yes
20. Roadside Rest Area
This is a free campground. It is dog friendly. It is accessible to off road caravans and four wheel drives.
Cost: Free
Type: Bush Camping / Rest Area
Location: David Carnegie Rd, Neale, Western Australia
GPS: -27.220941°, 124.446485°
Distance From Laverton WA: 290km
Distance From Uluru NT: 813km
Pet Friendly: Yes
21. Nullye Soak
This is a free campground. It is dog friendly. It is accessible to camper trailers, off road caravans and four wheel drives. Camping in tents is allowed.
Cost: Free
Type: Bush Camping
Location: Great Central Rd, Lake Wells, Western Australia
GPS: -27.185306°, 124.487631°
Distance From Laverton WA: 295km
Distance From Uluru NT: 807km
Pet Friendly: Yes
22. Tjukayirla Roadhouse
This paid caravan park offers toilets, showers, drinking water and power hookups. It is dog friendly. It is accessible to motorbikes, RVs, camper trailers and caravans. Camping in tents is allowed. They do not take bookings. First in best dressed. Fuel is available.
Cost: Powered $40 / Unpowered $30 (as at June 2024)
Type: Roadhouse Caravan Park
Location: Great Central Rd, Neale, Western Australia
GPS: Great Central Rd, Neale, Western Australia
Distance From Laverton WA: 277km
Distance From Uluru NT: 819km
Phone: (08) 9037-1108
Email: tjukayirlaroadhouse@ngcouncil.org.au
Web: http://tjukayirlaroadhouse.com.au
Pet Friendly: Yes
At Tjukayirla Roadhouse
23. Old Roadworks Camp Site
Unofficial stop. Leave no trace.
Cost: Free
Type: Bush Camping
Location: Great Central Rd, Lake Wells, Western Australia
GPS: -27.048529°, 124.818914°
Distance From Laverton WA: 333km
Distance From Uluru NT: 770km
Pet Friendly: Yes
24. Wahlgu Rockholes
Unofficial stop. Leave no trace.
Cost: Free
Type: Bush Camping
Location: Great Central Rd, Western Australia
GPS: -27.061158°, 125.185781°
Distance From Laverton WA: 370km
Distance From Uluru NT: 727km
25. Corheads Kangaroo Camp
Off the highway. Easily accessible with turn around points and plenty of space trees for shade. Don’t go too far past the big opening as it does get rough & hard to turn around.
Cost: Free
Type: Bush Camping
Location: Great Central Road, Western Australia
GPS: -27.056238°, 125.183536°
Distance From Laverton WA: 370km
Distance From Uluru NT: 727km
26. Road Water Dam
This is a free campground. It is accessible to motorbikes, RVs, camper trailers and caravans.
Cost: Free
Type: Bush Camping
Location: Great Central Road, Western Australia
GPS: -27.050051°, 125.206958°
Distance From Laverton WA: 372km
Distance From Uluru NT: 724km
Pet Friendly: Yes
27. Road Realignment
This is a free campground. It is dog friendly. It is accessible to RVs, camper trailers and caravans.
Cost: Free
Type: Bush Camping
Location: Great Central Road, Western Australia
GPS: -27.034355°, 125.227917°
Distance From Laverton WA: 375km
Distance From Uluru NT: 722km
Pet Friendly: Yes
28. Gravel Pit – Paradise Camp
This is a free campground. An unofficial sign names it as Paradise Camp.
Cost: Free
Type: Bush Camping
Location: GCR, Western Australia
GPS: -26.972562°, 125.407069°
Distance From Laverton WA: 394km
Distance From Uluru NT: 708km
29. Ridge Camp
This is a free campground. It is dog friendly. It is accessible to RVs, big rigs, camper trailers and caravans.
Cost: Free
Type: Bush Camping
Location: Great Central Road, Western Australia
GPS: -26.965449°, 125.412748°
Distance From Laverton WA: 395km
Distance From Uluru NT: 707km
30. Desert Surf Central
This is a free campground. It is accessible to motorbikes, RVs, camper trailers, caravans and big rigs. Camping in tents is allowed. Heaps of room for a few camps, good firewood around and caves to explore. We stayed at Desert Surf Central in August 2024 – click here to read our full rundown.
Cost: Free
Type: Bush Camping
Location: Great Central Road, Western Australia
GPS: -26.836652°, 125.658008°
Distance From Laverton WA: 424km
Distance From Uluru NT: 679km
Pet Friendly: Yes
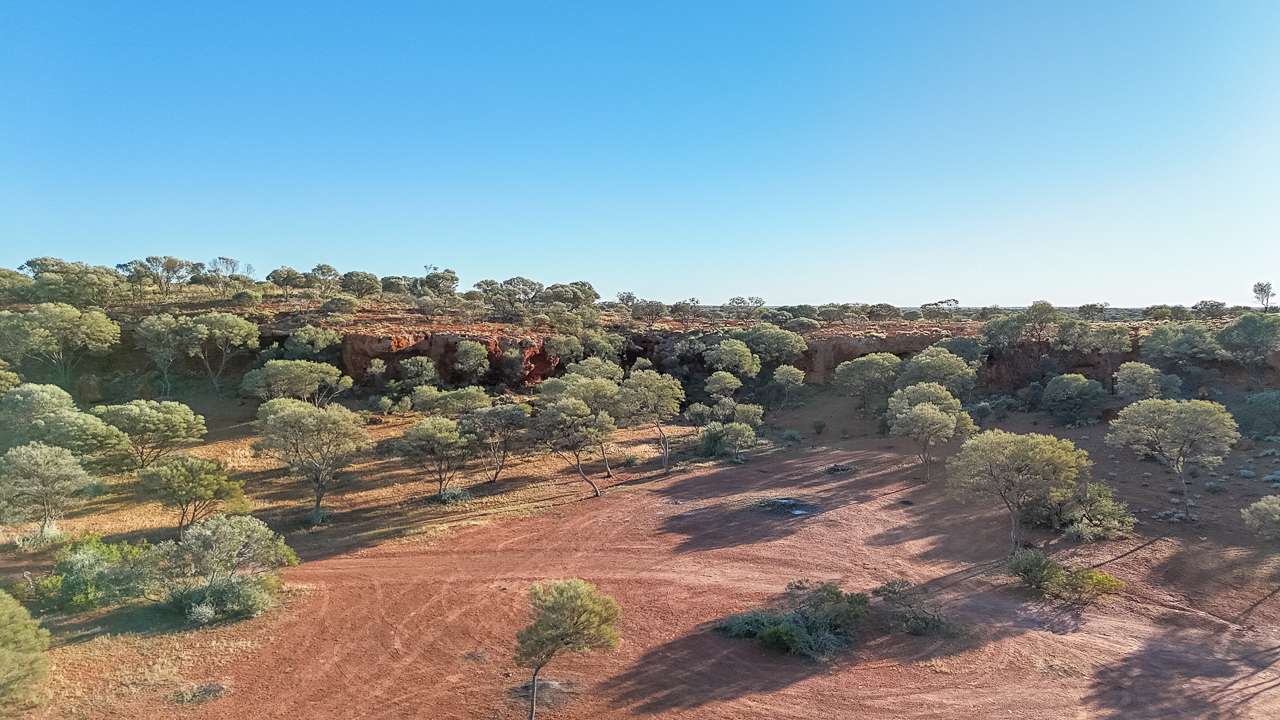
Breakaways At Desert Surf Central
31. Off The Road
This is a free camping area. It’s dog friendly.
Cost: Free
Type: Bush Camping
Location: Great Central Road, Gibson Desert South, Western Australia
GPS: -26.816710°, 125.693160°
Distance From Laverton WA: 428km
Distance From Uluru NT: 675km
Pet Friendly: Yes
Old Roadworks Camp Site On Great Central Road 770km From Uluru
32. Gravel Dump
This is a free camping area. It’s dog friendly.
Cost: Free
Type: Bush Camping
Location: Great Central Road, Western Australia
GPS: -26.708662°, 125.766645°
Distance From Laverton WA: 442km
Distance From Uluru NT: 661km
Pet Friendly: Yes
33. Quarry
This is a free camping area.
Cost: Free
Type: Bush Camping
Location: Great Central Road, Gibson Desert South, Western Australia
GPS: -26.621734°, 125.875080°
Distance From Laverton WA: 457km
Distance From Uluru NT: 646km
34. Chris’s Place
This is a free campground. It is dog friendly. It is accessible to motorbikes, RVs, camper trailers, caravans and four wheel drives. Huge area in the bush. It used to be a quarry.
Cost: Free
Type: Bush Camping
Location: Great Central Road, Western Australia
GPS: -26.524739°, 126.029550°
Distance From Laverton WA: 476km
Distance From Uluru NT: 626km
Pet Friendly: Yes
35. Pete’s Bush Camp
This is a free campground. It is accessible to motorbikes, RVs, camper trailers, caravans and big rigs. Camping in tents is allowed.
Cost: Free
Type: Bush Camping
Location: Great Central Road, Gibson Desert South, Western Australia
GPS: -26.522112°, 126.027955°
Distance From Laverton WA: 476km
Distance From Uluru NT: 626km
36. Mikes Place – Near Pete’s
This is a free campground. It is accessible to motorbikes, RVs, camper trailers, caravans and big rigs. Camping in tents is allowed.
Cost: Free
Type: Bush Camping
Location: Great Central Road, Gibson Desert South, Western Australia
GPS: -26.522197°, 126.038044°
Distance From Laverton WA: 477km
Distance From Uluru NT: 625km
37. Micks Camp
Nice quiet spot off to the side of the plateau. A long way off the road pretty good views.
Cost: Free
Type: Bush Camping
Location: Great Central Road, Western Australia
GPS: -26.502166°, 126.056394°
Distance From Laverton WA: 480km
Distance From Uluru NT: 623km
38. Jonas Camp
This is a free camping area off to the side of the road.
Cost: Free
Type: Bush Camping
Location: Great Central Rd, Gibson Desert South, Western Australia
GPS: -26.421422°, 126.146363°
Distance From Laverton WA: 493km
Distance From Uluru NT: 610km
39. Rest Area Unofficial
This is a free campground. Camping in tents is allowed.
Cost: Free
Type: Bush Camping / Rest Area
Location: Great Central Rd, Gibson Desert South, Western Australia
GPS: -26.290962°, 126.234395°
Distance From Laverton WA: 511km
Distance From Uluru NT: 592km
40. Rest Area Along The Old GCR
Rest area along the old Great Central Road. About 30km west of Warburton WA.
Cost: Free
Type: Bush Camping
Location: Old Great Central Road, Western Australia
GPS: -26.219057°, 126.310647°
Distance From Laverton WA: 523km
Distance From Uluru NT: 580km
41. Rock Holes Via Old Great Central Road
This is a free campground. It is accessible to four wheel drives. Camping in tents is allowed. It has a bit of Telstra reception.
Cost: Free
Type: Bush Camping
Location: Great Central Road, Western Australia
GPS: -26.198019°, 126.384344°
Distance From Laverton WA: 530km
Distance From Uluru NT: 572km
42. Old Great Central Hwy Lookout / Rest Stop
This is a free campground. It is accessible to four wheel drives. Camping in tents is allowed. Telstra reception.
Cost: Free
Type: Bush Camping
Location: Old Great Central Hwy (Unsealed), Western Australia
GPS: -26.196682°, 126.390149°
Distance From Laverton WA: 531km
Distance From Uluru NT: 572km
43. Warburton Roadhouse
Congratulations you’re almost at exactly the half way point! For travellers crossing the Great Central Road, the Warburton Roadhouse is the perfect place to restock and refuel. With a variety of accommodation options and a good supply of both fresh and frozen food, Warburton Roadhouse is a welcome sight for many a weary traveller.
Facilities
The Roadhouse offers the following services.
- Diesel and Opal* fuel (*Opal is a replacement for unleaded petrol.)
- A takeaway food service and provision of breakfast and dinner if reserved in advance.
- A well stocked store offering food and personal items including fresh fruit & veg, bread, drinks, ice, fuels, meat, basic grocery items and ice creams.
- A range of accommodation options to suit everyone from the budget back-packer to the discerning traveller, as well as complete units that will act as a home away from home for persons employed on extended contracts in the community.
- Tyre repair tools available for use.
- 24 hour power.
- The ability to cater for large groups and bus tours.
- Telstra Network coverage (including 3G).
Cost: $15 per person per night (as on web site June 2024)
Type: Roadhouse Caravan Park
Location: Great Central Rd, Warburton, Western Australia
GPS: -26.131815°, 126.568548°
Distance From Laverton WA: 550km
Distance From Uluru NT: 552km
Phone: (08) 8956-7656
Web: https://warburtonroadhouse.com.au
Email: roadhouse.warbo@bigpond.com
Toilets: Yes
Showers: Yes
Power: Yes
Drinking Water: Yes
Laundry Facilities: Yes
Dump Point: Yes
Telstra Reception: Yes
Pet Friendly: Yes
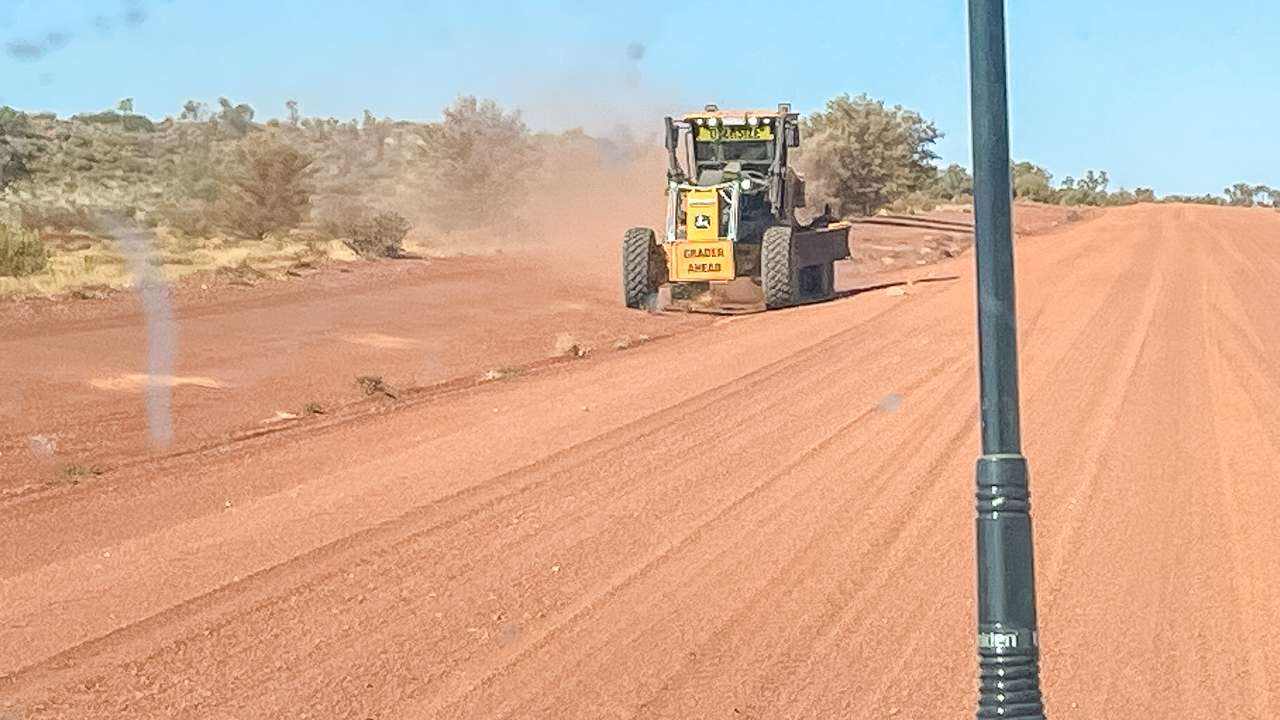
Grader On The Great Central Road Near Warburton
44. Piggies Place
This is a free campground. It is accessible to motorbikes, RVs, camper trailers, caravans and big rigs. Camping in tents is allowed. It’s dog friendly.
Cost: Free
Type: Bush Camping
Location: Great Central Rd, Ngaanyatjarra-Giles 0872, Western Australia
GPS: -25.927265°, 126.861635°
Distance From Laverton WA: 592km
Distance From Uluru NT: 510km
Pet Friendly: Yes
45. Yarla Kutjarra Camping
This is a free campground. It is accessible to motorbikes, RVs, camper trailers, caravans and big rigs. Camping in tents is allowed. It’s dog friendly. Telstra reception. We stayed at Yarla Kutjarra in August 2024 – click here to read our full rundown.
Cost: Free
Type: Bush Camping
Location: Great Central Rd, Between Warakurna and Warburton, Western Australia
GPS: -25.610328°, 127.223357°
Distance From Laverton WA: 646km
Distance From Uluru NT: 457km
Toilets: Yes
Non Potable Water: Yes
Pet Friendly: Yes
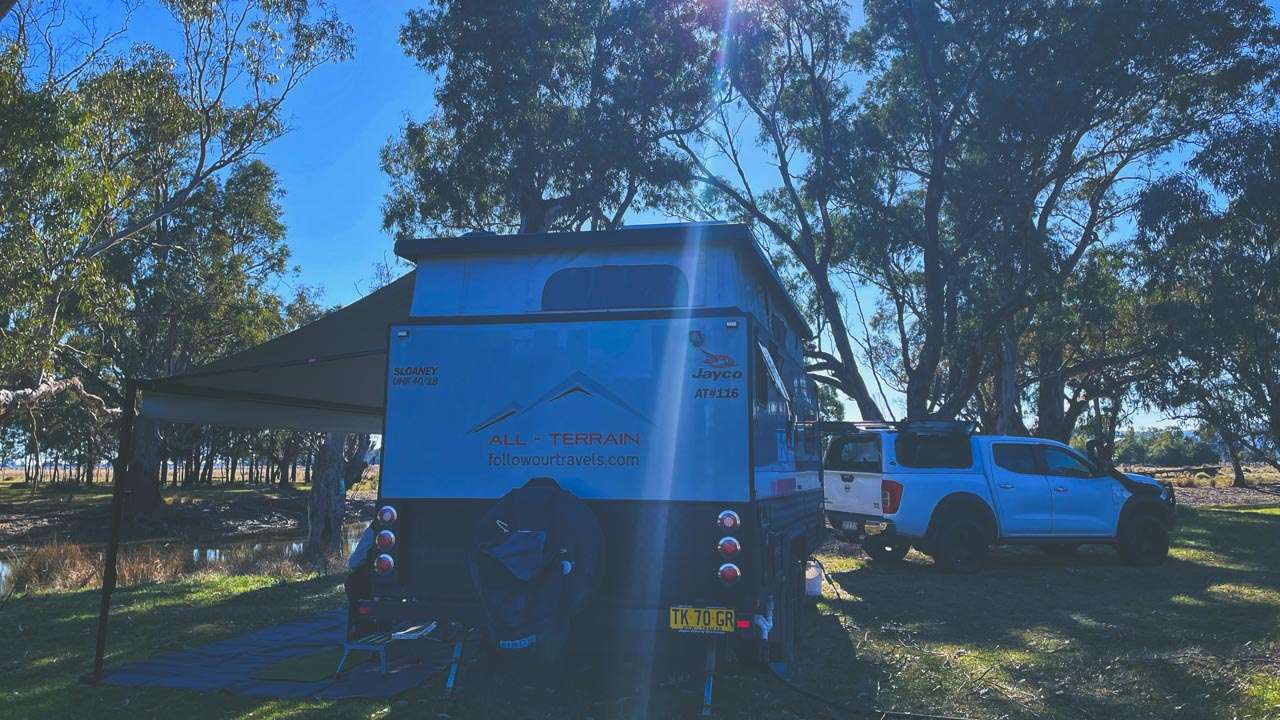
Our Camp On The Great Central Road Camping At Yarla Kutjarra
46. 2 GS Gravel Pit
Very big open area. Nice and flat. No firewood around so BYO. Loads of room here to turn around even the largest of rigs.
Cost: Free
Type: Bush Camping
Location: GCR, Western Australia
GPS: -25.518839°, 127.371185°
Distance From Laverton WA: 665km
Distance From Uluru NT: 438km
Pet Friendly: Yes
47. Gnamma Holes
This is a free campground. It is accessible to motorbikes, RVs, camper trailers, caravans and big rigs. Camping in tents is allowed. It’s dog friendly. Telstra reception.
Cost: Free
Type: Bush Camping
Location: Great Central Road, Ngaanyatjarra-Giles, Western Australia
GPS: -25.299460°, 127.817354°
Distance From Laverton WA: 717km
Distance From Uluru NT: 385km
Pet Friendly: Yes
48. Warakurna Roadhouse
The Warakurna Roadhouse is located along the Great Central Road, within the Great Victoria Desert, 781km west of Alice Springs and 331km from Yulara (Ayers Rock). Laverton is 811km to the west of the roadhouse and Kalgoorlie is 1163km west.
The Roadhouse offers the following services
- Diesel and Opal fuel.
- A takeaway food service.
- A range of accommodation options to suit everyone from the budget back-packer to the discerning traveller. Including complete units that will act as a home away from home for persons employed on extended contracts in the community.
- A well stocked store offering food and personal items including fresh fruit & veg, bread, drinks, ice, fuels, meat, basic grocery items and ice creams.
- 24 hour power
- An after-hours fuel service
- Yurliya Gallery (High end Gallery exclusively selling works produced by Warakurna Artists)
Cost: Unpowered $20 – Powered $35 (as on web site June 2024)
Type: Roadhouse Caravan Park
Location: Great Central Rd, Warakurna, Western Australia
GPS: -25.043060°, 128.303328°
Distance From Laverton WA: 811km
Distance From Uluru NT: 331km
Phone: (08) 8956-7344
Web: https://warakurnaroadhouse.com.au
Toilets: Yes
Showers: Yes
Power: Yes
Drinking Water: Yes
Laundry Facilities: Yes
Dump Point: No
Telstra Reception: Yes
Pet Friendly: Yes
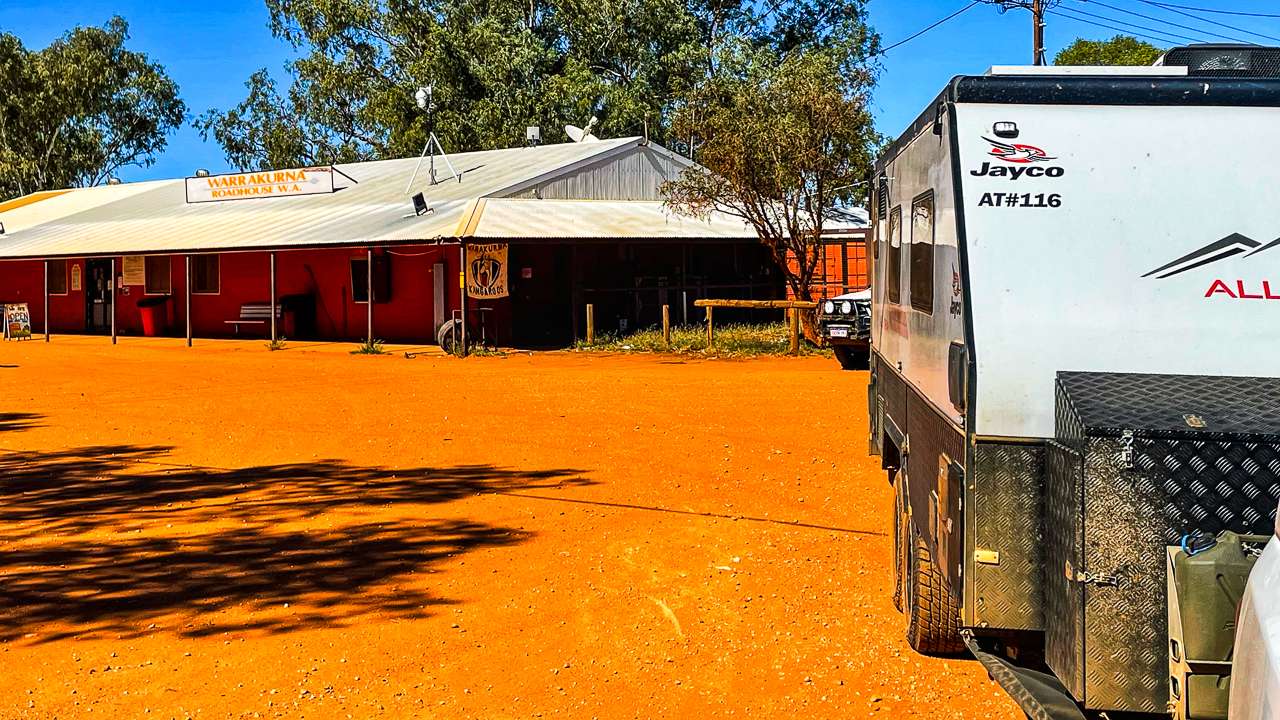
Warakurna Roadhouse
49. Camel Last Resort
This is a free campground. It is accessible to motorbikes, camper trailers and caravans. Camping in tents is allowed. It’s dog friendly.
Cost: Free
Type: Bush Camping
Location: Great Central Road, Ngaanyatjarra-Giles, Western Australia
GPS: -25.155309°, 128.507698°
Distance From Laverton WA: 801km
Distance From Uluru NT: 302km
Pet Friendly: Yes
50. Giles Mulga Park Rd
This is a free campground. It is accessible to motorbikes, camper trailers and caravans. Camping in tents is allowed. It’s dog friendly.
Cost: Free
Type: Bush Camping
Location: Just Off Giles-Mulga Park Road, Western Australia
GPS: -25.167268°, 128.540448°
Distance From Laverton WA: 804km
Distance From Uluru NT: 298km
Pet Friendly: Yes
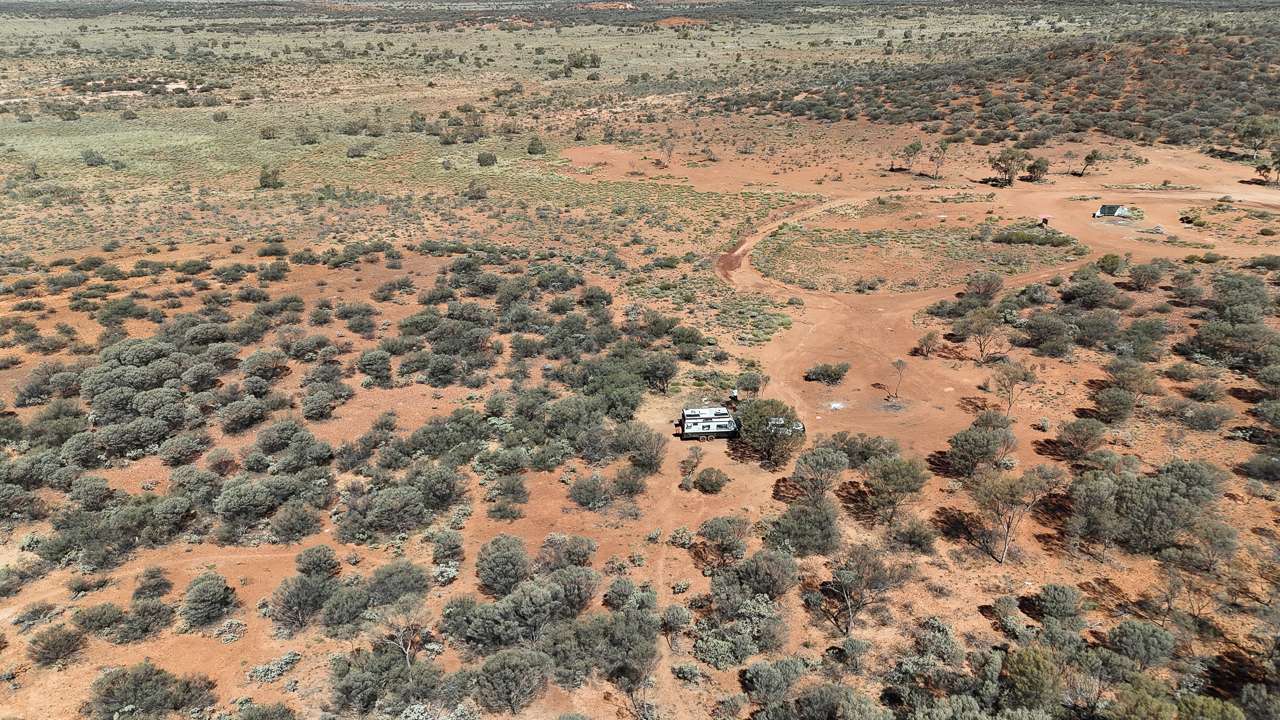
We stayed at Docker River in August 2024 – click here to read our full rundown.
- This unpaid campground no longer offers toilets or showers.
- It is dog friendly.
- It is accessible to RVs, camper trailers, caravans and big rigs.
- Local community (shop and diesel) closed to other than residents.
- Camping in tents is allowed.
- Telstra reception
NOTE: store/fuel at Docker River NOT OPEN SUNDAYS
Cost: Free
Type: Bush Camping
Location: Tjukaruru Rd, Docker River, Northern Territory
GPS: -24.865080°, 129.061564°
Distance From Laverton WA: 875km
Distance From Uluru NT: 228km
Pet Friendly: Yes
52. Ayers Rock Campground
Located 20km from Ayers Rock, Ayers Rock Campground is a great home base for truly experiencing the beauty of Ayers Rock. Unwind in air-conditioned cabins, hook up your caravan, campervan, motor home, or camper trailer at one of the powered campsites, or pitch your tent under the shade of native desert oaks and sleep under the stars. The camping ground also provides a range of services and facilities including a swimming pool, BBQ facilities and outdoor kitchen and self-service laundry facilities to make the great outdoors truly enjoyable.
**YOU CANNOT ENTER SITE IF YOU HAVE A CAT ON BOARD**
Hop on the complimentary shuttle bus for access to the Resort’s restaurants and bars, shops, a well-stocked IGA supermarket, petrol station, Tour & Information Centre, and art galleries. Participate in a range of free daily activities including guided garden walks and Indigenous bush yarns.
Pre-booking is essential. Especially during the Australian School Holiday periods and also peak season from May to August the campground sells out consistently. Contact number is 1300 134 044
Cost: Unpowered $50 – Powered $75 (as on web site June 2024)
Type: Resort / Caravan Park
Location: 173 Yulara Dr, Yulara 0872, Northern Territory
GPS: -25.238749°, 130.990129°
Distance From Laverton WA: 1,107km
Distance From Uluru NT: 15km
Phone: 0130 013 404
Web: https://ayersrockresort.com.au
Toilets: Yes
Showers: Yes
Power: Yes
Drinking Water: Yes
Laundry Facilities: Yes
Dump Point: Yes
Telstra Reception: Yes
Pet Friendly: Yes
Pet Sitting: Yes
53. Sandy View Roadside Rest Area
This is a free campground. It’s not on the Great Central Road however it’s the only listed free camping area anywhere near Uluru.
- It is accessible to motorbikes, RVs, camper trailers and caravans.
- Camping in tents is allowed.
- You can stay here for up to 24 hours.
- This is a roadside site only.
- Free camping at Ayers Rock.
- Free camping at Uluru.
- Free camping at Yulara.
Cost: Free
Type: Roadside Camping
Location: Lasseter Hwy, Yulara, Northern Territory
GPS: -25.220208°, 131.229939°
Distance From Laverton WA: 1,133km
Distance From Uluru NT: 41km
Pet Friendly: Yes
Preparation For The Trip
Vehicle Requirements
Embarking on the Great Central Road requires a reliable 4WD vehicle. Ensure your vehicle is well-maintained and equipped for off-road conditions. Spare tyres, extra fuel, and a comprehensive toolkit are essential.
Essential Supplies
Pack enough food, water, and camping gear for the entire journey. Consider carrying extra supplies in case of emergencies. A first aid kit, navigation tools, and satellite phone are also crucial.
Permits And Regulations
Travelling through Aboriginal lands requires permits. Make sure to obtain the necessary permits for each section of the road. Respect local regulations and be aware of restricted areas.
Best Time to Travel
Seasonal Considerations
The best time to travel the Great Central Road is during the cooler months from April to October. This time of year offers more manageable temperatures and has the potential for fewer weather related disruptions.
Weather Conditions
Prepare yourself for extreme weather conditions including sudden storms and high temperatures. And don’t forget the temperature can also be very cold at night – even down below zero during the winter months. Check weather forecasts regularly and plan your journey to suit.
Major Attractions
Tjukayirla Roadhouse
This roadhouse is a popular stop for travellers, offering fuel, food, and basic accommodation. Refuel and have a break before continuing your journey.
The Warburton Community is rich in First Nation culture and gives a view into the traditions and lifestyles of the local people. Visit the Tjulyuru Cultural and Civic Centre for an immersive cultural experience.
Docker River
Docker River is a small community with a stunning backdrop of red desert landscapes. It’s a fantastic place to camp. You can set up here and explore the surrounding area.
Kata Tjuta (The Olgas)
These impressive rock formations are located near Uluru and are a must-see. Kata Tjuta, meaning “many heads” is a sacred site with stunning walking trails.
Uluru (Ayers Rock)
The journey culminates at Uluru, a UNESCO World Heritage Site. Witness the changing colours of this iconic rock at sunrise and sunset, and learn about its cultural significance.
Cultural Significance
Aboriginal Communities
The Great Central Road passes through lands belonging to various Aboriginal groups. Remember to respect their customs, traditions and privacy. Engage with local communities to learn about their rich cultural heritage.
Respecting Local Traditions and Laws
Always seek permission before entering Aboriginal lands. Please follow and respect guidelines for behaviour and interactions and avoid disturbing sacred sites.
Flora and Fauna
Unique Wildlife
The outback is home to a big range of wildlife including kangaroos, emus and dingoes. Keep watch for these animals and maintain a safe distance so you don’t disturb them.
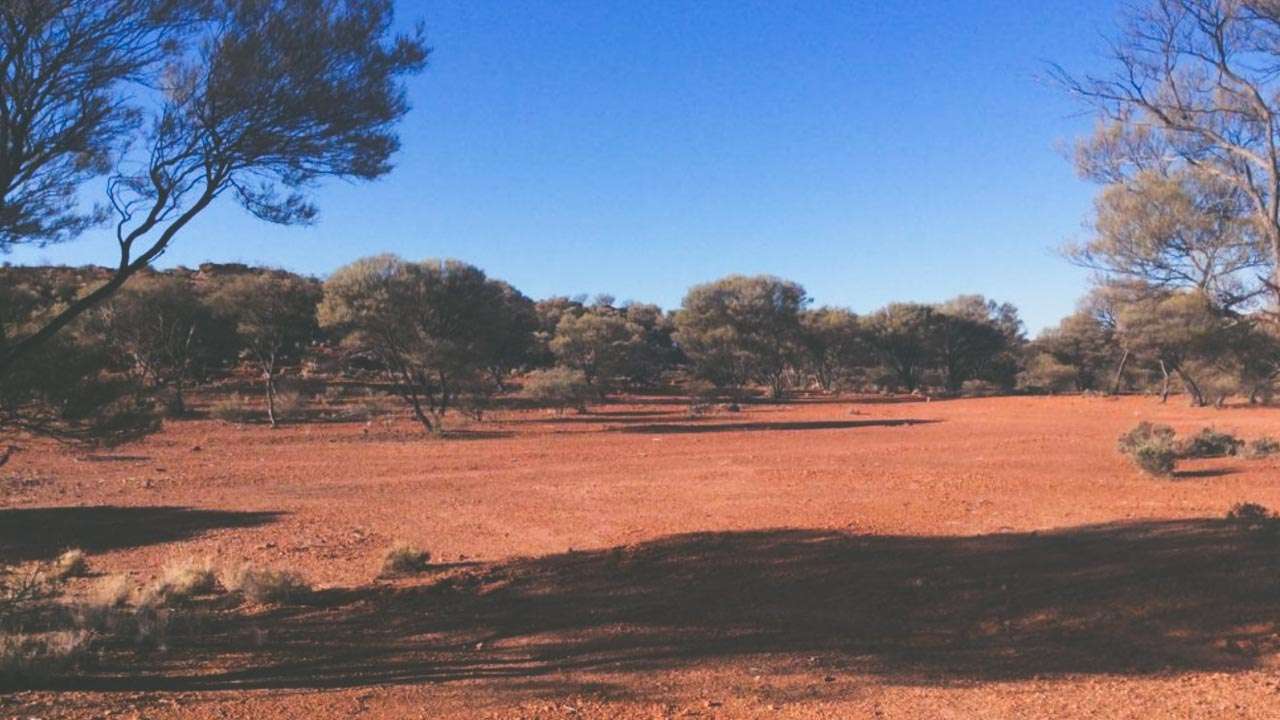
Plant Life
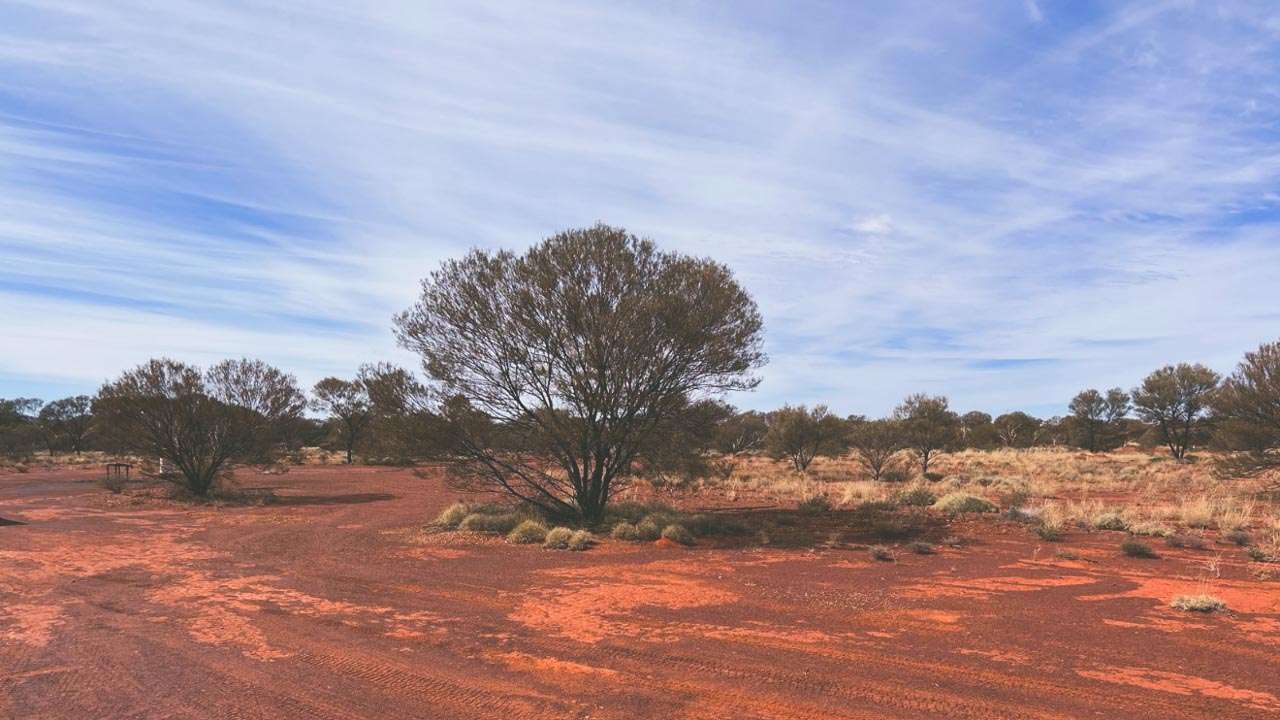
The desert landscape features unique vegetation adapted to the harsh conditions. Look for resilient plants like spinifex and mulga trees that thrive in the outback environment.
Roadhouses On The Great Central Road
Roadhouses are your best and most reliable sources of water, fuel and food along the Great Central Road. Generally in most circumstances these will be your only sources to purchase these items. So plan your journey carefully. and know where they are. And an old adage in the bush still holds true. Never drive past a roadhouse without filling up as you never know if the next one will be open or will have fuel.
Tjukayirla Roadhouse
Tjukayirla Roadhouse is located in the Great Victoria Desert, along the Great Central Road (Outback Way). A distance of 305 km separates the roadhouse from Laverton, and a distance of 245 km separates it from Warburton. The Tjukayirla Roadhouse was established and owned by the Blackstone Community. As part of the original survey route to Warburton, the surveyors placed a Paine and Barclay Surveyor marker next to the Tjukayirla Rockholes, which give the roadhouse its name. A visit to the desert breakaways and wildflowers is well worth the time. It is common to see dingoes, emus, kangaroos, camels, as well as a wide variety of birds around the roadhouse.
Trading Hours
Monday to Friday: 8am – 5pm
Saturday – Sunday: 9am – 5pm
After hours to 8pm: $20 fee to open
Fuel
Diesel and Opal fuel is available
Stores
Sit down or takeaway meals, hot & cold drinks, snacks, souvenirs, indigenous paintings, artefacts, basic food items, motor vehicle accessories and tyres
Accommodation
- Twin share rooms with tea and coffee making facilities
- 2 x self contained units with television (without bathroom)
- Caravan and camping sites with or without power
- Amenities block
- 24 hour power
Pets
Pets are not permitted in rooms but are allowed outside on a leash. All pets must be under control at all times
Repairs
Minor mechanical, welding repairs, breakdown recovery, tow service to Perth
Managers: Andrew and Sussan Bignell
Contact Details
Postal Address: PMB 53 Alice Springs NT 0872
Phone: (08) 9037 1108
Fax: (08) 9037 1110
Email: tjukayirlaroadhouse@bigpond.com
Web: https://tjukayirlaroadhouse.com.au/
Warburton Roadhouse
The Warburton Roadhouse is located outside the community on the Great Central Road.
Trading Hours
Monday to Friday: 8am – 5pm (WST)
Saturday to Sunday: 9am – 3pm (WST)
Public Holidays: 9am – 12 midday (WST)
Please note: No shop or fuel sales are made outside of these hours.
Fuel
Diesel and Opal fuel is available
Stores
Takeaway food, fruit & veg, bread, drinks, ice, meat, basic grocery items, tyres and motor vehicle accessories
Accommodation
- 2 x Self Contained Units
- 12 x Double Ensuites
- 11 x Single Budget
- 20 x Single Ensuites
- There are two toilet facilities and one laundry
The Roadhouse is able to cater for coach groups and have enough beds for approximately 63 people. As well as accommodation, dinner and breakfast are available with prior arrangements. Meals are available but orders are to be made when booking rooms. Anyone arriving after hours can come to the Manager’s house, which is located at the rear of the roadhouse, for accommodation and camping inquiries.
Pets
On arrival please notify managers if you have a pet with you. Pets only allowed if you are camping. No pets allowed to wander freely in the grounds and must be kept on a leash
Repairs
Tyre and other minor repairs including welding can be carried out in the community workshop
Manager: Scott Peers
Contact Details
Postal Address: Warburton Community, PMB 71 Kalgoorlie WA 6430
Phone: (08) 8956 7656
Fax: (08) 8956 7645
Email: roadhouse.warbo@bigpond.com
Web: https://warburtonroadhouse.com.au/
Warakurna Roadhouse
The Warakurna Roadhouse is located outside the community on the Great Central Road.
Trading Hours (Central Standard Time)
Monday to Friday: 8.30am – 5.00pm
Saturday-Sunday: 9.00am – 3.00pm
Public Holidays: 9.00am – 12.00 midday
Closed: Good Friday, Christmas Day and New Years Day.
Fuel
Diesel and Opal fuel is available.
After hours fuel only up to 8.00pm.
If fuel is required outside of trading hours then a fee of $20 will apply per vehicle.
Closed Good Friday, Christmas Day and New Years Day.
Stores
Takeaway food, drinks, basic grocery items and local artefacts
Accommodation
- 5 x self contained units (sleeps 2-5 people)
- 10 x backpacker style rooms
- Powered camp sites
- An after hours service is available (until 8pm CST), by going to the managers residence for camping and accommodation
Pets
Contact Managers
Repairs
Tyre repairs can be carried out in the workshop
Contact Details
Postal Address: C/- Warakurna Community, PMB 62 Alice Springs NT 0872
Phone: (08) 8956 7344
Fax: (08) 8956 2850
Email: warakurnaroadhouse@bigpond.com
Web: https://warakurnaroadhouse.com.au/
Safety Tips
Navigating Remote Areas
Always travel with a detailed map and GPS. Inform someone of your travel plans and estimated arrival times.
Health Precautions
Stay hydrated and protect yourself from the sun with appropriate clothing and sunscreen. Carry a well-stocked first aid kit for emergencies.
Travel Tips
Driving Advice
Drive cautiously and be prepared for varying road conditions. Reduce speed in sandy or rocky areas to avoid damage to your vehicle.
Communication
Mobile phone coverage is limited, so carry a satellite phone for emergencies. Inform others of your location and travel plans regularly.
Fuel Management
Plan your fuel stops carefully. Carry extra fuel in approved containers, and refuel whenever possible to avoid running out in remote areas.
Environmental Impacts Of The Great Central Road
Leave No Trace Principles
Follow Leave No Trace principles to minimise your environmental impact. Pack out all waste and avoid damaging vegetation and wildlife habitats.
Conservation Efforts On The Great Central Road
Help to assist local conservation efforts by respecting guidelines and participating in community led initiatives. Protecting the outback ensures its beauty for future generations.
Common Challenges And How To Overcome Them
Road Conditions
Road conditions can vary, with sections being sandy, rocky, or corrugated. Drive cautiously and adjust your speed to the conditions. You can check the current road conditions here > https://www.ngaanyatjarraku.wa.gov.au/road-conditions/road-conditions.aspx
Vehicle Breakdowns
Be prepared for potential vehicle issues. Carry spare parts and tools, and know basic repair techniques. Assistance can be far away, so self-sufficiency is crucial.
Weather Related Issues
A sudden weather change can bugger up your travel plans. Keep an eye on forecasts and be flexible with your itinerary to accommodate unexpected conditions. Check your weather apps whenever you have a viable internet connection. Remember that mobile phone connection can be spotty at best.
Valuable Resources
Conclusion
The Great Central Road offers a once in a lifetime adventure through Australia’s outback. From its rich cultural heritage to its stunning landscapes, this journey is as rewarding as it is challenging. By preparing adequately, respecting local traditions, and embracing the spirit of adventure, you’ll create unforgettable memories on this epic road trip. So, pack your gear, fuel up, and set off on the adventure of a lifetime along the Great Central Road.
FAQs – Frequently Asked Question About The Great Central Road
What permits do I need to travel the Great Central Road?
You'll need permits to travel through Aboriginal lands. These can be obtained online or at specific entry points along the route.
Is the Great Central Road suitable for beginners?
While it's a challenging route, beginners can undertake it with proper preparation and a reliable 4WD vehicle. Plan thoroughly and seek advice from experienced travellers.
How long does it take to drive the Great Central Road?
The journey typically takes 4-7 days, depending on your pace and the stops you make along the way. Allow extra time for exploration and rest.
Are there fuel stops along the Great Central Road?
Yes, there are several fuel stops, including roadhouses like Tjukayirla and Warburton. Plan your fuel stops carefully to avoid running out.
What is the best vehicle for the Great Central Road?
A well-maintained 4WD vehicle is essential for this journey. Ensure it is equipped for off-road conditions and carry necessary spare parts and tools.