Caravan vs camper van – which suits Aussie travellers best? Discover pros, cons, costs & features to to help you make the right choice for your camping adventures. Planning your next Australian adventure involves a crucial decision between two popular options – caravan vs camper van.
Caravan vs Camper Van – which option offers better value for Australian adventurers?The choice between a caravan and camper van depends on your travel style, budget, and camping preferences. Caravans provide more living space and can be detached for separate exploration, whilst campervans offer superior manoeuvrability and convenience for spontaneous travel across Australia’s diverse landscapes.
Planning your next Australian adventure involves a crucial decision between two popular accommodation options. Furthermore, understanding the differences between caravans and campervans helps determine which suits your travel needs best. Consequently, this comprehensive guide examines every aspect of the caravan vs camper van debate to help Australian camping enthusiasts make informed choices.

Caravan Vs Camper Van
Caravan Vs Camper Van – Understanding The Basic Differences
What Defines A Caravan
A caravan represents a towable living space attached to a trailer chassis. Additionally, caravans require another vehicle such as a ute or larger car for mobility. Meanwhile, caravans connect to motor vehicles via towing connections and remain stationary when unhitched from the tow vehicle.
What Makes A Campervan Unique
Conversely, campervans integrate living spaces directly into the vehicle itself. Therefore, the interior of a van or larger vehicle receives conversion for living and sleeping purposes. Subsequently, campervans operate as fully mobile units without requiring separate towing vehicles.
Caravan Vs Camper Van: Initial Purchase Costs
Understanding the financial implications helps narrow your decision significantly. Moreover, several factors influence the total investment required for each option.
Caravan Purchase Prices
New caravans in Australia typically start around $50,000 for basic models. However, prices can start from as little as $32,000 up to well over $160,000 depending on size and features. Typically small caravans measuring 12-16 feet cost between $32,000 and $75,000. Meanwhile, larger caravans from 20 feet onwards start around $65,000.
Campervan Purchase Costs
$10,000 for a basic, used model to over $200,000 for a new, high end luxury motorhome.
Campervan Vs Caravan: Space And Comfort Comparison
| Feature |
Caravan |
Campervan |
| Interior Space |
Larger living areas, multiple rooms |
Compact design, space at premium |
| Sleeping Capacity |
Full-size beds, bunk options |
Usually sleeps around 4 people |
| Kitchen Facilities |
Full-size appliances possible |
Compact kitchenette design |
| Bathroom Access |
Often includes full bathrooms |
Limited or shared facilities |
| Standing Room |
Full standing height available |
May require stooping in some areas |
Caravan Space Advantages
Caravans provide spacious interiors with multiple rooms including bedrooms and kitchens. Additionally, they often feature full-size beds and kitchen appliances. Meanwhile, caravans typically allow full standing height without stooping.
Campervan Space Considerations
Campervans maximise compact spaces efficiently but compromise on room. Furthermore, space remains at a premium as a trade-off for travel convenience. However, modern campervans incorporate clever storage solutions throughout their design.
Driving And Manoeuvrability: Caravan Vs Camper Van
Caravan Driving Challenges
Towing caravans requires additional skill similar to driving with large trailers. Additionally, finding parking spots for car and towable combinations proves difficult. Meanwhile, quick roadside stops become challenging with caravan setups.
Consequently, caravans face speed limit restrictions and passing prohibitions in many areas. Furthermore, manoeuvring becomes much more difficult, particularly when reversing. Therefore, towing courses help drivers develop necessary confidence and skills.
Campervan Driving Benefits
Campervans offer superior manoeuvrability compared to caravan combinations. Moreover, their compact size makes driving simple, even on narrow country lanes. Subsequently, campervans fit into most parking spaces easily.
Additionally, campervans require no towing experience if you can drive cars. Furthermore, they navigate tight corners and country roads effectively. Consequently, campervans gain acceptance at more campsites than caravans.
Setup And Convenience: Campervan Vs Caravan
Caravan Setup Requirements
Setting up a caravan involves detaching it from your tow vehicle. Additionally, this process requires levelling the caravan and deploying steadies. Meanwhile, connecting electricity and water systems adds setup time.
However, caravans offer the advantage of being ready for occupation immediately after setup. Furthermore, minimal transformation occurs since caravans remain configured for living. Consequently, occupants can relax whilst others handle campervan conversions.
Campervan Setup Simplicity
Campervans require minimal setup procedures upon arrival. Moreover, setting up involves simply applying the handbrake and stopping. Additionally, no attachment or detachment procedures occur with campervans.
Therefore, campervans excel for spontaneous trips and quick getaways. Furthermore, packing up involves simply closing the door and departing. Subsequently, this convenience suits travellers preferring minimal preparation time.
Caravan Vs Camper Van: Mobility And Exploration
Caravan Exploration Benefits
Caravans provide significant advantages once established at campsites. Additionally, detaching caravans allows separate vehicle exploration. Meanwhile, tow vehicles explore surrounding areas without hauling living spaces.
Furthermore, this flexibility proves especially beneficial in narrow streets. Consequently, caravans offer superior local exploration capabilities once positioned. Moreover, grocery shopping and sightseeing become easier with detached vehicles.
Campervan Mobility Advantages
Campervans deliver unmatched freedom for continuous travel. Additionally, they allow easy packing and exploration anywhere at ease. Meanwhile, campervans enable stopping wherever desired during journeys.
Furthermore, campervans suit travellers visiting multiple destinations efficiently. Subsequently, they eliminate public transport dependency and accommodation booking stress. Therefore, campervans excel for touring multiple locations quickly.
Storage And Maintenance: Caravan Vs Camper Van
Caravan Storage Requirements
Caravans need dedicated storage spaces when not travelling. Additionally, this might involve driveways or rented storage yards. Meanwhile, storage costs range from $600 to $3,000 annually depending on coverage.
Furthermore, outdoor storage costs $600-1,200 yearly across most locations. Conversely, undercover storage ranges from $1,400-1,800 annually. Subsequently, enclosed storage costs $1,500-3,000 per year.
Campervan Storage Benefits
Campervans park easily kerbside without neighbourhood problems. Additionally, they remain ready for spontaneous weekend trips constantly. Moreover, campervans serve as daily vehicles when not travelling.
Furthermore, campervans eliminate separate storage facility requirements. Consequently, they offer multipurpose use including grocery shopping and day trips. Therefore, campervans provide better storage convenience overall.
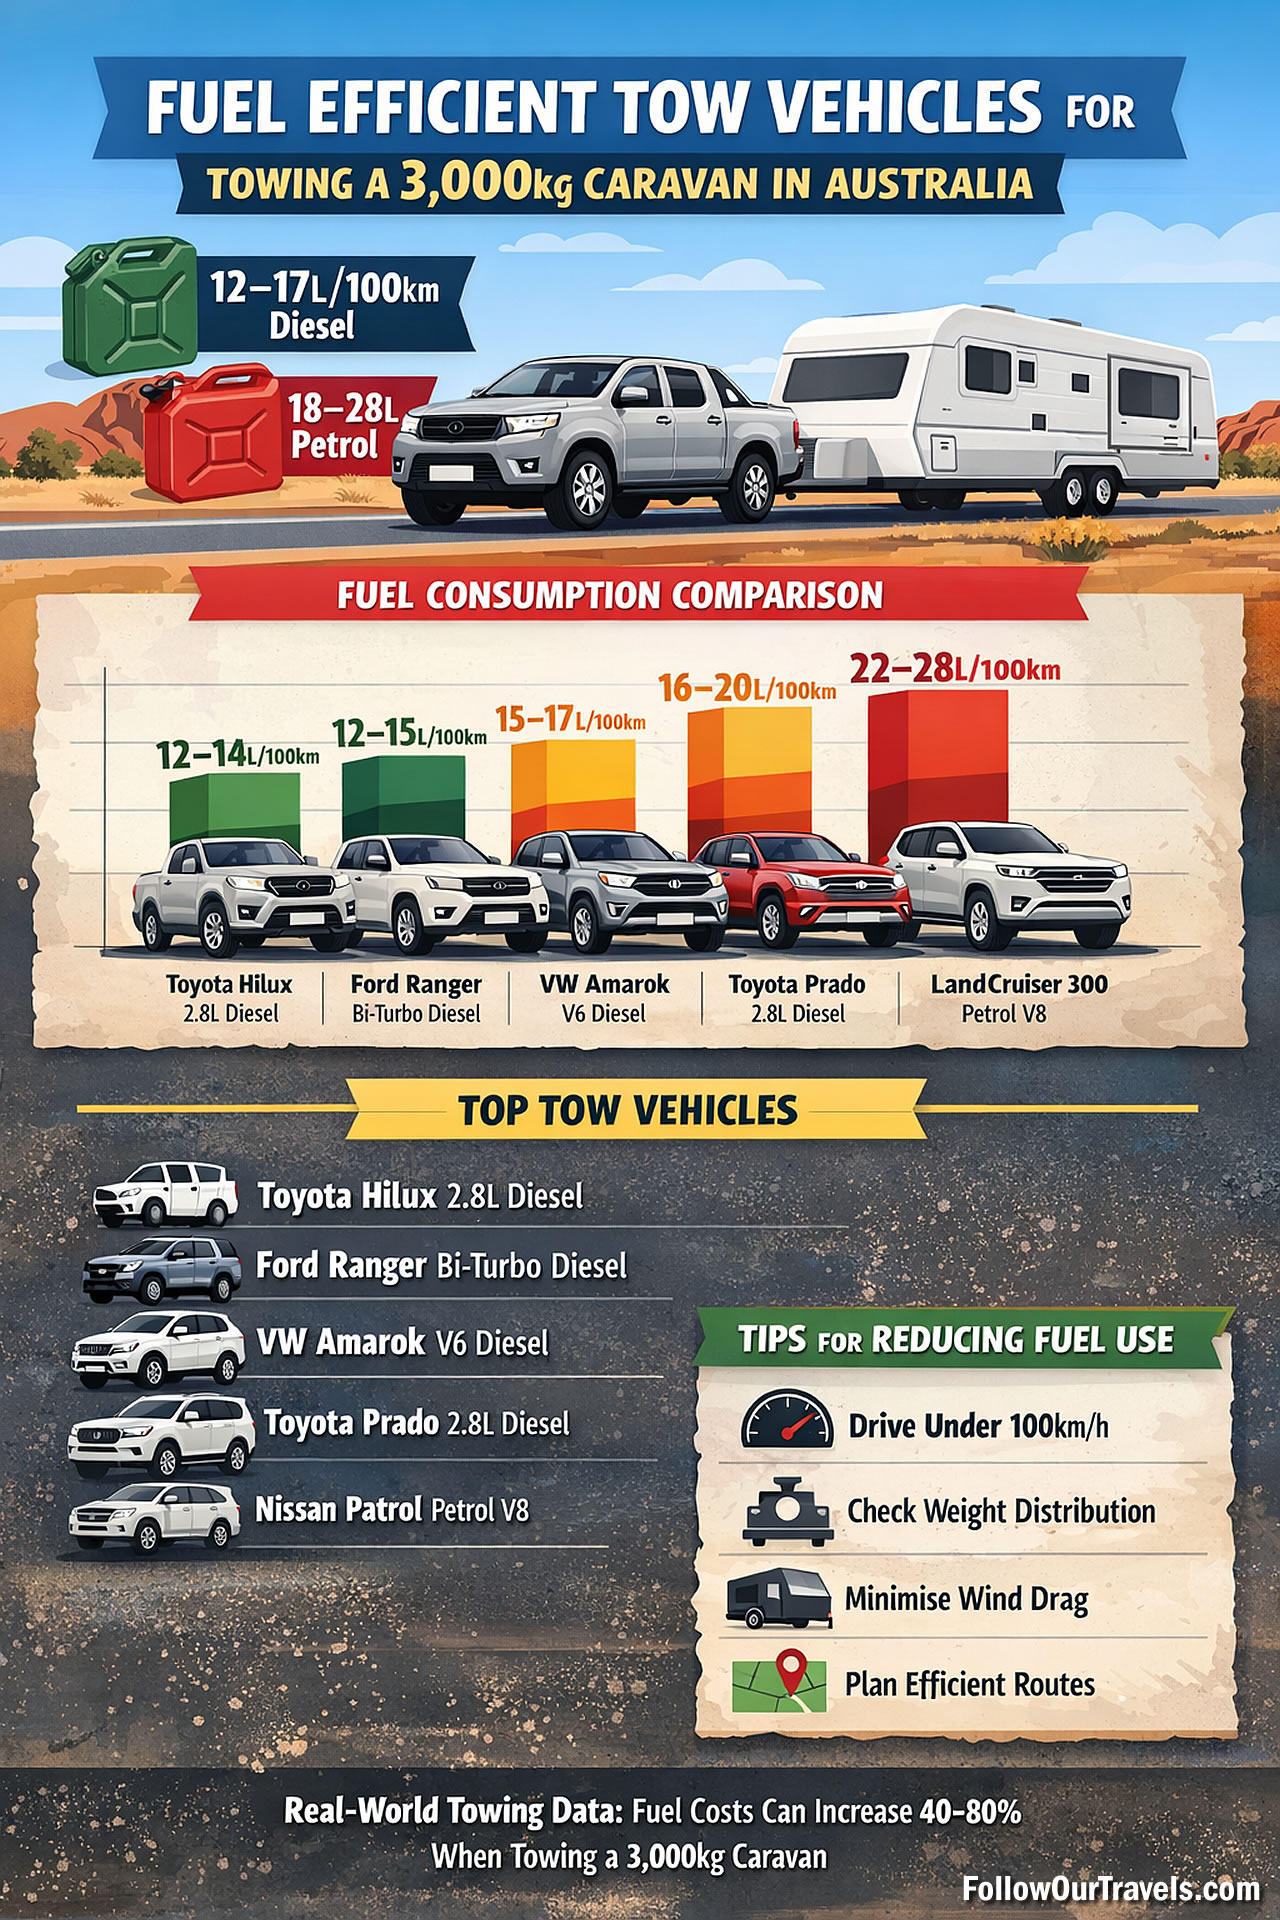
Fuel Consumption And Running Costs
Caravan Fuel Impact
Towing caravans significantly increases fuel consumption for tow vehicles. Additionally, every additional kilometre per hour costs disproportionately large fuel amounts. Meanwhile, caravans face lower speed limits affecting journey efficiency.
Campervan Fuel Efficiency
Small campervans typically use around 1 litre per 8-10 kilometres driven. Larger motorhomes can easily use double or more. Furthermore, 2-6 berth campervans maintain reasonable fuel economy. Additionally, choosing fuel-efficient campervans reduces carbon footprints significantly.
Maintenance And Servicing Costs
Caravan Maintenance Requirements
Caravan servicing costs depend on size and axle type annually. Additionally, setting aside $500 to $1000 annually covers typical maintenance needs. Meanwhile, caravans require specialised mechanic attention every 10,000 kilometres.
Campervan Maintenance Considerations
Campervans require regular engine maintenance like standard vehicles. Furthermore, specialised components may increase repair costs occasionally. However, campervans eliminate separate tow vehicle maintenance requirements.
Legal Requirements And Weight Restrictions
Caravan Towing Regulations
Australian towing laws require matching caravan weight to vehicle capacity. Additionally, maximum unbraked towing limits typically reach 750kg. Meanwhile, braked trailers require vehicles with adequate towing capacity.
Furthermore, caravans exceeding 750kg gross trailer mass must have brakes. Consequently, tow vehicles need sufficient capacity for safe caravan handling. Therefore, checking towing specifications prevents legal complications.
Campervan Licence Requirements
Campervans under 3,500kg require standard car licences. Additionally, larger campervans may require truck licences depending on weight. Furthermore, width restrictions apply at construction sites including mirrors.
Environmental Impact: Caravan Vs Camper Van
Sustainable Caravan Travel
Caravans enable sustainable camping through renewable energy integration. Additionally, advanced solar panels provide clean energy for caravan operations. Meanwhile, efficient water usage systems minimise environmental impact.
Furthermore, sustainable caravanning involves harnessing solar energy effectively. Consequently, waste management solutions reduce environmental footprints significantly. Therefore, caravans support responsible outdoor recreation practices.
Eco-Friendly Campervan Options
Campervans offer fuel-efficient travel options reducing carbon emissions. Additionally, diesel-powered campervans provide better environmental performance. Meanwhile, hybrid or electric campervans further minimise environmental impact.
Furthermore, campervans enable eco-friendly travel through sustainable building materials. Consequently, choosing fuel-efficient campervans supports environmental conservation. Therefore, campervans contribute to sustainable tourism practices.
Family Considerations: Campervan Vs Caravan
Caravan Family Benefits
Caravans excel for families requiring substantial living space. Additionally, they provide comfortable accommodation for extended family trips. Meanwhile, multiple rooms offer privacy for different family members.
Furthermore, research shows 85% of campers feel closer to spouses. Additionally, 75% of campers feel closer to children during trips. Consequently, caravans facilitate quality family bonding experiences effectively.
Campervan Family Dynamics
Campervans bring families together in compact spaces naturally. Additionally, they eliminate unpacking and repacking stress during multi-location trips. Meanwhile, campervans teach children about self-sufficiency and adventure.
Furthermore, 97% believe camping allows children environmental learning. Additionally, 94% believe camping teaches children essential life skills. Therefore, campervans provide valuable educational opportunities for families.
Resale Value And Depreciation
Caravan Depreciation Rates
Caravans experience higher depreciation compared to campervans. Additionally, Australian Taxation Office rates show 16.67% diminishing value annually. Meanwhile, 20-year-old caravans retain significantly less value than equivalent campervans.
Campervan Resale Performance
Campervans maintain better resale values over extended periods. Furthermore, they run longer without major issues typically. Additionally, well-known brands like Jayco maintain higher resale values.
Consequently, campervans represent better long-term financial investments generally. Moreover, service history and maintenance records enhance resale appeal. Therefore, campervans offer superior depreciation resistance overall.
Insurance And Security Considerations
Caravan Insurance Requirements
Caravan insurance typically costs less than campervan coverage. Furthermore, multi-layered alarm systems provide robust caravan defence. Additionally, anti-tow systems prevent unauthorised caravan movement. Consequently, proper security measures protect caravan investments significantly.
Campervan Insurance Aspects
Campervan insurance varies based on vehicle type and usage. Additionally, liability reduction options help minimise financial exposure.
Campsite Acceptance And Restrictions
Caravan Park Policies
Many caravan parks accommodate both caravans and campervans equally. Additionally, some locations restrict certain vehicle types based on facilities.
Campervan Site Access
Campervans gain acceptance at more campsites than large caravans. Additionally, smaller campervans access sites refusing larger vehicles. Generally speaking campervans will navigate tight camping areas more effectively.
Weather And Seasonal Considerations
Caravan Weather Performance
Modern caravans include year-round comfort features effectively. Additionally, they provide superior insulation compared to compact campervans. Meanwhile, caravans offer better protection during extreme weather conditions.
Campervan Weather Capabilities
Campervans heat up faster upon arrival at winter destinations. Additionally, they maintain warmth more efficiently in compact spaces. However, extreme weather conditions may challenge smaller campervan designs.
Making Your Decision: Caravan Vs Camper Van
Consider your travel style when choosing between options. Additionally, evaluate your comfort requirements and space needs carefully. Meanwhile, assess your driving confidence and towing experience honestly.
Furthermore, examine your storage situation and ongoing cost tolerance. Subsequently, consider your typical trip duration and destination variety. Therefore, matching vehicle choice to personal circumstances ensures satisfaction.
Families requiring substantial space benefit from caravan selection typically. Additionally, adventurous travellers prefer campervan flexibility and convenience. Meanwhile, first-time buyers often choose campervans for simplicity.
Conclusion
The caravan vs camper van decision ultimately depends on individual priorities and circumstances. Additionally, caravans excel in providing spacious accommodation and local exploration flexibility. Meanwhile, campervans offer superior convenience, manoeuvrability, and spontaneous travel capabilities.
Furthermore, budget considerations influence choice through purchase prices and ongoing costs. Consequently, evaluating total ownership expenses helps determine long-term value. Therefore, considering all factors ensures the best choice for your Australian camping adventures.
Both options provide excellent opportunities for exploring Australia’s magnificent landscapes. Additionally, either choice facilitates memorable family experiences and outdoor adventures. Meanwhile, proper research and honest self-assessment guide optimal decisions.
Finally, remember that no perfect choice exists for everyone universally. Instead, the best option matches your specific needs, preferences, and circumstances. Consequently, thorough consideration of all factors leads to satisfying camping experiences across Australia’s diverse regions.
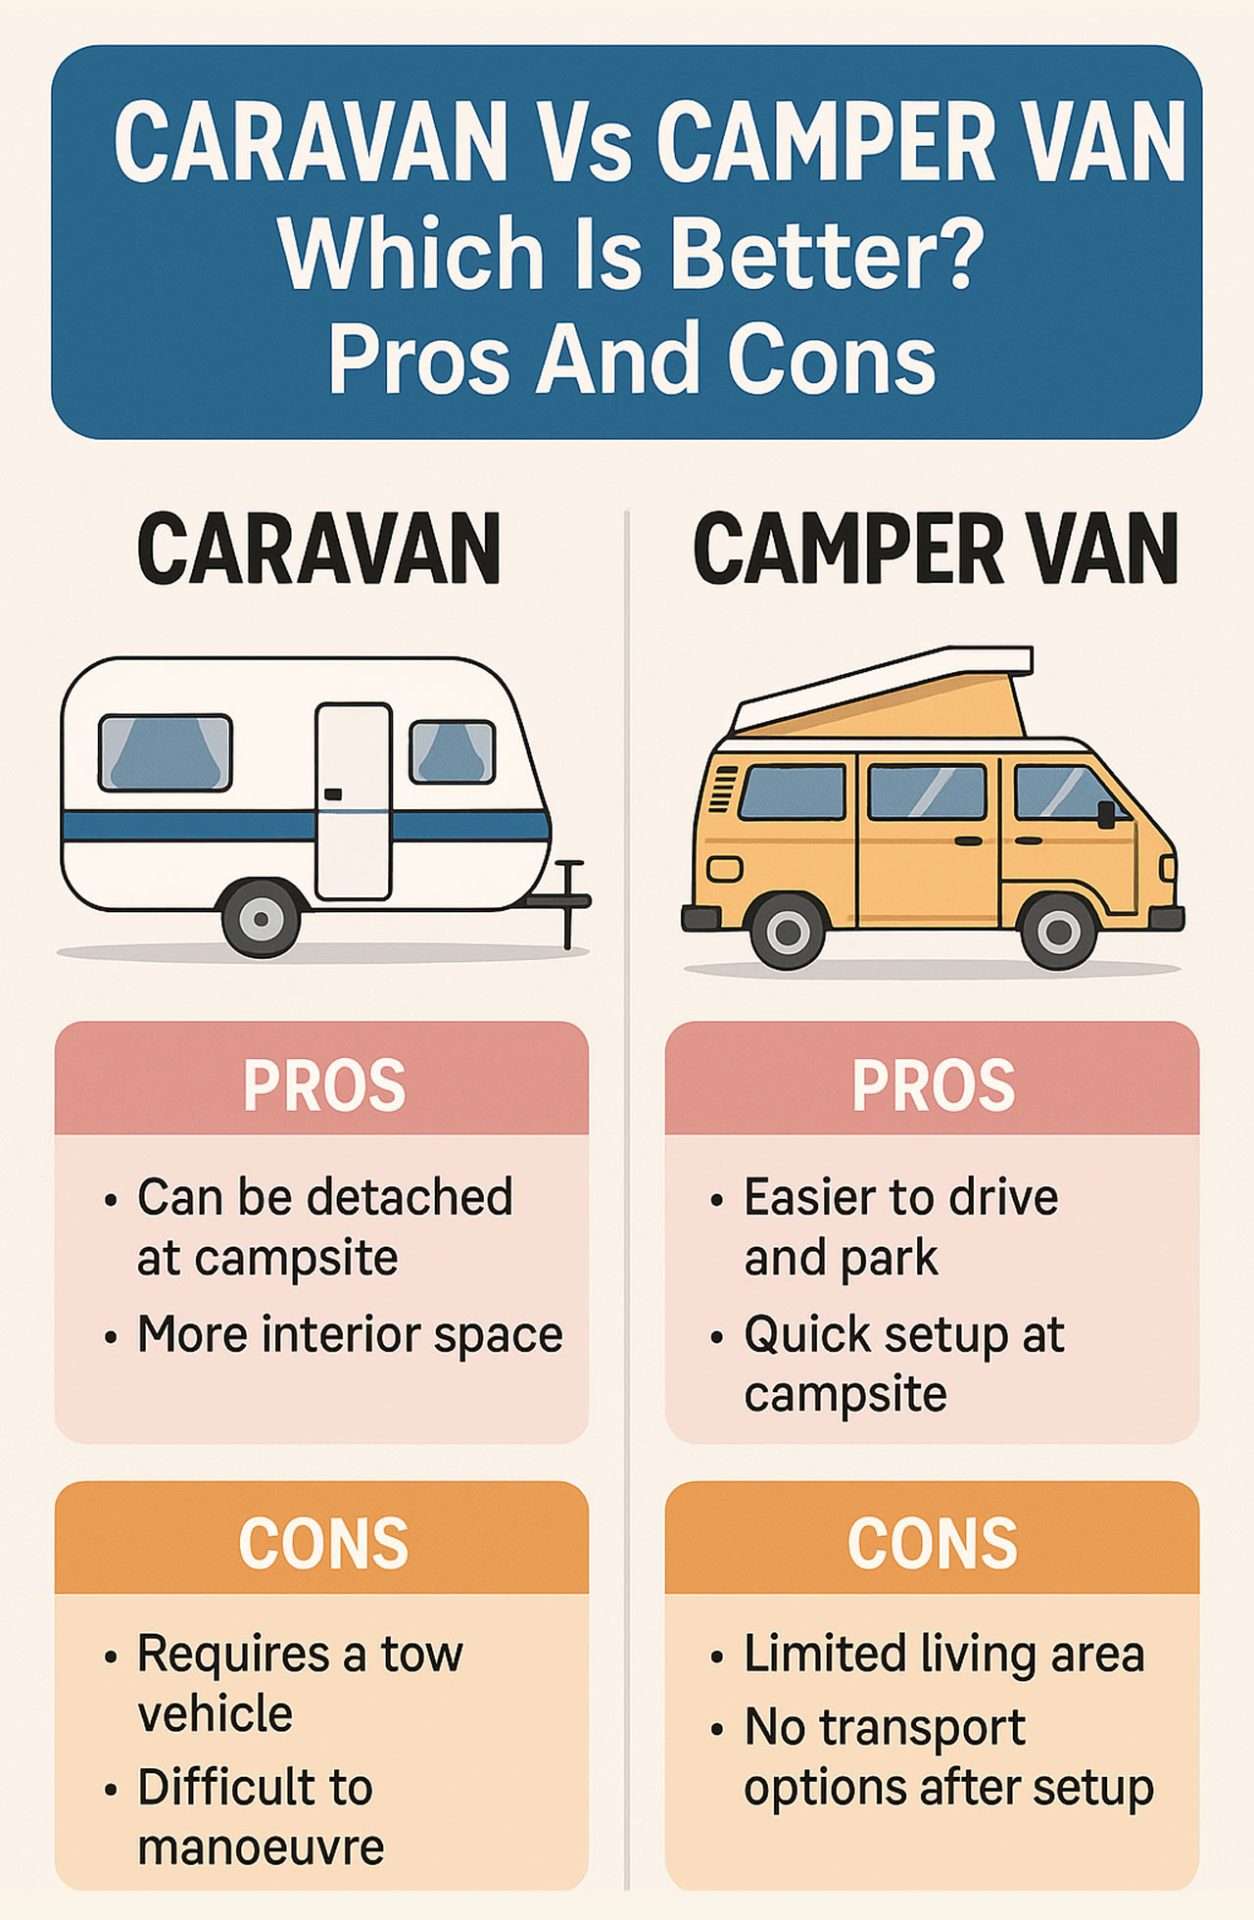
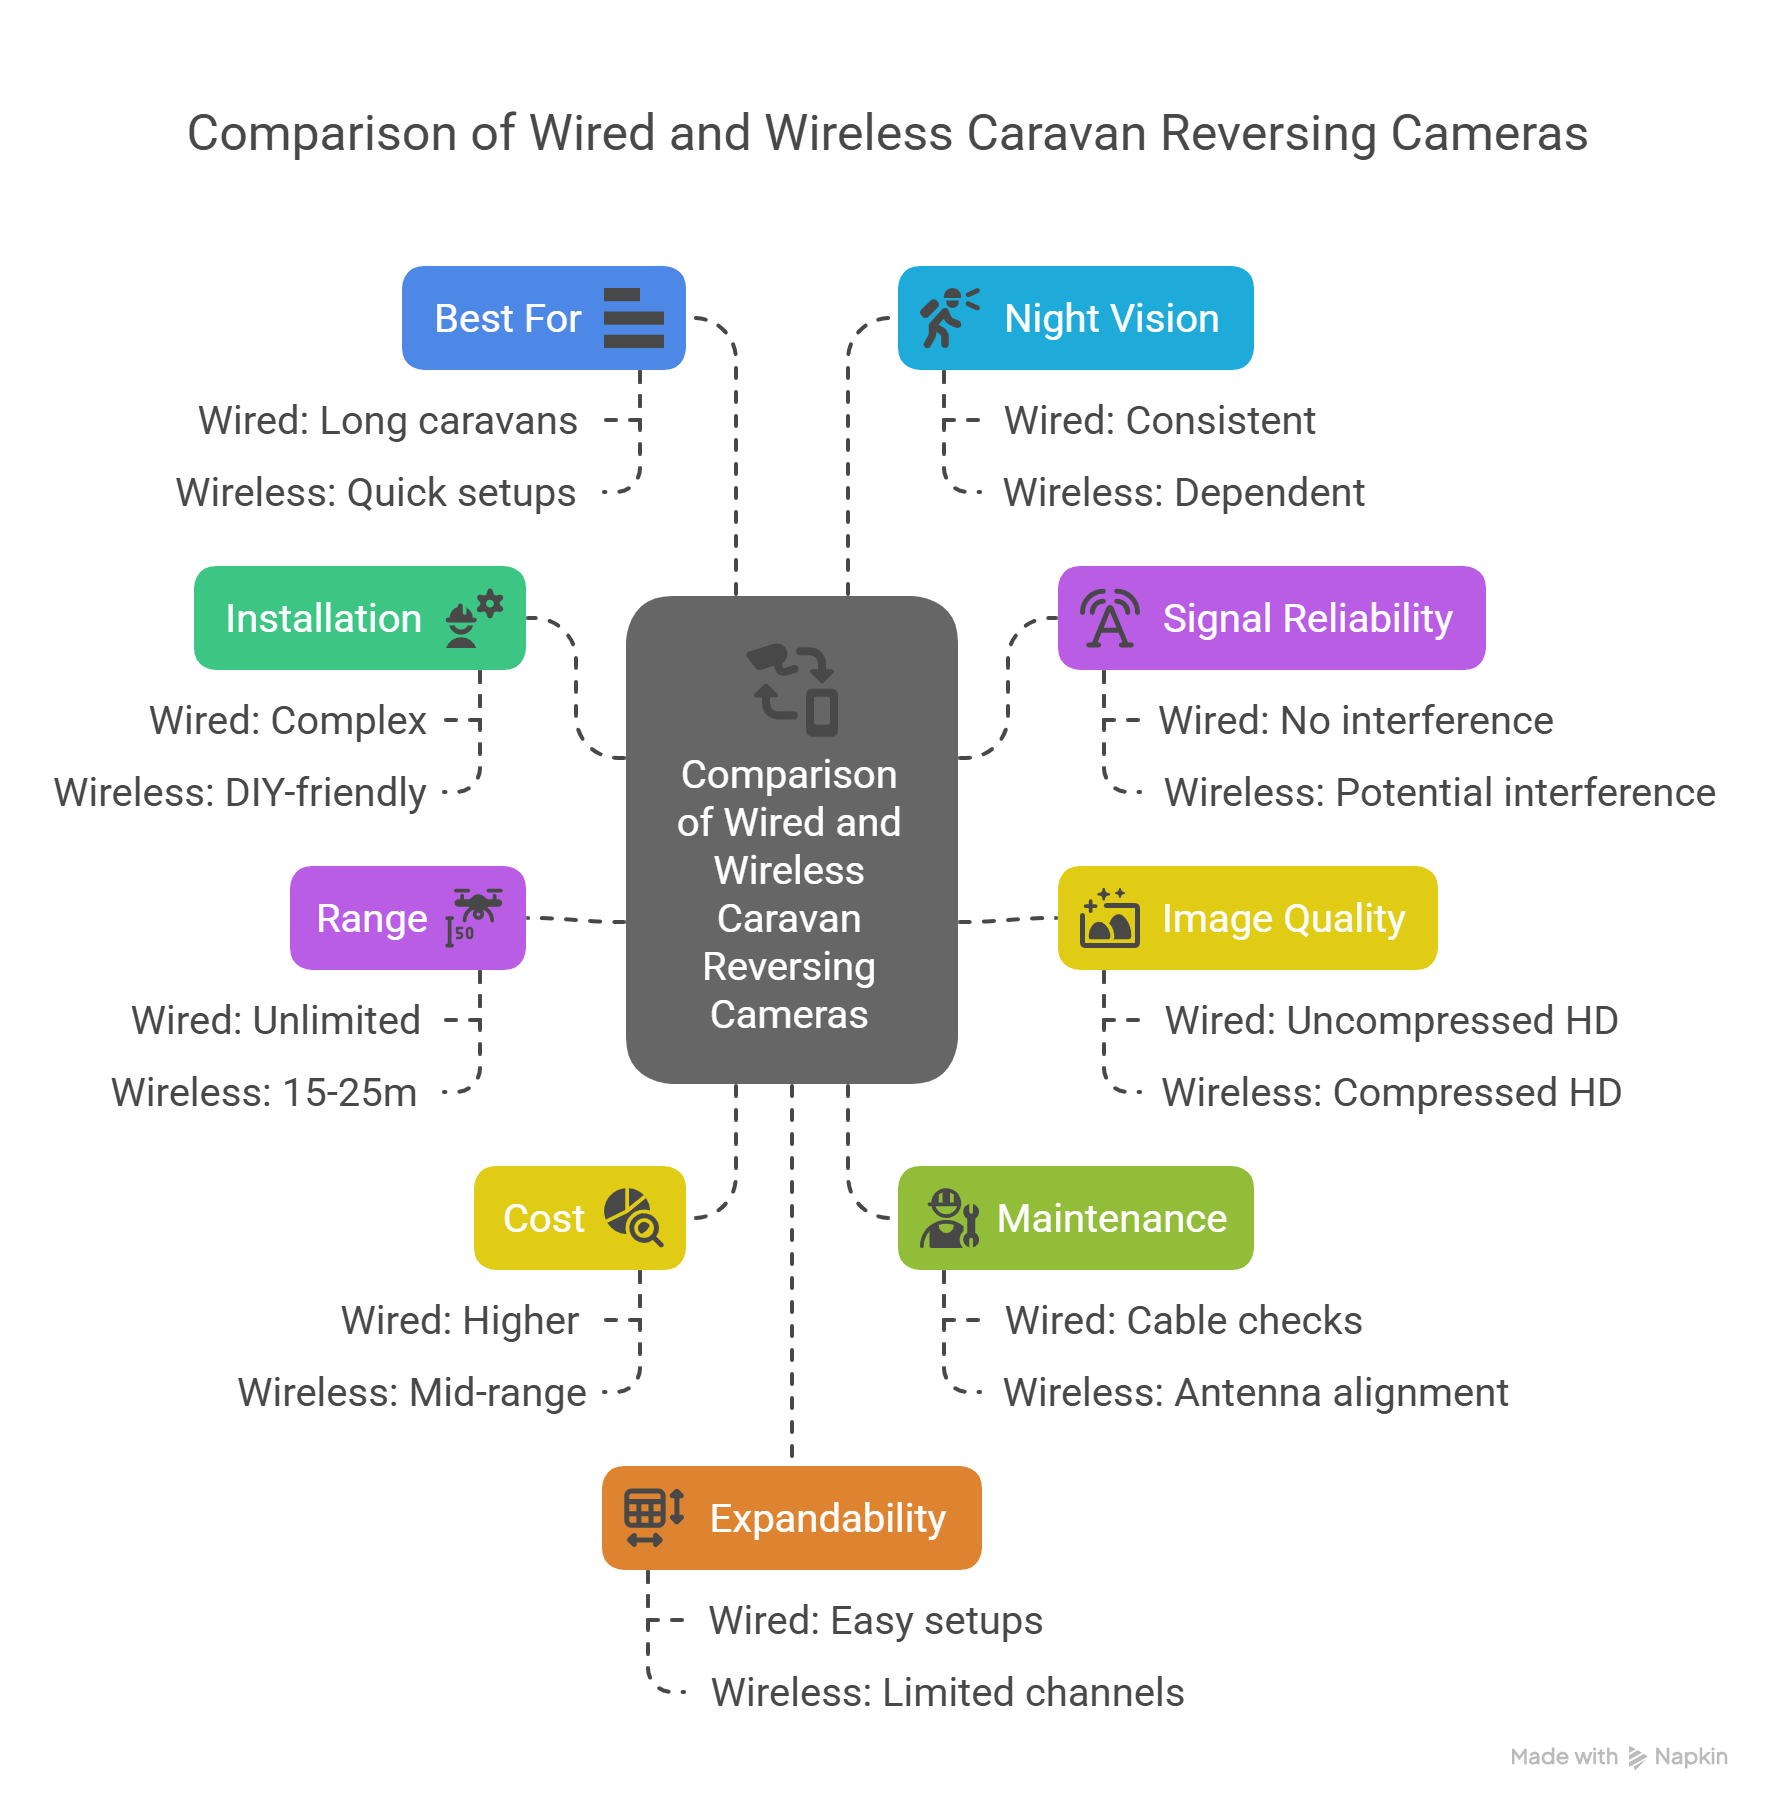
Infographic Caravan Vs Camper Van Which Is Better Pros And Cons