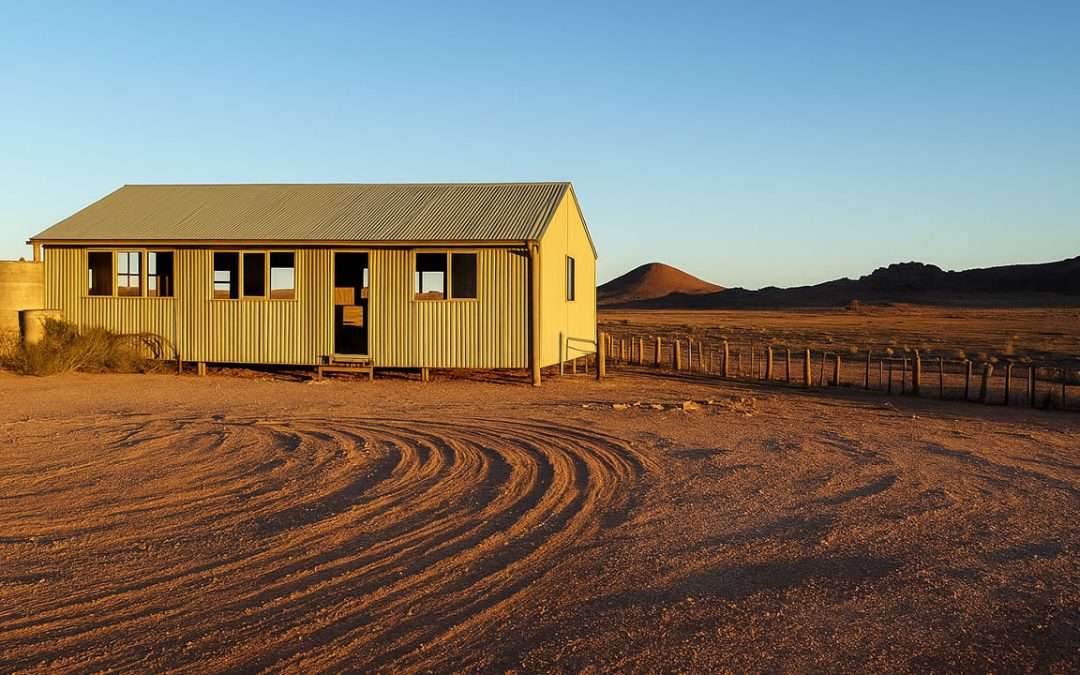
25 Campsites For Free Camping In Broken Hill
25 Campsites For Free Camping In Broken Hill
Explore Broken Hill on a budget with our free camping in Broken Hill camping guide. Learn where to stay, what to do and how to enjoy a safe stay. Broken Hill stands as an iconic outback destination that offers travellers a unique blend of mining heritage, artistic culture and breathtaking landscapes.
For caravan and camping enthusiasts seeking adventure without breaking the bank, free camping in Broken Hill provides an excellent opportunity to experience the raw beauty of Australia’s first heritage listed city. This guide explores everything you need to know about free camping in the region It has practical tips on nearby attractions making certain your outback journey is memorable for all the right reasons. With proper preparation and local knowledge, visitors can safely enjoy this historic mining town while taking advantage of the free camping opportunities in the surrounding area.
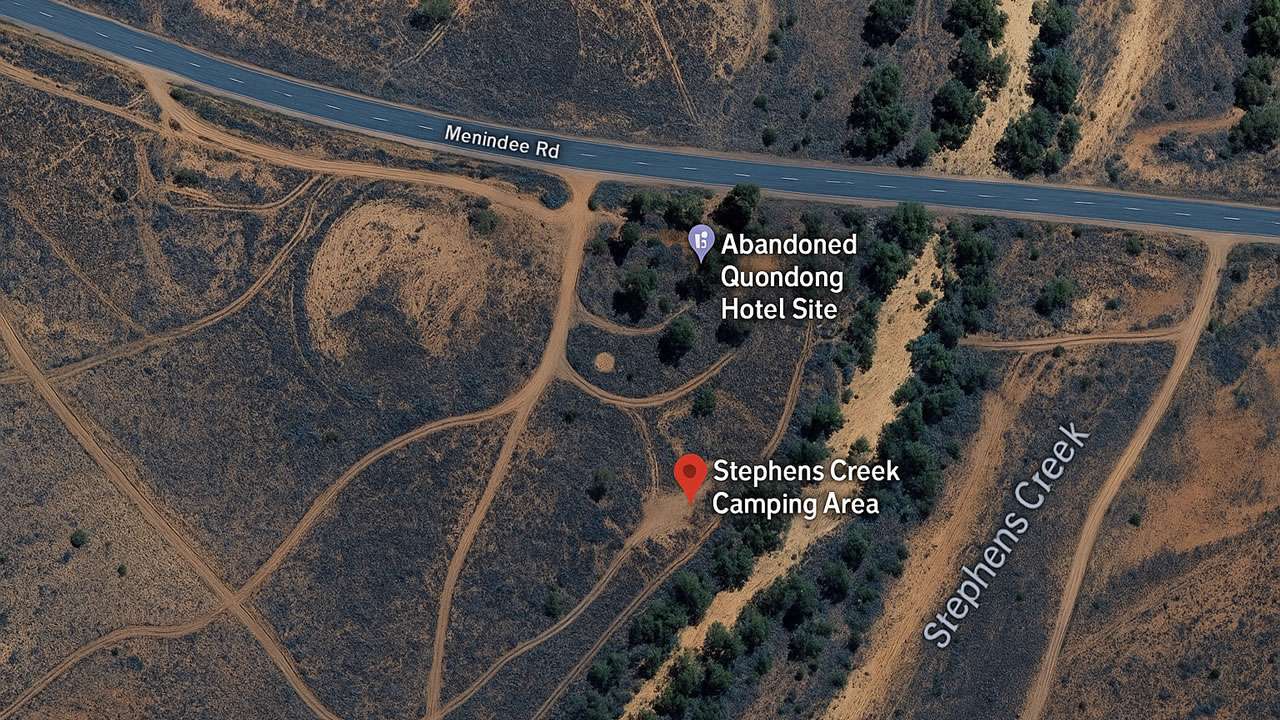
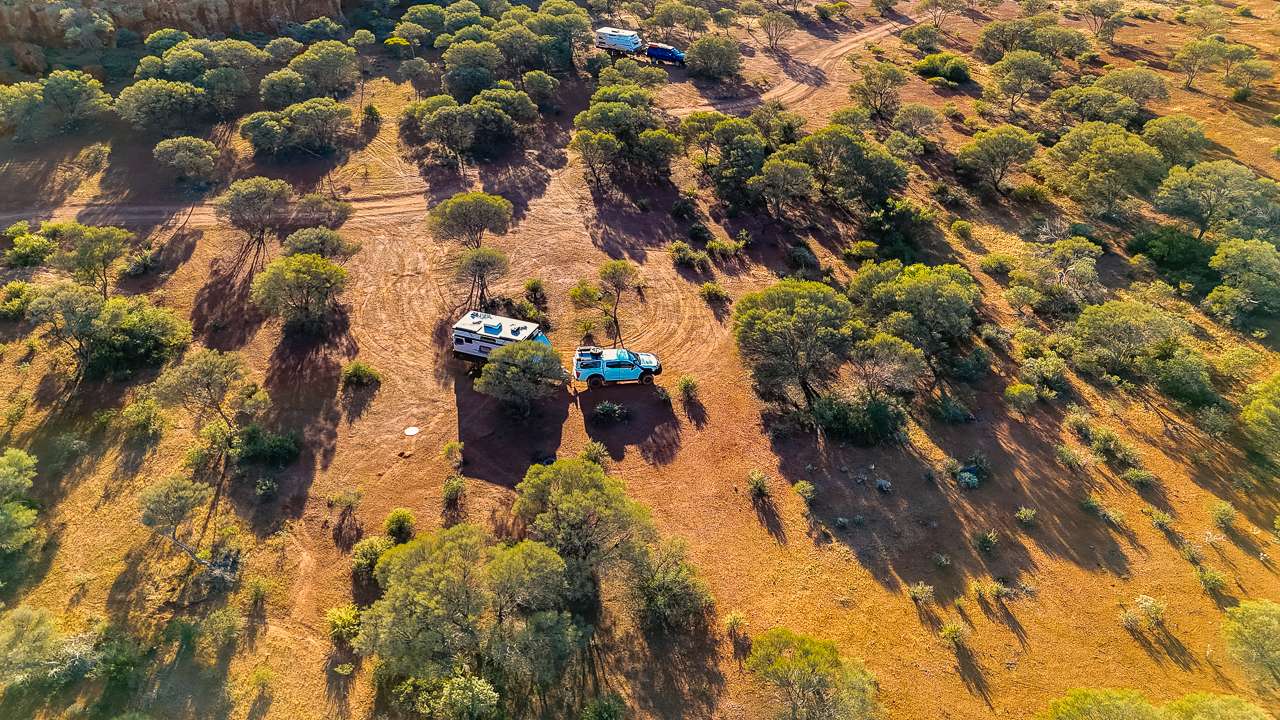
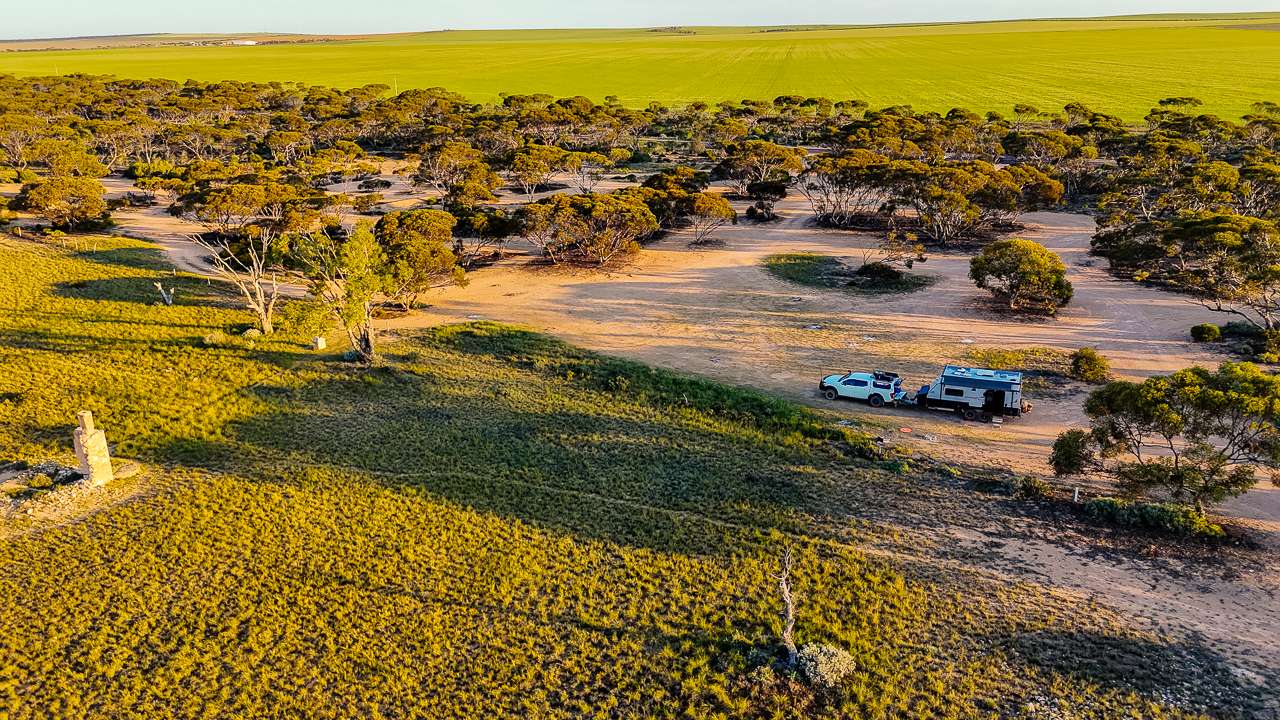
Stephens Creek Camping Area And Abandoned Quondong Hotel And Roadhouse Free Camping In Broken Hill
Free Camping In Broken Hill: 25 Great Campsites
If you’re planning a trip to Broken Hill and want to save on accommodation, free camping is a fantastic way to experience the outback without spending a cent. From quiet rest areas with basic facilities to peaceful bush spots surrounded by stunning landscapes, there are plenty of free camping sites around Broken Hill that suit caravans, camper trailers and tents alike. Whether you’re just passing through or staying a few days, these 25 free camping locations offer great options to rest, relax and soak up the unique Silver City vibe. Get ready to explore the best free camping spots Broken Hill has to offer!
1. Pine Creek
This is a free campground. It is dog friendly. It is accessible to RVs, camper trailers and caravans. A good solid overnight camp spot on the south side of the creek. There’s room to turn around and you could fit a couple of small to medium sized caravans. Fairly quiet, not a lot of road noise.
Type: Free Camping
Cost: Free
Location: Silvercity highway, New South Wales
GPS: -32.337660°, 141.456721° – Click To View
Pet Friendly: Yes
Distance To Broken Hill: 42km
2. Yancowinna Creek Gravel Pit
This is a free campground. It is dog friendly. It is accessible to motorbikes, RVs, camper trailers, caravans and big rigs. Camping in tents is allowed.
Type: Gravel Pit
Cost: Free
Location: Barrier Hwy, Broken Hill, New South Wales
GPS: -31.844723°, 141.948554° – Click To View
Pet Friendly: Yes
Toilets: No
Showers: No
Drinking Water: No
Distance To Broken Hill: 47km
3. Little Topar Roadhouse
Camping and 24 hour card only fuel available. This free campground offers toilets. It is dog friendly. It is accessible to RVs, caravans and big rigs. Has toilets but by all reports they aren’t overly clean.
Type: Roadhouse
Cost: Free
Location: Barrier Highway, Little Topar, New South Wales
GPS: -31.780313°, 142.227626° – Click To View
Pet Friendly: Yes
Toilets: Yes
Showers: No
Drinking Water: No
Phone: (08) 8091 9428
Fuel: Yes
Distance To Broken Hill: 75km
4. RTA Stockpile 64
This is a gravel pit suitable place for pulling a vehicle over to for the driver to rest where an overnight stay is permitted. It is dog friendly. It is accessible to RVs, camper trailers, caravans and big rigs. It has a good solid grvel surface.
Type: Gravel Pit
Cost: Free
Location: Silver City Hwy, Broken Hill, New South Wales
GPS: -32.449432°, 141.556669° – Click To View
Pet Friendly: Yes
Distance To Broken Hill: 56km
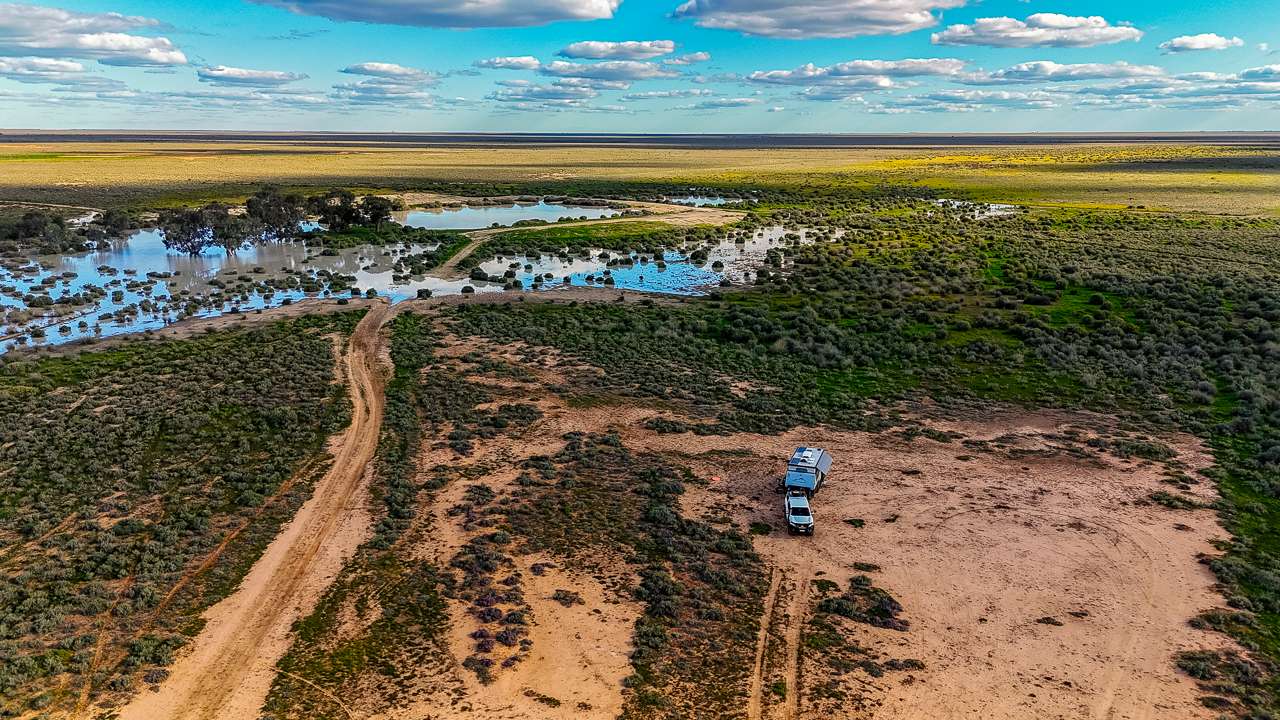
5. Broken Hill Cattle Yard At Menindee Turn Off
This is a free campground. It is dog friendly. It is accessible to RVs, camper trailers, caravans and big rigs. Turn off at the cattle yards before the dirt road it is on the right. A rock pyramid (cairn) marks the entry. No noise. A great overnight stop.
Type: Free Camping
Cost: Free
Location: Silver city highway, New South Wales
GPS: -32.623490°, 141.693503° – Click To View
Pet Friendly: Yes
Distance To Broken Hill: 72km
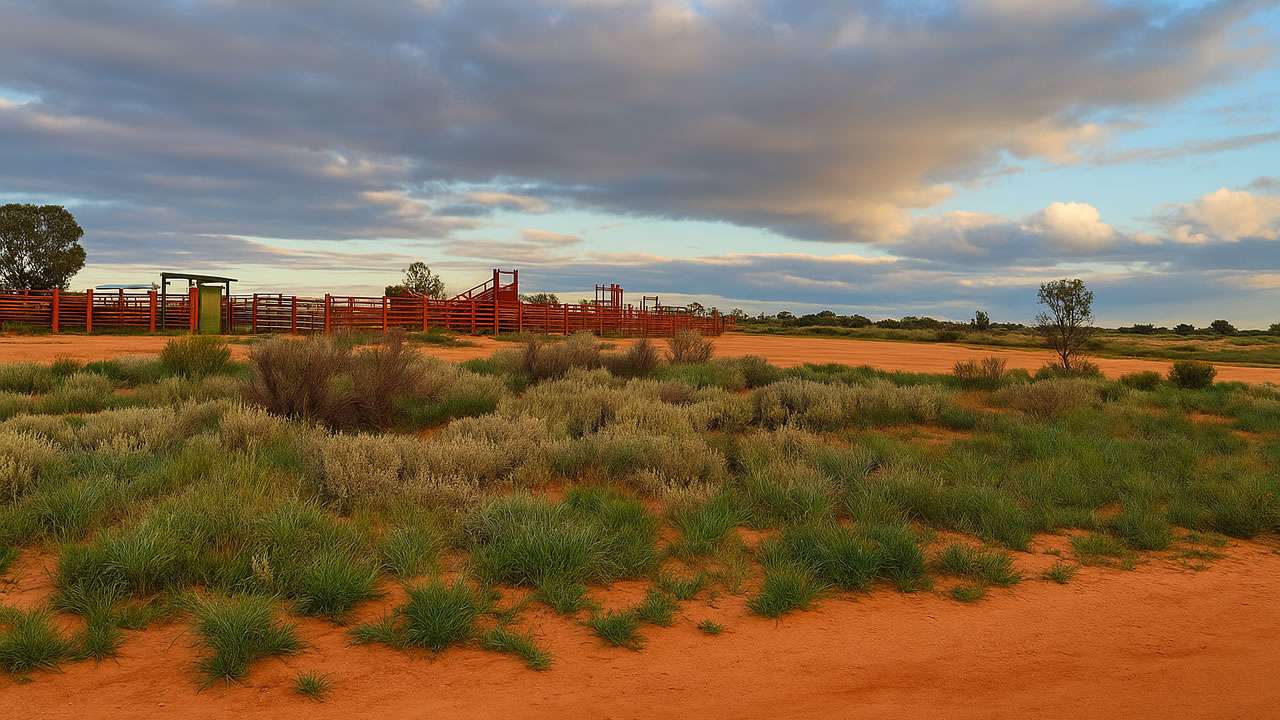
Broken Hill Cattle Yard At Menindee Turn Off
6. Tandou Rd Camp
This is a free campground. It is dog friendly. Nice and quiet. Great little site about 100m before the end of the bitumen road on the right hand side. Site is set back, grassy and level. Would be almost impossible to find in the dark. Room for maybe 3 or 4 small caravans or camper trailers. Too small for big caravans. No facilities. Perfectly suited for an overnight stay. Plenty of firewood. No good if wet.
Type: Free Camping
Cost: Free
Location: Tandou Rd, New South Wales
GPS: -32.623392°, 141.693671° – Click To View
Pet Friendly: Yes
Distance To Broken Hill: 72km
7. Stephens Creek
This is a free campground. It is dog friendly. It is accessible to motorbikes, RVs, camper trailers, caravans and big rigs. Camping in tents is allowed.
There used to be a roadhouse here – Quandong Roadhouse. It disappeared years ago. All that’s left of it is rubble & old tin. Great for overnight. If you follow the track on the right you can get further away from the road however there’s not much noise anyway. It’s an isolated camping area which is great if that’s your preference.
Type: Free Camping
Cost: Free
Location: Near The Abandoned Quondong Hotel Site Off Menindee Rd Stephens Creek, New South Wales
GPS: -32.155959°, 141.917910° – Click To View
Pet Friendly: Yes
Distance To Broken Hill: 48km
8. Mingary Creek Camp
This is a free campground. It is dog friendly. It is accessible to motorbikes, RVs, camper trailers, caravans and big rigs. Camping in tents is allowed.
It’s a nice camp spot tucked in off the road and across the railway tracks. Lots of trees around to give shade if required.Trucks and trains will travel past during the night. There’s a bit of firewood around.
Type: Free Camping
Cost: Free
Location: Mooleulooloo Road, Pastoral Unincorporated Area, South Australia
GPS: -32.127374°, 140.736240° – Click To View
Pet Friendly: Yes
Distance To Broken Hill: 160km
9. Marshalls Clearing
This is a free campground. It is dog friendly. It is accessible to motorbikes, RVs, camper trailers, caravans and big rigs. Camping in tents is allowed.
Type: Free Camping
Cost: Free
Location: Silver city highway, Quarry Nob, New South Wales
GPS: -31.504133°, 141.669828° – Click To View
Pet Friendly: Yes
Distance To Broken Hill: 54km
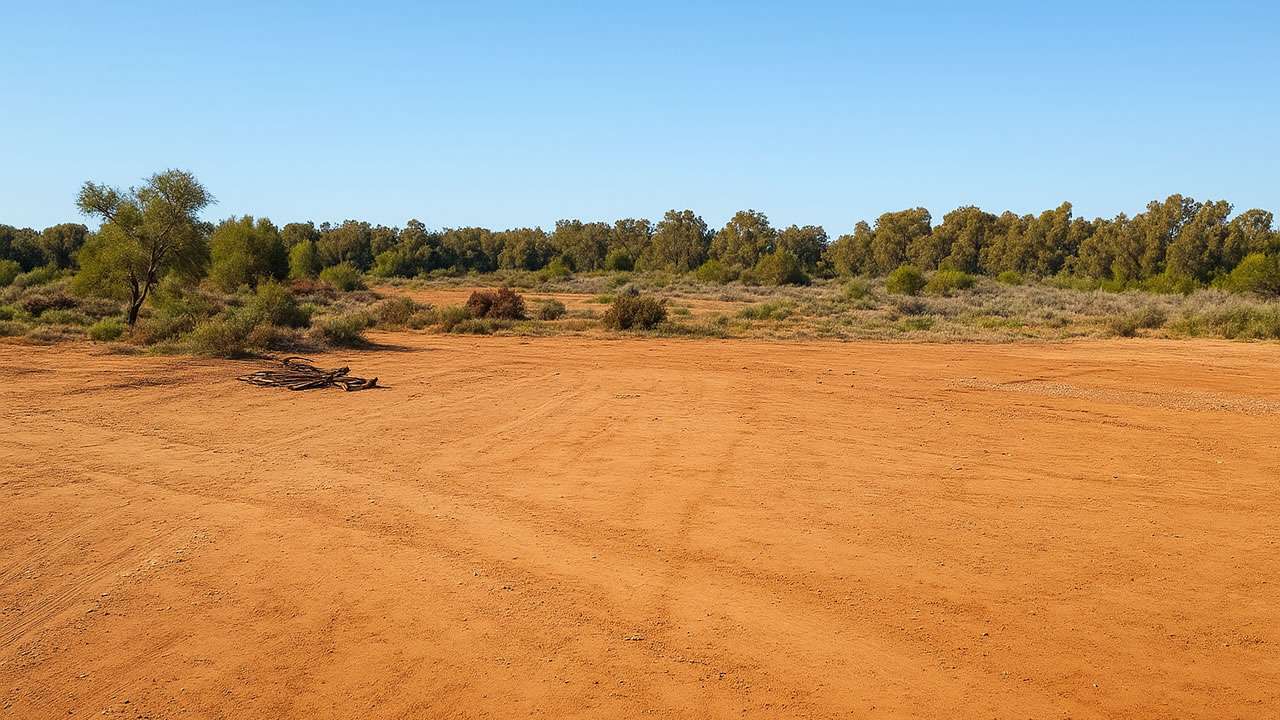
Marshalls Clearing
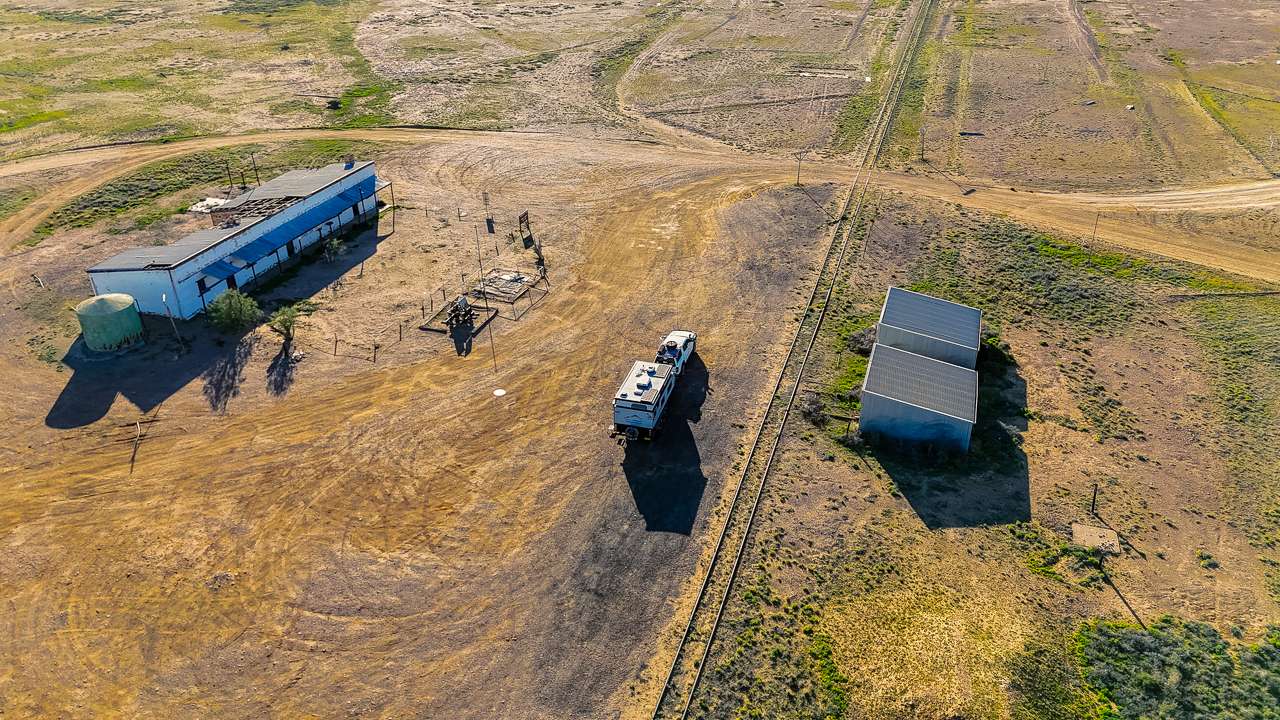
10. Open Area Near An Old Shearing Shed
This is a free campground. It is dog friendly. It is accessible to motorbikes, RVs, camper trailers, caravans and big rigs. Camping in tents is allowed.
A good stopover on the way to Tibooburra. It’s a lovely place to stay for a night or even a bit longer. The old shearing shed is majestic in it’s simplicity and looks to hold a lot of history. There is hardly any traffic on the road. The perfect outback campsite.
Type: Free Camping
Cost: Free
Location: Silver City Hwy, Fowlers Gap, New South Wales
GPS: -31.410895°, 141.629174° – Click To View
Pet Friendly: Yes
Distance To Broken Hill: 63km
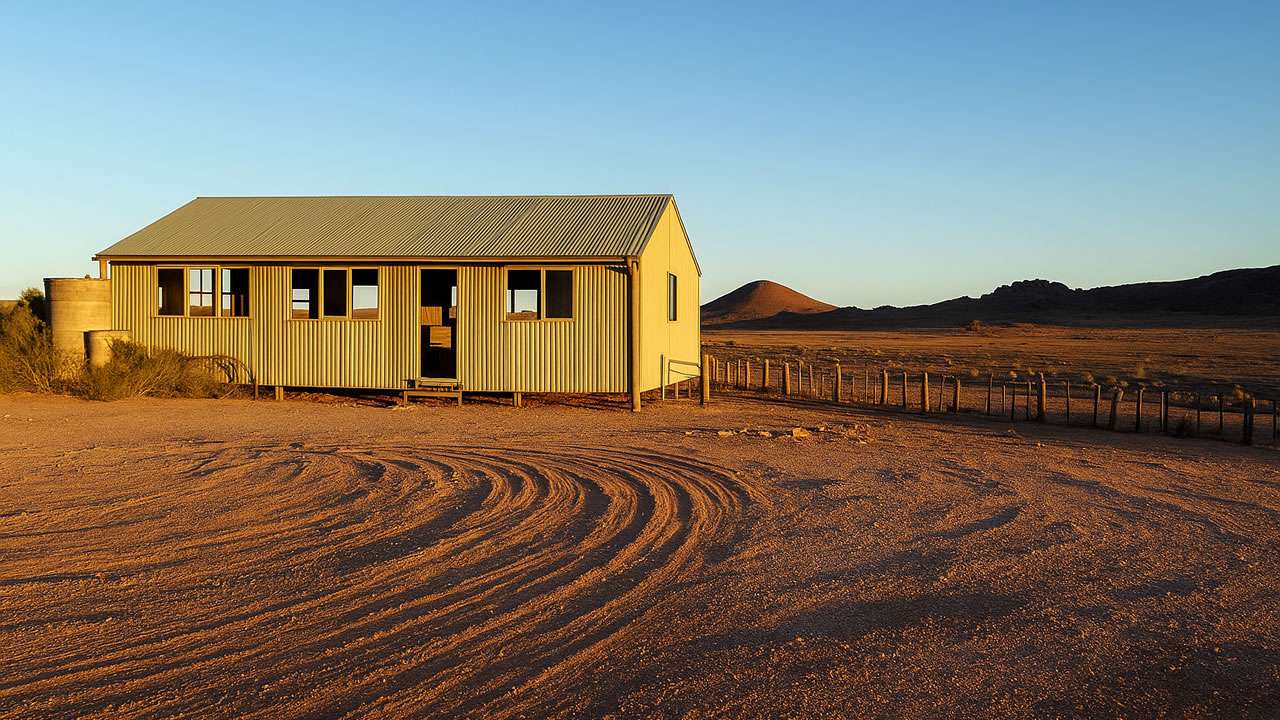
Old Shearing Shed Free Camping In Broken Hill
11. Matilda Wallace Rest Area
It’s a bitumen roadside rest area with a couple of rubbish bins. Nice views. It’s a wide area safely back off the highway. It’s a remote area.
Type: Rest Area
Cost: Free
Location: Silver City Highway, Eurowie, New South Wales
GPS: -31.387731°, 141.611964° – Click To View
Pet Friendly: Yes
Distance To Broken Hill: 65km
12. Euriowie Creek
This is a free campground. It is dog friendly. It is accessible to motorbikes, RVs, camper trailers and caravans. Camping in tents is allowed.
This is a remote campground in a large open unshaded area. It has awesome views of the Barrier Ranges. There’s little traffic noise so it’s a great stopover between here and there.
Type: Free Camping
Cost: Free
Location: Silver City Highway, Unincorporated Area, New South Wales
GPS: -31.357545°, 141.617855° – Click To View
Pet Friendly: Yes
Distance To Broken Hill: 68km
13. Round Hill Rest Area West Bound
This is a Free roadside rest area. Pets are allowed. It is accessible to motorbikes, RV’s, caravans and big rigs. Camping in tents is not allowed. Not the greatest of camping spots but it’s free and if you are in need it’ll work.
Type: Rest Area
Cost: Free
Location: Round Hill Rest Area Barrier Highway, Broken Hill
GPS: -31.940049°, 141.514252° – Click To View
Pet Friendly: Yes
Distance To Broken Hill:
14. 8 Mile Creek Gravel Pit
This is an unofficial camping area. Usual rules apply, take out what you take in and leave no trace. It’s an old gravel pit with a nice flat surface. Ok for an overnight stay. Not much firewood about. No facilities. Enough space for a few vans. Little traffic noise.
Type: Gravel Pit
Cost: Free
Location: Silver City Hwy, Unincorporated Area, New South Wales
GPS: -31.269553°, 141.611742° – Click To View
Pet Friendly: Yes
Distance To Broken Hill: 78km
15. Fowlers Gap Gravel Pit
This is a suitable place for pulling a vehicle over for the driver to rest where an overnight stay is permitted. It’s not official campground. It is dog friendly. It is accessible to RVs, caravans and big rigs.
Type: Gravel Pit
Cost: Free
Location: Silver City Highway, Unincorporated Area, New South Wales
GPS: -31.246728°, 141.622863° – Click To View
Pet Friendly: Yes
Distance To Broken Hill: 80km
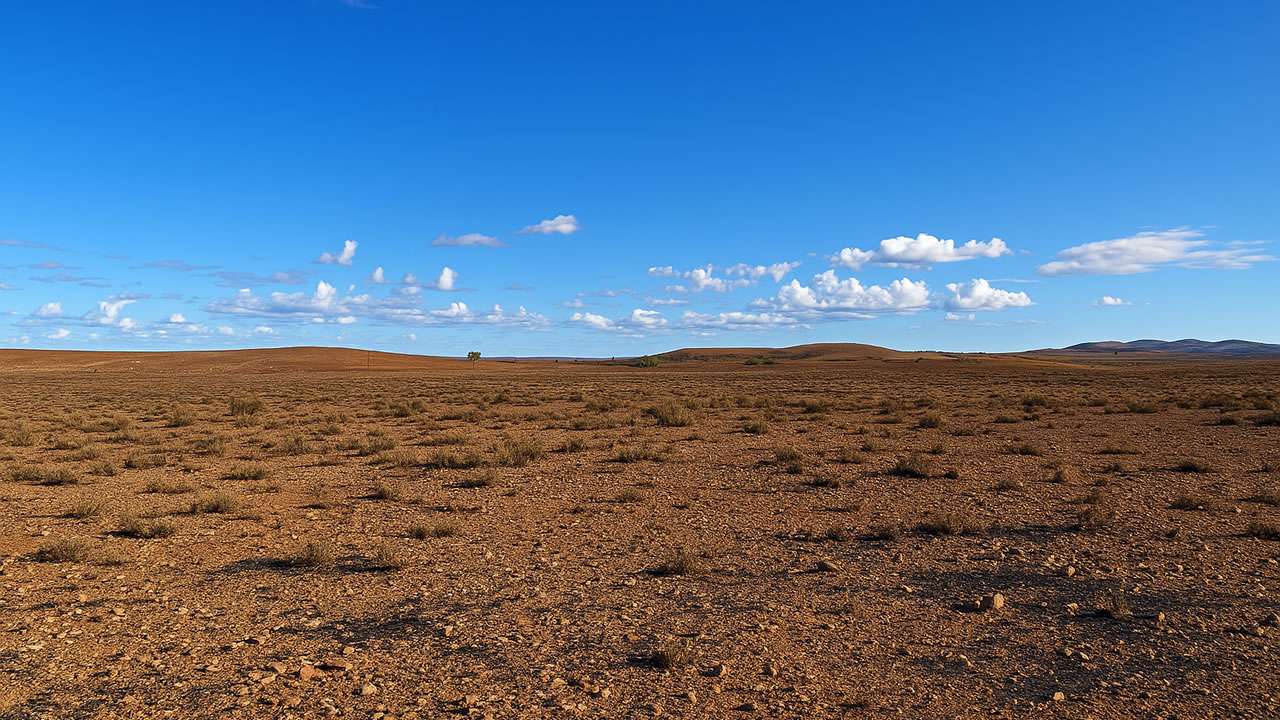
Fowlers Gap Rest Area
16. Fowlers Gap Rest Area
This is a suitable place for pulling a vehicle over for the driver to rest where an overnight stay is permitted. It’s not official campground. It is dog friendly. It is accessible to RVs, caravans and big rigs.
Type: Free Camping
Cost: Free
Location: Silver City Hwy, Fowlers Gap, New South Wales
GPS: -31.102183°, 141.701897° – Click To View
Pet Friendly: Yes
Distance To Broken Hill: 98km
17. Fowlers Gap North
This is a small unofficial site between a river bed and a man made waterway. Entry is on the east side of Silver City Highway. It’s a very rocky track in but passable in two wheel drive vehicles with care. There are no facilities at this site. Take all rubbish with you and leave no trace.
Type: Free Camping
Cost: Free
Location: Silver City Hwy, Fowlers Gap, New South Wales
GPS: -31.085282°, 141.713805° – Click To View
Pet Friendly: Yes
Distance To Broken Hill: 100km
18. Spring Hills Rest Area
This is a free campground. It is dog friendly. It is accessible to motorbikes, RVs, camper trailers, caravans and big rigs. Camping in tents is allowed.
Type: Rest Area
Cost: Free
Location: Barrier Hwy, Spring Hills, New South Wales
GPS: -31.723274°, 142.685349° – Click To View
Pet Friendly: Yes
Toilets: Yes
Distance To Broken Hill: 118km
19. The Valley
This isn’t free but it is cheap and great value. Beautiful farm stay at this paid campground. It has toilets, showers, rubbish bins and a dump point. It is accessible to motorbikes, RVs and camper vans.
Type: Farm Stay
Cost: $20 per night
Location: 770 Silver City Highway, New South Wales / ACT
GPS: -31.903180°, 141.516811° – Click To View
Pet Friendly: Yes
Toilets: Yes
Showers: Yes
Dump Point: Yes
Distance To Broken Hill: 8km
20. Broken Hill Regional Event Centre & Racecourse
This isn’t free but it is cheap and great value. Situated just on the outskirts of Broken Hill town centre, the Broken Hill Regional Events Center is the perfect camping location for tents, camper vans, caravans and larger recreational vehicles. Dump point and drinking water on site.
Offering a number of large grassed areas adjacent to the racetrack. The primitive facilities also include basic showering and toilet facilities (as new and fabulous showers) and a dump point at very affordable prices. Powered and unpowered sites are available. (Please note that powered sites have risen $5 due to escalating electricity costs, now more than $100,000 per year)
The overnight stabling of horses travelling through the city is also available for an additional small fee. This facility is on Crown Land and is a NFP site, run largely by a Trust and voluntary
labour.
Please contact the caretaker to book a site (this is particularly important during busy periods or if you plan to arrive after hours).
- OFFICE HOURS: 9.00am-11.30, 12.00-5.30
- CHECK IN: From 12 midday.
- CHECK OUT: 10.00am
- Please note Broken Hill is on Adelaide time.
Type: Showground Camping
Cost: Powered $40, Unpowered $25, CMCA members $15 for unpowered sites
Location: Racecourse Road, Broken Hill, New South Wales
GPS: -31.917935°, 141.480024° – Click To View
Booking Required: Yes
Pet Friendly: Yes
Toilets: Yes
Showers: Yes
Drinking Water: Yes
Dump Point: Yes
Phone: 0437 250 286
Email: camping@brokenhilleventscentre.org.au
Website URL: https://www.brokenhilleventscentre.org.au
Distance To Broken Hill: 4km
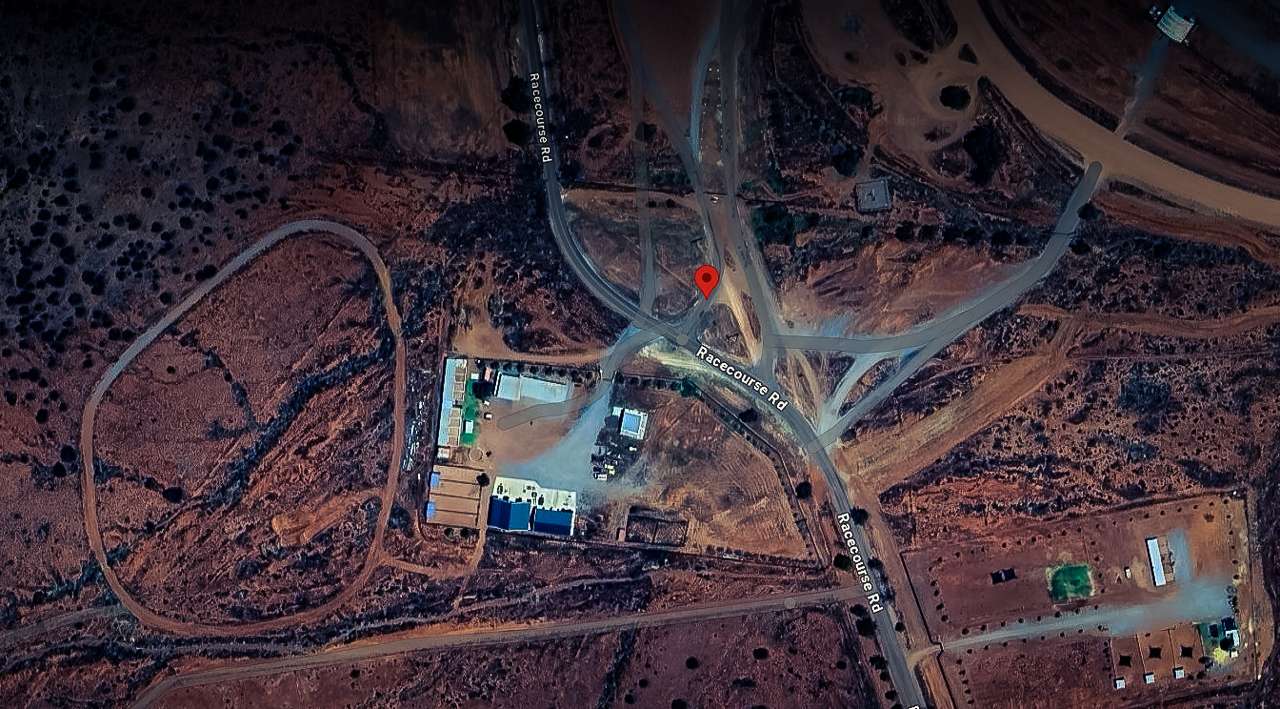
Free Camping In Broken Hill Broken Hill Regional Event Centre & Racecourse
21. Starview Primitive Campsite
This isn’t free but it is cheap and great value. This paid campground offers toilets, showers and drinking water. Dogs are not permitted. Maximum 5 night stay. It is accessible to RVs, camper trailers, caravans and big rigs. Camping in tents is allowed.
You must book in advance
Book at the Info Centre in town or online at https://www.brokenhill.nsw.gov.au/Facilities/Living-Desert-State-Park/Starview-Campsite
Type: Paid Campground
Cost: $25 per night plus one off $7 camp fee
Location: Living Desert State Park, Broken Hill, New South Wales
GPS: -31.907072°, 141.443280° – Click To View
Booking Required: Yes
Pet Friendly: No
Toilets: Yes
Showers: Yes
Drinking Water: Yes
Phone: (08) 8080 3560
Email: https://www.brokenhill.nsw.gov.au/Facilities/Living-Desert-State-Park/Starview-Campsite
Website URL: https://www.brokenhill.nsw.gov.au/Facilities/Living-Desert-State-Park/Starview-Campsite
Distance To Broken Hill: 6km
22. Stirlingvale
This isn’t free but it is cheap and great value. 7km from broken hill outback camp site. Unpowered sites in bushland. $25 per vehicle per night via honesty box. EFT or cash.
- Dogs at own risk due to active farm
- Toilets on site – bring your own toilet paper
- RV dump point
- Non potable water
- Fires allowed depending on fire season
Type: Station Stay
Cost: $25 per night
Location: Barrier Highway, Broken Hill, New South Wales
GPS: -31.986284°, 141.366655° – Click To View
Pet Friendly: Yes At Own Risk
Toilets: Yes
Dump Point: Yes
Phone: 0484 376 797
Email: Stirlingvalestation@gmail.com
Website URL: https://WWW.Stirlingvale.com.au
Distance To Broken Hill: 10km
23. Nine Mile Station
This isn’t free but it is cheap and great value. Nine Mile Station is a working sheep station close to town.
This paid camp ground offers powered sites and several non-powered sites. Powered sites are near the homestead and woolshed $30 (limited). There is a toilet/ shower block available for all campers. Non powered sites ($20) are approx 1km from the homestead. Campers can also use shower/toilet/laundry block if they would like to use these facilities. Some clearance is required for powered sites near the homestead due to levy bank.
Please note google maps is not accurate – please travel 11.5km on the Silver City Highway towards Tibooburra.Turn left onto the Nine Mile Road (a good dirt road). The homestead is 1km along on the left. Please wait on this road near homestead for Greg. Note: Nine Mile road and campsites may be inaccessible when wet.
If you are a local or a group and would like a more isolated campsite, please let Greg know. Please call Greg to book 0427671012. We are a working station and sometimes busy with stock work or out of range. If Greg does not answer straight away – please text and he will get back to you asap. Bookings Essential.
Type: Station Stay
Cost: Unpowered $20, Powered $30
Location: 1421 Silver City Hwy, Broken Hill, New South Wales
GPS: -31.837304°, 141.502423° – Click To View
Booking Required: Yes
Pet Friendly: Yes
Toilets: Yes
Showers: Yes
Water (Non Drinking): Yes
Phone: 0427 671 012
Email: ninemilestation@bigpond.com
Website URL: https://facebook.com/Nine Mile Station Stay
Distance To Broken Hill: 14km
24. Eckerboon Camping Area
This isn’t free but it is cheap and great value. New camping area in NSW State Parks Conservation area. Great camp site for an overnight camp or a bit longer. Toilets and BBQs fairly new and clean. Table and chairs with a sensor light under shelter. Very quiet being away from the road. Ranger comes around to collect fees.
Type: NSW State Conservation Area
Cost: $19.5 for 2 people per night
Location: Langidoon Metford, New South Wales
GPS: -31.673531°, 142.062727° – Click To View
Pet Friendly: No
Toilets: Yes
Distance To Broken Hill: 65km
25. Thackaringa Rest Area
Rest area south of the Barrier Rest Area. Picnic table, non potable water tank, bush library exchange in the pink fridge. As an added bonus we found a geocache here!
Type: Rest Area
Cost: Free
Location: Barrier Highway, Broken Hill, New South Wales
GPS: -32.045098°, 141.128301° – Click To View
Pet Friendly: Yes
Toilets: Yes
Distance To Broken Hill: 33km
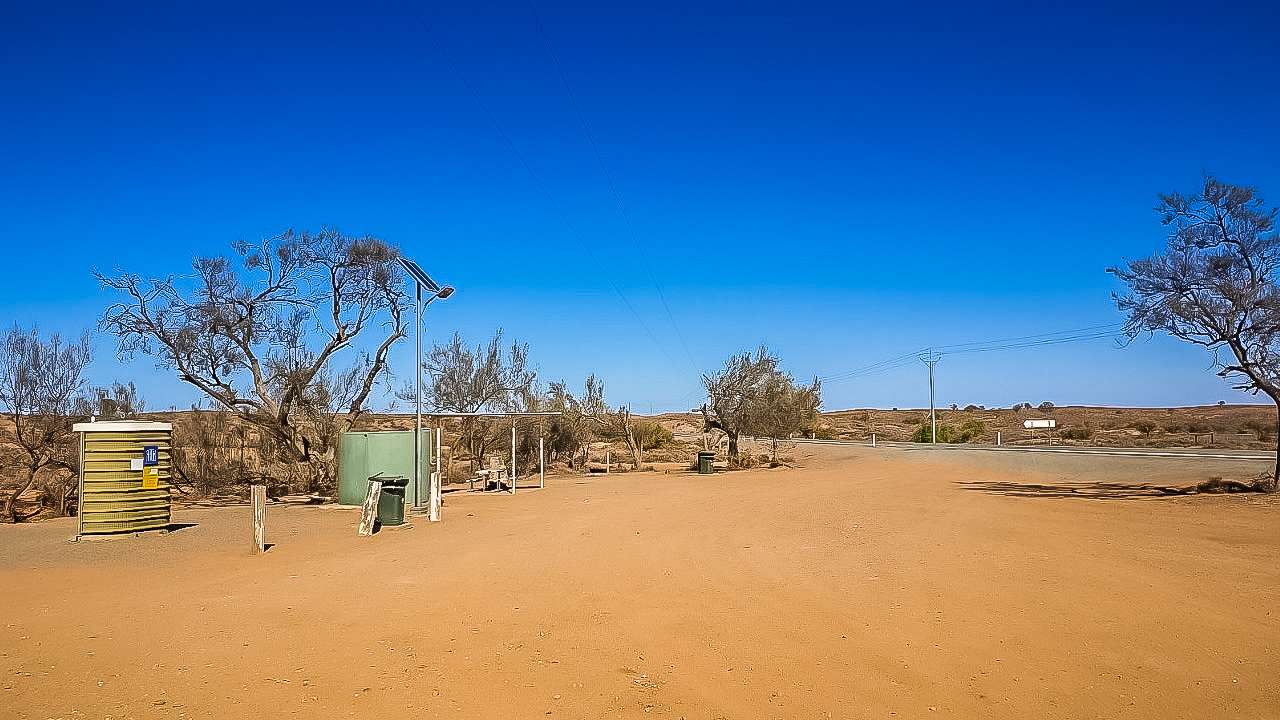
Thackaringa Rest Area
Broken Hill – A Rich History
Nestled in the far west of New South Wales, Broken Hill earned its nickname “The Silver City” through its remarkable mining heritage. The city’s story began in 1883 when boundary rider Charles Rasp discovered what he initially thought was tin but turned out to be the world’s largest silver – lead – zinc mineral deposit. This momentous discovery transformed a small settlement into a booming mining town. Consequently, the Broken Hill Proprietary Company (BHP) was established in 1885, laying the foundation for what would become one of Australia’s largest corporations.
Broken Hill’s landscape is defined by the Line of Lode, a massive ore body that rises prominently through the centre of town. The city flourished during the late 19th and early 20th centuries as mining operations expanded. The town developed a strong sense of community and worker solidarity, becoming a significant site for the development of Australia’s trade union movement. The Miners Memorial, standing atop the Line of Lode, commemorates the more than 800 miners who lost their lives working in the mines since operations began.
Free Camping In Broken Hill: Historical Context
The tradition of camping around Broken Hill dates back to the early prospectors and miners who would set up temporary accommodations while searching for minerals. Today, free camping in Broken Hill continues this outback tradition. The surrounding landscape offers campers the chance to experience the same rugged terrain that challenged those early settlers. Additionally, many free camping spots provide views of historical mining infrastructure that dots the landscape, connecting modern travellers to the region’s rich past.
Broken Hill has evolved beyond its mining origins to become a thriving cultural centre. The city is home to numerous galleries and museums that preserve its history while showcasing contemporary Australian art. Moreover, the town’s isolation has fostered a resilient and creative community spirit that visitors can experience firsthand when free camping in Broken Hill and engaging with locals at various events and venues throughout the year.
Is Free Camping In Broken Hill Dangerous? Historical Perspectives
The question “is Broken Hill dangerous” takes on different meanings when viewed through a historical lens. During the early mining days, Broken Hill was indeed hazardous, with mining accidents, harsh working conditions and limited healthcare access creating a challenging environment. However, these historical dangers have transformed over time. The modern city has addressed many of these historical risks through improved safety standards, better infrastructure and comprehensive emergency services.
The mining industry itself has undergone significant changes, with workplace safety becoming a priority. Therefore, while acknowledging the dangerous conditions that were once part of Broken Hill’s identity, visitors today can appreciate how the community has evolved while preserving its historical character. This evolution makes free camping in Broken Hill an opportunity to connect with Australia’s mining heritage in a safe and educational environment.
Reaching The Silver City
How To Get To Broken Hill From Sydney
The journey from Sydney to Broken Hill spans approximately 1,150 kilometres, offering travellers multiple route options. The most direct path takes you through Dubbo and Cobar, following the Mitchell Highway and Barrier Highway. This route typically requires about 13 hours of driving time, making it ideal to break up into a two day journey for those interested in free camping in Broken Hill. Moreover, several interesting towns along the way provide perfect stopping points to stretch your legs and experience rural New South Wales.
For those preferring not to drive, Regional Express (REX) operates daily flights between Sydney and Broken Hill, with a flight time of approximately 2.5 hours. Additionally, NSW TrainLink runs a weekly train service called the Outback Explorer, departing from Sydney Central Station on Mondays and returning from Broken Hill on Tuesdays. The train journey takes about 13 hours but offers spectacular scenery of the changing landscape as you head west.
Coach services also connect Broken Hill to major centres, providing another alternative for travellers. However, having your own vehicle once you arrive gives you the freedom to explore the region and access free camping in Broken Hill and the surrounding areas more easily. Furthermore, a 4WD vehicle is recommended for accessing some of the more remote camping spots around the region.
Travel Times To Broken Hill
Understanding the distances involved when planning your free camping in Broken Hill adventure is essential for adequate preparation. The following table outlines approximate travel times and distances to Broken Hill from major Australian cities and nearby rural centres:
| Departure City/Town | Distance (km) | Driving Time | Transport Options |
|---|---|---|---|
| Sydney | 1,150 | 13 hours | Car, train, flight, coach |
| Melbourne | 840 | 9 hours | Car, coach, flight via Adelaide |
| Adelaide | 510 | 5.5 hours | Car, coach, flight |
| Brisbane | 1,570 | 17 hours | Car, flight via Sydney |
| Dubbo | 750 | 8 hours | Car, coach |
| Mildura | 300 | 3.5 hours | Car, coach |
| Port Augusta | 390 | 4 hours | Car, coach |
| Wilcannia | 200 | 2 hours | Car |
| Cobar | 450 | 4.5 hours | Car, coach |
| Wagga Wagga | 845 | 9 hours | Car, coach |
When planning your journey for free camping in Broken Hill, remember that outback driving requires extra precautions. Firstly, always carry plenty of water and supplies. Secondly, inform someone of your travel plans. And most importantly ensure your vehicle is in good condition before setting off.
Free Camping In Broken Hill: Essential Information
What Constitutes Free Camping In Broken Hill
Free camping in Broken Hill refers to areas where travellers can stay overnight without payment. These designated spots typically offer minimal facilities but provide authentic outback experiences. The local council maintains several free camping areas around the region, usually allowing stays between 24/72 hours depending on the location. These sites operate on a first come, first served basis and typically do not require bookings.
While these areas are free, campers should understand and respect certain guidelines. Most importantly, practising “Leave No Trace” principles is essential when free camping in Broken Hill. This means taking all rubbish with you, avoiding damage to vegetation and respecting wildlife. Additionally, many free camping spots have specific rules regarding campfires, particularly during fire ban seasons, which visitors must strictly observe.
The appeal of free camping in Broken Hill lies in the opportunity to connect with the authentic outback environment. Furthermore, these sites often provide spectacular sunset and sunrise views, outstanding stargazing opportunities due to minimal light pollution and chances to spot native wildlife in their natural habitat. This combination of natural beauty and cost effectiveness makes free camping in Broken Hill particularly attractive to budget conscious travellers seeking genuine Australian experiences.
Is Broken Hill Safe At Night For Campers?
A common concern for those considering free camping in Broken Hill is safety, particularly at night. The question “is Broken Hill safe at night” is frequently asked by potential visitors. Generally speaking, Broken Hill is considered a safe destination for travellers and campers. Broken Hill has a strong community spirit and locals are typically friendly and helpful to visitors. However, as with any location, taking standard safety precautions remains advisable.
When free camping in Broken Hill, particularly in more remote areas, it’s important to be self sufficient and prepared. This means carrying adequate water, food supplies, first-aid equipment and communication devices. Moreover, letting someone know your camping location and expected return date is always a good practice when venturing into more isolated areas.
The primary safety considerations when free camping in Broken Hill relate more to environmental factors than personal security. The outback can experience extreme temperature variations, with very hot days and surprisingly cold nights. Additionally, wildlife encounters are possible, though most native animals pose little threat if respected and not approached. Therefore, while asking “is Broken Hill safe at night” is reasonable, with appropriate preparation and common sense, campers can enjoy a secure and comfortable experience under the spectacular outback sky.
Is Broken Hill Safe: A Crime Perspective
When evaluating “is Broken Hill safe” through a crime statistics lens, the data reveals nuanced realities. According to 2021 crime reports, Broken Hill’s crime rate sits significantly higher than the New South Wales average, with 3,052 criminal incidents recorded annually. Crimes against persons occur at a rate of 4,678 per 100,000 residents – triple the NSW average of 1,500. Domestic violence related offences particularly stand out, with Broken Hill ranking 4th among NSW local government areas for reported incidents. Malicious property damage remains persistently high, with 300 cases recorded in 2021 alone.
Theft and burglary rates show some improvement, decreasing 16% and 15% respectively between 2017-2021. However, intimidation and harassment cases surged 22.6% during the same period. Drug offences remain stable, predominantly involving cannabis and methamphetamine possession. While violent crime represents 27% of total offences, most incidents occur between known parties rather than random attacks. Visitors should note that 91% of NSW suburbs are statistically safer than Broken Hill, with residents having a 1 in 9 chance of experiencing crime compared to the state average of 1 in 20.
Is Broken Hill Safe At Night: Personal Safety Considerations
Addressing “is Broken Hill safe at night” requires understanding both crime patterns and environmental factors. While 44% of assaults occur between 6 PM-6 AM, these predominantly involve alcohol related disputes in licensed venues. The city centre maintains regular police patrols, with Barrier Police District responding to 828 crimes against persons annually. Recent incidents like the April 2025 Crystal Street police pursuit demonstrate active law enforcement response to nighttime offences.
Solo travelers report feeling generally secure after dark, particularly in well lit commercial areas around Argent Street. However, locals advise avoiding isolated spots like the Line of Lode lookout at night due to limited visibility and emergency access. The NSW Police recommend standard urban precautions: securing vehicles, avoiding walking alone in unpopulated areas and refraining from confronting intoxicated individuals.
Nighttime safety improvements include increased CCTV coverage in the CBD and community initiatives like the Night Safe Space program operating weekends until 2 AM. While Broken Hill’s crime rate exceeds state averages, strategic precautions – staying in populated areas, securing valuables and using licensed taxis after dark – significantly reduce personal safety risks for visitors.
Is Broken Hill Dangerous For Visitors?
Addressing the question “is Broken Hill dangerous” requires considering multiple perspectives. For visitors accustomed to urban environments, the outback presents unique challenges that might initially appear dangerous. However, with proper preparation and awareness, these challenges are easily managed. The remoteness of free camping in Broken Hill means services are limited, but this isolation is part of the authentic outback experience that attracts many visitors.
The main concerns when considering “is Broken Hill dangerous” relate to environmental factors. Firstly, the region can experience extreme heat, particularly during summer months, making dehydration a risk. Secondly, storms and changing weather conditions can develop quickly. Thirdly, some tracks and roads may become impassable after rain. Nevertheless, staying informed about weather forecasts, carrying adequate supplies and having a reliable vehicle minimizes these risks significantly.
From a personal safety perspective, Broken Hill has a lower crime rate than many larger Australian cities. The close knit community and relatively small population contribute to a generally safe environment for visitors. However, as with any destination, basic precautions like securing valuables and being aware of your surroundings remain advisable. Ultimately, when asking “is Broken Hill dangerous,” most experienced travellers would agree that the benefits of experiencing this unique outback city far outweigh any perceived risks.
Free Camping In Broken Hill: Practical Advice
Essential Preparations
Proper preparation is crucial for a successful free camping in Broken Hill experience. The remote nature of the region requires self sufficiency and forward planning. Start by ensuring your vehicle is in excellent condition. Consider getting a professional service before departure if embarking on a long journey. Additionally, carrying basic spare parts and knowing how to perform simple repairs can prevent minor issues from becoming major problems.
Water is absolutely essential when free camping in Broken Hill. Experts recommend carrying at least 5-10 litres per person per day, plus extra for emergencies. Food supplies should include non-perishable items that can last the duration of your trip, plus additional supplies for unexpected delays. Furthermore, a comprehensive first-aid kit tailored for outback conditions is non negotiable for responsible campers.
Communication can be challenging in remote areas around Broken Hill. Therefore, consider hiring or purchasing a satellite phone or personal locator beacon for emergencies if venturing far from town. Mobile phone coverage is generally good within Broken Hill itself but becomes patchy or non-existent in more remote camping locations. Moreover, downloading offline maps before your journey ensures you can navigate even without internet connectivity, an important consideration when planning free camping in Broken Hill adventures.
How To Get To Broken Hill From Sydney: The Ultimate Road Trip
Transforming the journey from Sydney to Broken Hill into a memorable road trip enhances the entire free camping experience. The drive presents numerous opportunities to discover regional New South Wales and experience the gradual transition from coastal landscapes to outback terrain. Starting from Sydney, heading west through the Blue Mountains offers spectacular scenery and the first taste of elevation changes. The mountains provide several lookout points and walking trails worth exploring before continuing your journey.
Bathurst makes an excellent first major stop, offering historical significance as Australia’s oldest inland settlement. Continuing west, Dubbo provides another logical breaking point, with the renowned Western Plains Zoo offering a wildlife experience before entering more arid regions. As you progress further along the Mitchell Highway through Nyngan and Cobar, the landscape noticeably changes, becoming more characteristically outback with red soil and sparse vegetation.
Several free camping spots along this route allow you to break up the journey comfortably. The town of Wilcannia, about two hours east of Broken Hill, marks the final stretch of the journey. This historic port once served as a major paddlesteamer hub on the Darling River. Finally, as you approach Broken Hill, the distinctive mining landscapes and unique light that has attracted artists for generations signals your arrival at your free camping in Broken Hill destination. The entire journey offers a gradual immersion into outback Australia that forms an integral part of the overall experience.
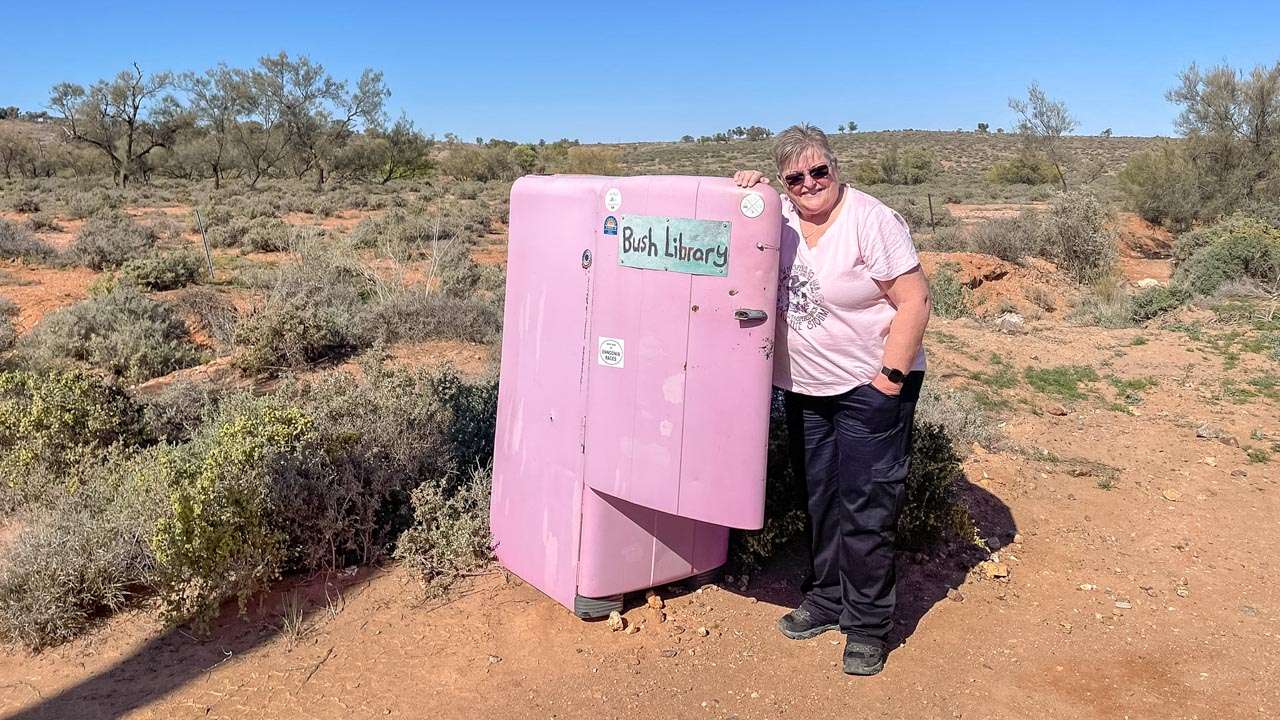
Bush Library At Rest Area Between Broken Hill And Cockburn
10 Must Do Activities Near Broken Hill
Free Camping In Broken Hill: Nearby Attractions
While free camping in Broken Hill provides an excellent base, exploring the region’s attractions enhances the overall experience. Here are ten must do activities within easy reach of Broken Hill:
- The Living Desert Sculptures
Located just 9km north of Broken Hill, this outdoor art installation features 12 sandstone sculptures created by international artists in 1993. Set against the backdrop of the vast outback landscape, these impressive works are particularly stunning at sunrise or sunset when the changing light brings them to life. The site offers a 2.8km cultural trail where visitors can learn about Aboriginal heritage and native plants. - Silverton Ghost Town
Once a booming mining town, Silverton now stands as a captivating relic of the past just 25km from Broken Hill. Home to fewer than 50 residents today, this iconic location has featured in numerous films including Mad Max 2. The famous Silverton Hotel, Mundi Mundi Plains lookout and several art galleries make this quirky town worth exploring while free camping in Broken Hill. - Pro Hart Gallery
Immerse yourself in the colourful works of one of Australia’s most renowned artists, Kevin “Pro” Hart. This gallery houses an impressive collection of the late artist’s paintings that capture the essence of outback life. Located in Broken Hill itself, the gallery also includes Hart’s studio preserved exactly as he left it, providing insight into his creative process. - Royal Flying Doctor Service Visitor Centre
Learn about this essential service that provides emergency and primary healthcare across remote Australia. The interactive displays and original equipment showcase the challenges of delivering medical services in the outback. The visitor centre offers guided tours and a chance to step inside an actual RFDS aircraft used for medical evacuations. - Menindee Lakes
Approximately 110km southeast of Broken Hill, this system of lakes formed by the Darling River creates an unexpected oasis in the desert. When filled, these lakes attract abundant birdlife and offer excellent fishing opportunities. The historic Menindee township is also worth exploring, with connections to the ill-fated Burke and Wills expedition making it historically significant. - Broken Hill Regional Art Gallery
Australia’s oldest regional gallery houses an impressive collection of colonial, modern and contemporary Australian art, including significant Indigenous works. Housed in the restored Sully’s Emporium building, the gallery provides cultural enrichment for those enjoying free camping in Broken Hill and seeking artistic experiences. - Mutawintji National Park
Located about 130km northeast of Broken Hill, this significant Aboriginal site features ancient rock engravings and hand stencils. The dramatic gorges, rock pools and desert landscapes offer excellent bushwalking opportunities. Guided tours with Aboriginal rangers provide cultural insights that deepen appreciation of this special place. - Line of Lode Miners Memorial
This striking structure sits atop the massive ore body that gave birth to Broken Hill. The memorial honours more than 800 miners who lost their lives working the mines since 1883. The site also offers panoramic views of Broken Hill and houses a restaurant with spectacular vistas – a must visit while free camping in Broken Hill. - Day Dream Mine
Experience Broken Hill’s mining heritage firsthand with an underground tour of this historic mine. Knowledgeable guides explain mining techniques and working conditions from the 1880s, providing insight into the industry that built Broken Hill. Located about 20km north of Broken Hill, tours involve walking and climbing through underground tunnels. - Sturt National Park
For those willing to venture further (about 330km northwest of Broken Hill), this vast park showcases classic outback landscapes including the famous red sand dunes, gibber plains and flat topped mesas. The park protects significant flora and fauna and offers camping facilities for those extending their free camping in Broken Hill adventure northward.
Seasonal Considerations For Free Camping In Broken Hill
Free Camping In Broken Hill: Best Times To Visit
The extreme climate of the outback significantly impacts the free camping in Broken Hill experience throughout the year. Summer (December to February) brings intense heat, with temperatures regularly exceeding 40°C. These conditions can make camping challenging without proper equipment and preparation. Conversely, winter (June to August) delivers mild, sunny days around 16-20°C but cold nights that can drop below freezing, requiring good quality sleeping bags and warm clothing.
Most experienced outback travellers consider spring (September to November) and autumn (March to May) the ideal seasons for free camping in Broken Hill. During these periods, daytime temperatures typically range from comfortable mid 20s to low 30s, while nights remain mild. Additionally, spring often brings wildflowers that temporarily transform the arid landscape with bursts of colour, creating spectacular photographic opportunities.
Another consideration for timing your visit is Broken Hill’s event calendar. The city hosts several significant events throughout the year that attract visitors from across Australia. The Broken Heel Festival in September celebrates the legacy of Priscilla Queen of the Desert with three days of drag performances and festivities. Additionally, the Broken Hill Agfair in May showcases rural industries with exhibitions and entertainment. Planning your free camping in Broken Hill trip around these events adds another dimension to your outback experience.
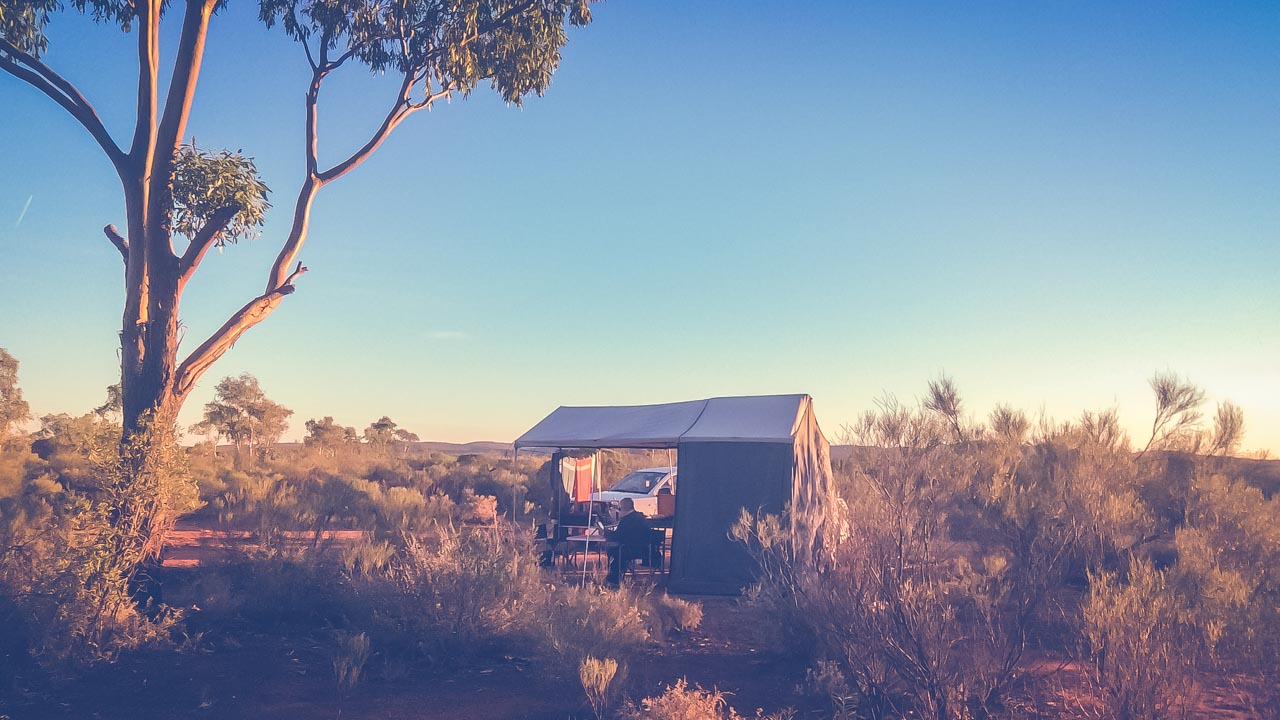
Camping In Broken Hill Penrose Park Silverton
Is Broken Hill Dangerous: Weather Considerations
When addressing “is Broken Hill dangerous,” weather extremes represent the most significant natural hazard for campers. Summer heatwaves pose serious risks including dehydration, heat exhaustion and heatstroke. Visitors from cooler regions may underestimate how quickly these conditions can develop. Therefore, summer free camping in Broken Hill requires abundant water supplies, shade structures and limiting physical activity during peak heat hours.
Dust storms occasionally sweep through the region, particularly during drier periods. These can reduce visibility dramatically and affect respiratory conditions. Having a weather radio or app with alerts enabled provides warning of approaching storms. Additionally, securing camping equipment properly prevents damage from sudden wind gusts that often precede these dramatic weather events.
Flash flooding, though rare, can occur after heavy rainfall, transforming dry creek beds into powerful waterways within minutes. This presents particular dangers when free camping in Broken Hill’s outlying areas. Always avoid camping in dry creek beds or low lying areas, regardless of how unlikely rain might seem. By respecting these environmental hazards and preparing accordingly, the question “is Broken Hill dangerous” becomes less about genuine risk and more about appropriate preparation and respect for outback conditions.
Conclusion: Free Camping In Broken Hill
Free camping in Broken Hill offers adventurous travellers a genuine outback experience enriched by fascinating history, stunning landscapes and unique attractions. The combination of heritage significance and natural beauty makes this region particularly special among Australian destinations. By understanding the practical considerations, respecting the environment and preparing appropriately, visitors can safely enjoy all that the Silver City and its surroundings have to offer.
When addressing concerns like “is Broken Hill safe at night” or “is Broken Hill dangerous,” knowledge and preparation remain key. The outback presents challenges but rewards prepared travellers with unforgettable experiences and perspectives that simply can’t be found elsewhere. The journey of how to get to Broken Hill from Sydney itself becomes part of the adventure, transitioning travellers from coastal environments to the distinctive red landscapes of outback Australia.
Whether you’re drawn by the mining heritage, artistic culture, or simply the call of the open outback, free camping in Broken Hill provides an accessible way to immerse yourself in one of Australia’s most iconic regions. The connections formed with the landscape, the history and the resilient local community create memories that last long after the red dust has been washed from your camping equipment.
References
- “Broken Hill.” Visit NSW, www.visitnsw.com/destinations/outback-nsw/broken-hill-area/broken-hill
- “Line of Lode Miners Memorial.” Broken Hill City Council, www.brokenhill.nsw.gov.au/explore/line-of-lode-miners-memorial
- “History of Broken Hill.” Broken Hill Heritage, www.brokenhill.com.au/history
- “Outback NSW Art and Culture.” Destination NSW, www.destinationnsw.com.au/outback-arts
- National Museum of Australia. “Broken Hill Mining History.” www.nma.gov.au/defining-moments/resources/broken-hill
- Safe Work Australia. “Mining Safety Evolution.” www.safeworkaustralia.gov.au/industry/mining
- Transport for NSW. “Sydney to Broken Hill.” transportnsw.info/regional/routes/broken-hill
- Regional Express. “REX Sydney to Broken Hill Flights.” rex.com.au/flights/sydney-broken-hill
- NSW TrainLink. “Outback Explorer Service.” transportnsw.info/regional/trains/outback-explorer
- NRMA. “Outback Driving Tips.” mynrma.com.au/travel/driving-tips/outback-travel
- Royal Automobile Club of Australia. “Outback Travel Safety.” www.racv.com.au/travel/driving-tips/safety
- Broken Hill City Council. “Camping Information.” www.brokenhill.nsw.gov.au/visit/camping
- Leave No Trace Australia. “Principles for Outback Camping.” www.lnt.org.au/principles
- Outback NSW Tourism. “Stargazing in Broken Hill.” www.visitnsw.com/outback-stargazing
- NSW Police Force. “Broken Hill Safety Information.” police.nsw.gov.au/safety-and-prevention/regional-safety
- Outback Safety Australia. “Camping Safety Guide.” www.outbacksafety.com.au/camping-guidelines
- Bureau of Meteorology. “Broken Hill Climate.” bom.gov.au/nsw/broken-hill
- Tourism Australia. “Australian Outback Safety.” australia.com/travel-information/safety
- NRMA. “Outback Road Conditions.” mynrma.com.au/travel/road-conditions
- Australian Bureau of Statistics. “Regional Safety Statistics.” abs.gov.au/statistics/regional-safety
- RACV. “Vehicle Preparation for Outback Travel.” www.racv.com.au/on-the-road/driving-maintenance/outback
- Australian Red Cross. “Outback Water Requirements.” redcross.org.au/first-aid/outback-travel
- Australian Communications and Media Authority. “Remote Communications Guide.” www.acma.gov.au/outback-communications
- Blue Mountains Australia. “Visitor Information.” www.visitbluemountains.com.au
- Taronga Western Plains Zoo. “Visit Information.” taronga.org.au/dubbo-zoo
- Wilcannia Tourism. “Historical River Port.” www.centraldarling.nsw.gov.au/wilcannia
- Living Desert Reserve. “Sculpture Information.” www.brokenhill.nsw.gov.au/visit/living-desert
- Silverton Village Committee. “Visitor Guide.” www.silverton.org.au
- Pro Hart Gallery. “About the Artist.” www.prohart.com.au
- Royal Flying Doctor Service. “Visitor Centre Information.” www.flyingdoctor.org.au/broken-hill
- NSW National Parks. “Menindee Lakes Information.” www.nationalparks.nsw.gov.au/menindee-lakes
- Broken Hill Regional Art Gallery. “Collection Information.” www.bhrag.com
- NSW National Parks. “Mutawintji National Park.” www.nationalparks.nsw.gov.au/mutawintji
- Broken Hill Tourism. “Line of Lode Memorial.” www.visitbrokenhill.com.au/line-of-lode
- Daydream Mine Tours. “Underground Experience.” www.daydreammine.com.au
- NSW National Parks. “Sturt National Park.” www.nationalparks.nsw.gov.au/sturt
- Outback Astronomy. “Broken Hill Star Viewing.” www.outbackastronomy.com.au
- Broken Hill Dark Sky Guide. “Best Stargazing Locations.” www.brokenhilltourism.com.au/stargazing
- Outback Astronomy. “Sky Shows Information.” www.outbackastronomy.com.au/shows
- Bureau of Meteorology. “Broken Hill Summer Climate.” bom.gov.au/nsw/broken-hill/summer
- Bureau of Meteorology. “Broken Hill Winter Climate.” bom.gov.au/nsw/broken-hill/winter
- Tourism Australia. “Best Time to Visit the Outback.” australia.com/planning/when-to-go/outback
- Broken Heel Festival. “Event Information.” www.bhfestival.com
- Australian Government Health Direct. “Heat-related Illness.” www.healthdirect.gov.au/heat-stress
- NSW Health. “Dust Storms and Health.” health.nsw.gov.au/environment/factsheets/dust
- SES NSW. “Flood Safety in Outback NSW.” www.ses.nsw.gov.au/outback-flooding
- Transport for NSW. “Sustainable Travel Options.” transportnsw.info/sustainability
- Planet Ark. “Sustainable Travel Tips.” planetark.org/sustainable-travel
- Carbon Neutral Australia. “Travel Offset Programs.” www.carbonneutral.com.au/travel-offsets