Our Jayco All Terrain Review. We’ve had ours for over 3 years. After nearly 120 nights & 25,000km we are very happy. Read our review so far. It hasn’t been all plain sailing and we’ll let you know about that too.
- We are very happy with our Jayco All Terrain despite having had a few problems with it so far. The problems have all been fixed to our satisfaction under warranty by our dealer or third party suppliers. The van has been a lot better than I was expecting it to be.
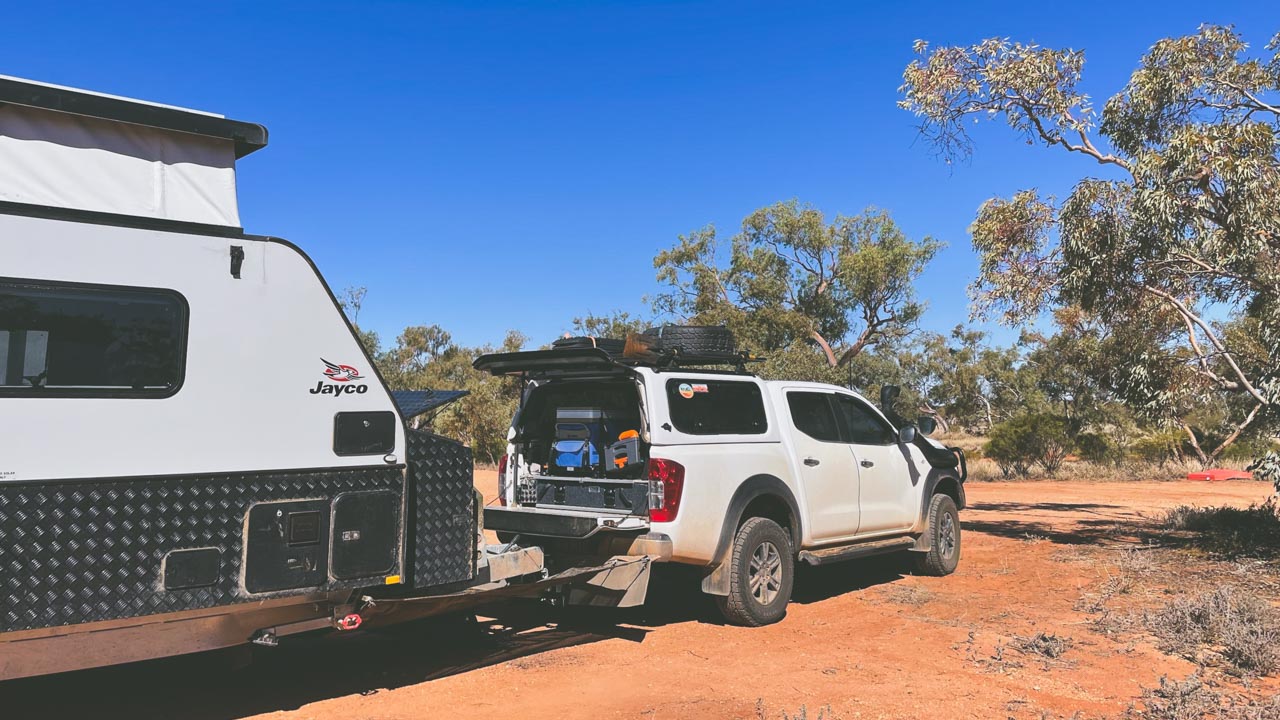
- It has been great offroad travelling the Oodnadatta Track twice and the full length of the Great Central Road (GCR). It travels very well behind our Navara and has let in no dust at all. The 240ah lithium batteries and solar set up have proved to be more than enough to run the upgraded compressor fridge we specced.
- Once you get through any warranty issues (they have been handled well by our dealer) and you have sorted out the underbody protection you have yourself a very capable offroad and offgrid caravan.
- All up – if you are considering buying one then go out and do it!
Pros & Cons
Pros – Jayco All Terrain Review Of What We Like
- Pricing was great compared to other vans we looked at of the same specification and features
- Build quality is surprisingly good
- Offroad performance has been excellent
- All parts used in the build are from name brand suppliers and replacements are readily available
- Loads of living room inside for a relatively small caravan
- Lots of storage space inside and outside with the tunnel boot and huge front toolbox

Jayco All Terrain Single Bed Layout 17.55-9.AT
Cons – Jayco All Terrain Review Of What We Don’t Like
- Electrical issues
- Had to sort out protection of underbody wiring and plumbing ourselves
- Niggly build issues that could have been done right the first time with a bit more care and attention
- Terrible hand over experience

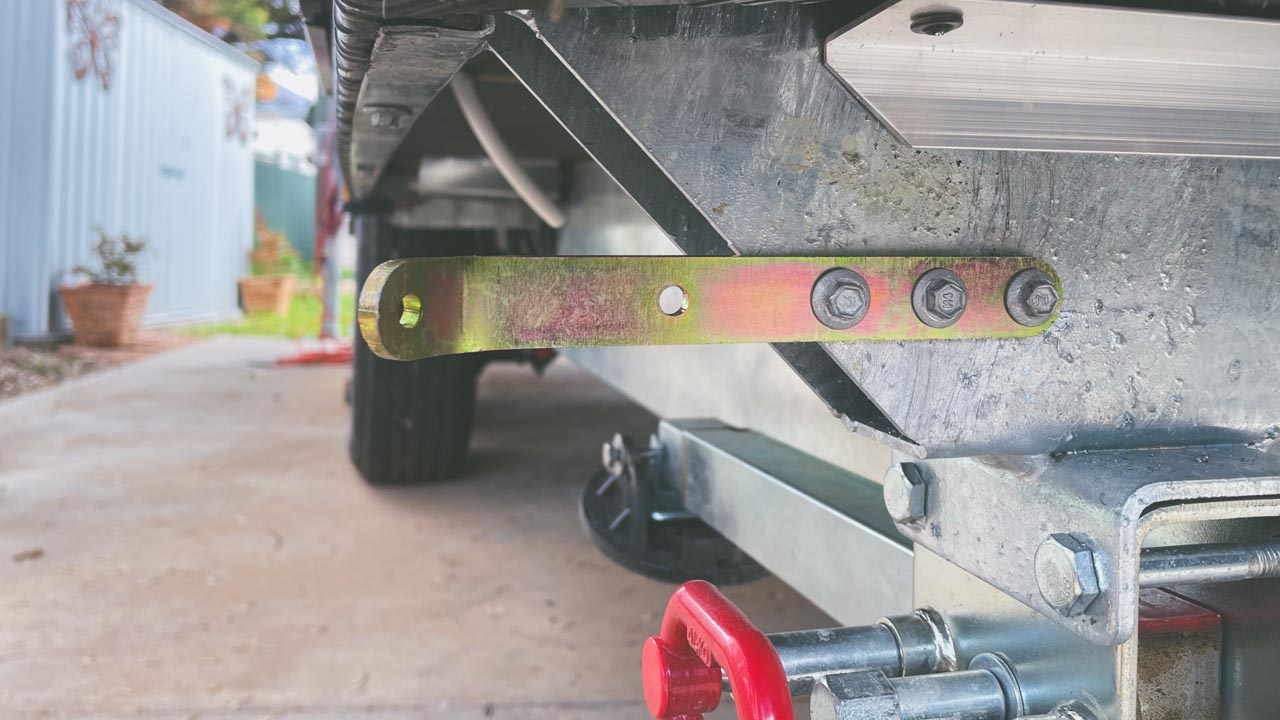
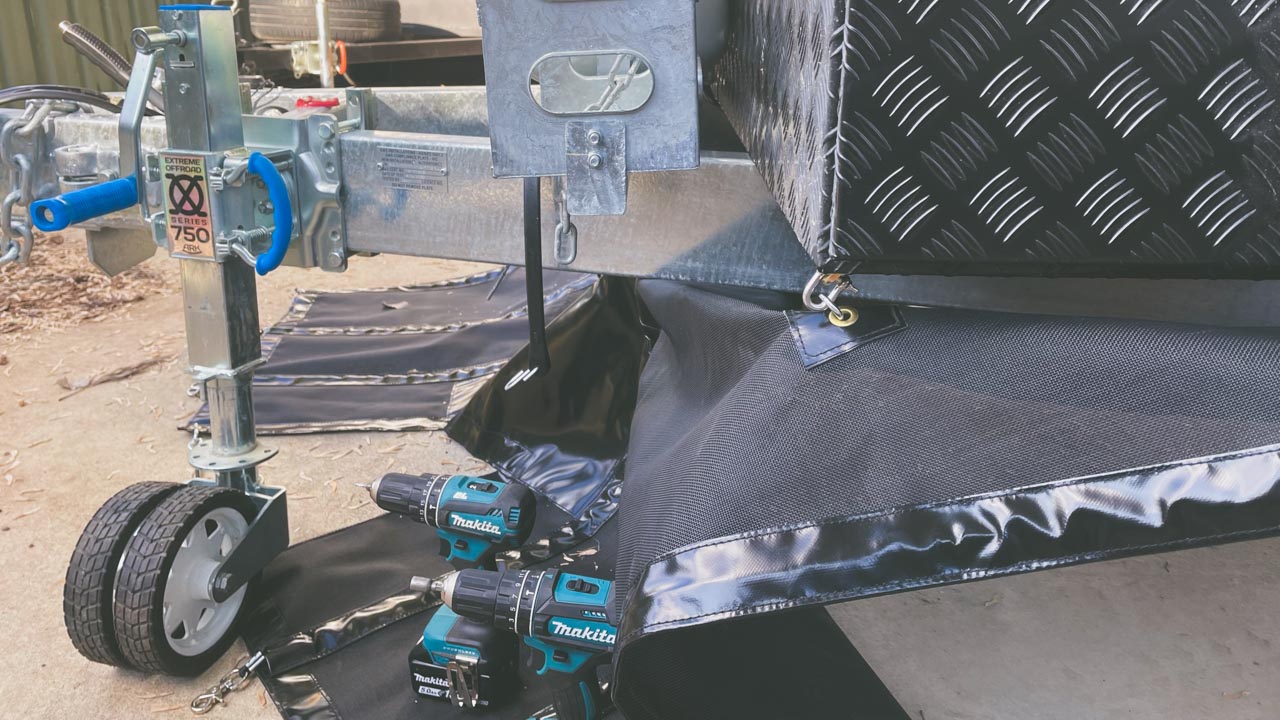
Jayco All Terrain Review Added Underbody Protection
Jayco All Terrain Review Of Problems
It hasn’t been all plain sailing with our Jayco All Terrain. We have had had some issues. Some have been niggly little things that were easy to fix however there was one that forced us to pull the pin on the last week of a 4 week adventure and come home.
The Small Issues
Handover Was An Abomination
- We turned up to pick up our van from the dealer and upon being presented the van the first thing we saw was water leaking everywhere under the van. The slide out kitchen plumbing hadn’t been correctly installed. Problem was resolved during the handover.
- The bloke who did the walkthrough with us knew very little about the caravan. I doubt that he knew much about caravans at all. Don’t get me wrong he was a lovely bloke but he was pretty clueless. These are hi-tech vans with complex electrical systems and I had a load of questions I wanted to ask but it was a waste of time.
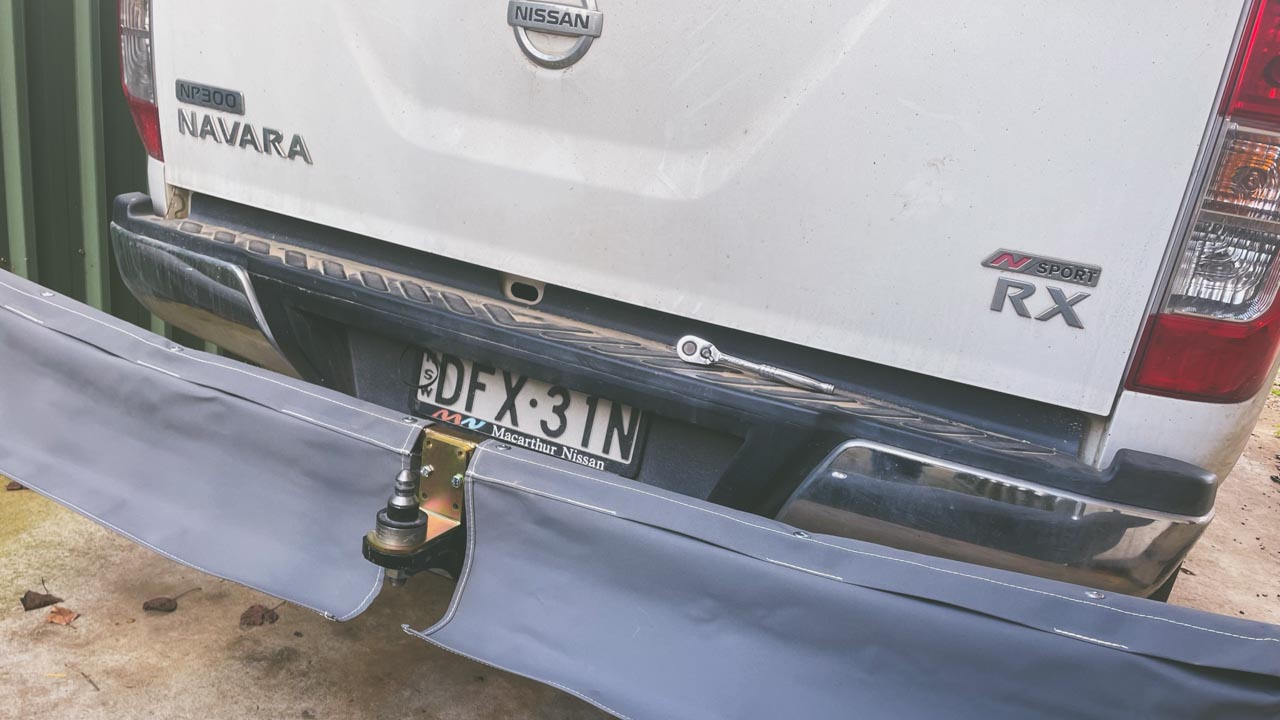
- Anderson plug hadn’t been installed on drawbar. We requested an Anderson plug be installed on drawbar and for it to go to the DCDC charger and this hadn’t been done. An Anderson plug to the DCDC charger was incorrectly spliced in to the wiring during the handover.
- Bedside CIG outlets for our sleep apnoea machines hadn’t been installed. One was installed during the handover the other was done a month later during the first service.
- Light in shower wouldn’t turn off. Problem was resolved during the handover.
- Table fitted to seating area was way too big. It was so big that not even the world’s skinniest supermodel would have been able to wedge herself in. It was totally not usable. When we got the van home I made a temporary table out of plywood and fitted it. The correct table was installed a month later during the first service.
Sink Tap
- Whenever we tried to run water inside the van via the water pump the taps would sputter and fart and we’d never get a good solid stream of water.
- It turns out the problem was a leaky diaphragm inside the sink mixer tap was allowing air into the system. The tap was replaced during the first service and the problem was fixed.
DCDC Charger Not Charging
- The Projecta PMDC-30 DCDC charger didn’t work from day one.
- We asked for this to be fixed at the vans first service. We arrived to pick up the van after the first service and at that point they told us the DCDC charger still wasn’t working. We had left the van with them for a week and phoned the day before to check it was ready and no mention was made of it not being fixed. It’s a five hour round trip to drop the van off to the dealer and another five hours to pick it up. I was not happy.
- I spoke to Projecta and they told me the reason the DCDC charger wasn’t working was insufficient diameter wiring being used by Jayco between the Anderson plug and the charger. Projecta said it is a very common problem with the Jayco factory installation of the Projecta PMDC-30 DCDC charger.
- After speaking with our dealers service department they agreed that Jayco would pay for our auto-electrician to run bigger wiring from the Anderson plug to the charger.
- Our auto electrician ran bigger wiring from the Anderson plug to the charger. This didn’t fix the problem.
- The van was back at our dealer two more times before the DCDC charger worked. From buying the van to finally having a working DCDC charger took two years.
Ensuite Sink Mixer Tap Rattled Loose
- On the Oodnadatta Track our ensuite sink mixer tap rattled loose and fell out.
- Luckily our friends we were travelling with had a 10mm socket long enough to reach the mounting nut underneath the sink. I used this and some Loctite to refit the tap and it was good from there on. While I was at it I used Loctite to refit the kitchen sink tap just in case.
Under Sink Water Filter Rattled Loose
- On the Oodnadatta Track our undersink water filter rattled loose and fell off it’s mounting.
- I used a load of silicone to refit it and used some thicker screws I carry as spare.
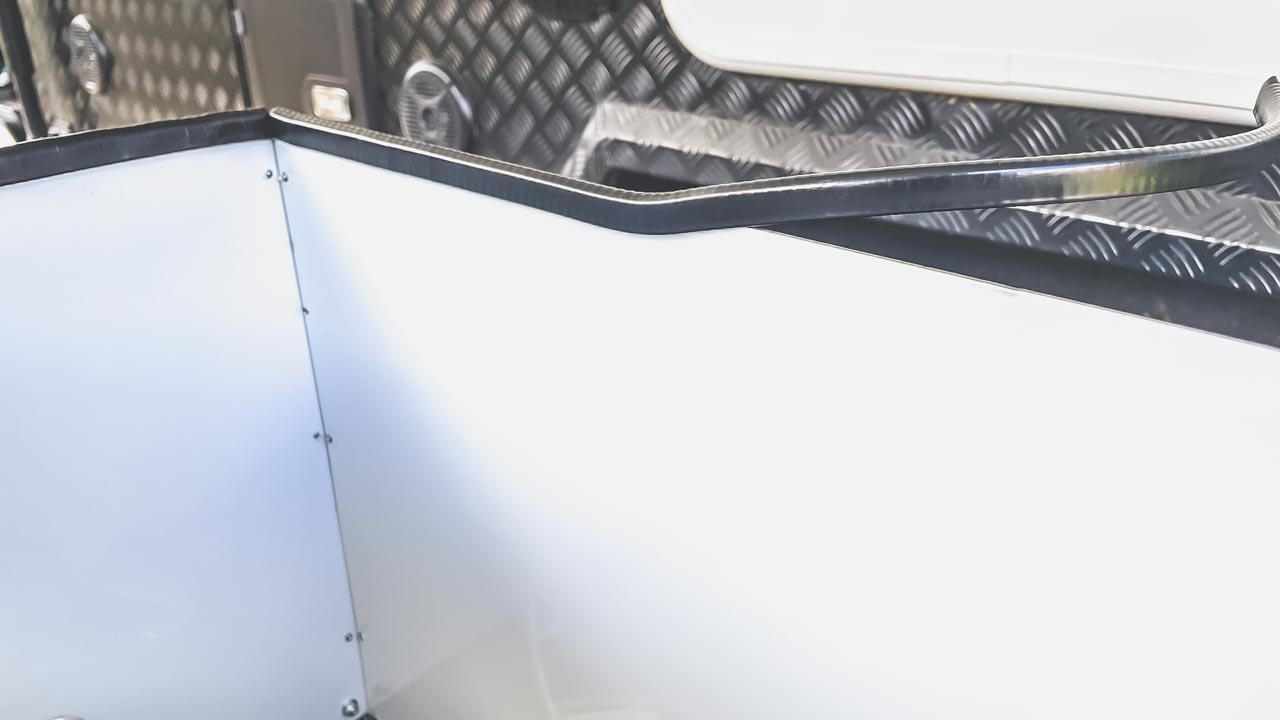
J-Mould Coming Away
- The J mould is coming away in a short section between the checkerplate and van siding in a short section.
- This has been fixed by the dealer as a warranty item.
Rangehood Stopped Working
- The rangehood died and wouldn’t turn off after about 12 months. It was back at the dealers to be fixed under warranty twice. However both times they didn’t have a replacement rangehood in stock to do the work. A year after reporting the issue they finally ordered a replacement in. So to be fair Jayco didn’t make the rangehood so it isn’t their fault that it died. However despite having reported the issue to the dealer many times it wasn’t fixed the two times that they had the van in for work.
- The dealer now has a replacement in (October 2024). We are arranging for it to be picked up from the dealer and will get it fitted ourselves.
Shower Screen Came Off Its Hinges
- The shower screen jumped out off its hinges a few times on rough dirt roads.
- I removed the shower screen and Amanda and replaced it with a shower curtain. We still have the shower screen and it will take about 30 minutes to put back in if we ever want to sell the van.
A Few Loose Screws
- On the Oodnadatta Track in August 2024 we had a few cupboard screws and a bit of timber bracing inside a cupboard come loose.
- At Alice Springs I glued the screws and the bracing back in place. After then completing the full length of the Great Central Road the screws and bracing haven’t moved.
Power Button On The Projecta LCD Control Screen Stopped Working
- The power button on the control screen for Projecta PM335J Stopped working (June 2025). It wasn’t the end of the world as you could still turn the power on and off using the phone app.
- I contacted Projecta and they quickly arranged for a replacement screen to be posted to us. Projecta once again were great to deal with.
- I replaced the screen. It was a very simple 5 minute job and the replacement works perfectly.
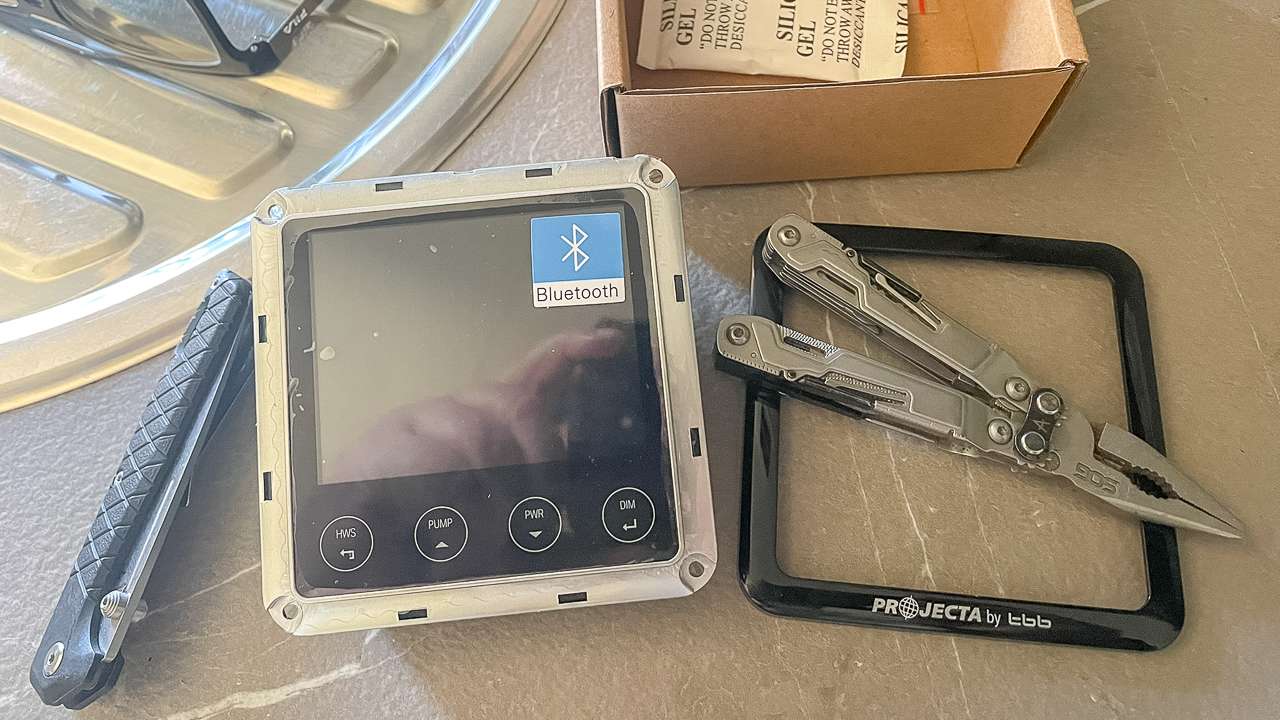
Removing Dress Ring From New Projecta LCD Screen
The Show Stopping Issue
Projecta PM335J Battery Management System Stopped Working On 12v
Ever since we had first used the Jayco All Terrain we had been experiencing intermittent power outage issues while free camping. The 12v system is crucial to us as we rarely ever stay in a caravan hooked up to power. At random intervals the 12v system was cutting out and not charging or supplying power literally leaving us in the dark.
One evening while we were free camping at Winton in outback QLD the Projecta PM335J battery management system stopped working and would not restart. After running through all of the usual checks such as connections and fuses I could not find anything obvious. So we got the torches out, cooked dinner and had an early night.
Getting Help From Projecta
In the morning I phoned Projecta to ask for advice. They had me run through a whole range of checks. After about an hour on the phone they couldn’t work out why the Projecta PM335J couldn’t see the batteries either and suspected that the unit had failed. After getting off the phone I thought I would remove the cover that goes over the wire inputs just for one last check. And I found the problem. The input to the unit where the positive lead from the batteries goes in to the Projecta PM335J was all brown and melted. Not white and normal like all of the other inputs.

Jayco All Terrain Review PM335J Not Working
I called Projecta back and they asked me to see if I could put the wire in and tighten it up and see what happened. It was soon pretty obvious that the wire input receptacle could not be tightened due to it having melted. Projecta asked me to jam the house battery positive wire in to it’s terminal and try to restart the unit. I did this and nothing started up. Projecta told me that the unit was most likely fried and would need a replacement be fitted. Projecta said that it wasn’t the first time they had experienced this issue and they believed the culprit to be the Jayco Factory not tightening the screw on the terminal correctly.
Getting Help From Our Dealer
Next I called our dealer and was put on to the service department. They were very good about the whole thing and said that they would get on to Jayco head office and organise a replacement unit to be fitted. They offered to send one up to Winton and we could arrange an auto electrician to fit it.
After doing some thinking we decided that it wouldn’t be feasible to get it fixed in Winton. The unit would take a day to be despatched from Projecta then a minimum of two days to get to Winton. Then if the moon and stars lined up an auto electrician would be available the next day to install it then we could be on our way. As we had to be back home within seven days and we were 1,800km from home we decided to end our holiday early and hightail it back home. We took everything out of the van fridge we could fit in to our Bushman fridge in the ute and gave the rest away. First night on the way home we stayed in a rest area outside of Augathella QLD in heavy rain which was great as were able to run our generator in the evening so we could make dinner. Second night we stayed at a rest stop at Nyngan NSW and had dinner at the RSL. The following day we made it home. It was a hectic two days where we covered 900km a day.
The Projecta PM335J unit has now been replaced under warranty by our dealer. The 12v system is back up and running perfectly. And yes – the first thing I did when I got the Jayco All Terrain back home was check out the input terminals on the Projecta PM335J to make sure they were all nice and tight! Overall looking at what the dealer has done with the installation of the new unit I have to say they have done a much nicer and neater installation than what the Jayco factory managed to do.

Jayco All Terrain Projecta 335J
Jayco All Terrain Review Of Our Buying Process
Before I begin with the reasons why we bought a Jayco All Terrain let me say that when we were looking for a new van we had no intentions of buying a Jayco. We had heard the stories of Junko this and rubbish that so a Jayco wasn’t really on our purchasing radar.
We had been travelling offroad with a caravan for quite a few years with our Supreme Getaway so we knew what it was like to have a reliable offroad caravan. Being a 2000 model we also knew what it was like to have an offroad caravan minus a lot of the modern bits available in newer vans.
Why We Wanted A New Caravan
We loved the Supreme Getaway but as we are planning on doing a lot more offroad travel in the years to come it was time to get something with a few more things to keep us in a little bit more comfort. For example the Supreme Getaway had a small cramped internal toilet shower combo. It was so small and cramped that we always set up a shower tent and used the external shower instead of the one inside. To use the toilet was an act more achievable by a circus contortionist than a mid fifties overweight bloke!
We began our hunt for the new van the same way as most people do by researching on the internet. Over the years we have been avid visitors to caravan and camping shows so had a list of vans that we liked and we researched all of these. We’d been thinking about our next van for a while so I had already joined a few Facebook groups for the brands and read through posts looking for common problems with different models so that helped rule a few out.
As an example we had seen the EzyTrail Parkes 15 at a couple of shows and liked it and it ticked most of our boxes but the issues users were reporting were varied and constant and didn’t seem to be addressed with new models. Problems were persistent with no sign of improvement.
Which Vans Did We Consider?
| Brand |
Model |
Length |
Price |
Why We Ruled It Out |
| Bushtracker |
Various |
17ft |
$120,000+ |
– Too heavy* |
| Crusader |
Various |
18ft |
$100,000+ |
– Not available as pop top |
| EzyTrail |
Parkes 15 MkII Twin |
15ft |
$59,990 |
– Fold out bed
– Combo ensuite
– Reliability & build quality issues |
| JB |
Various |
17ft |
$90,000+ |
– Not available as pop top |
| Lotus |
Freelander |
17ft |
$90,000+ |
– Too heavy
– Not available as pop top |
| MARS |
15 Deluxe |
15ft |
$59,990 |
– Fold out bed
– Combo ensuite
– Reliability & build quality issues |
| New Age |
Desert Rose |
18ft |
$110,000 |
– Too heavy
– Not available as pop top |
| New Age |
Road Owl + Adventure Pack |
16ft |
$70,000 |
– Not convinced it would handle any offroad work |
| Rhinomax |
Various |
16ft |
$100,000+ |
– Combo ensuite
– Didn’t like available internal layouts |
| Supreme |
Territory |
16ft |
$90,000+ |
– Too heavy
– Didn’t like finish quality on vans we looked at
– Salespeople not helpful |
List Of Things We Wanted In Our New Van
We spent a lot of time deciding what we wanted in our next caravan. We kept a list for about a year and added to and subtracted from it many times before we came up with the 30 things we really wanted. we didn’t get everything but we came very close. A few things we didn’t know we needed made the final selection. A few things we thought we needed it turned out that we didn’t.
1. DO35 Hitch
We had a DO35 on our Supreme Getaway and it was a must have on the new van.
YES. Standard.
2. Pop Top
We wanted a pop top as we like the lower travel height as it’s easier to get in to camp sites at the end of tracks with overhanging branches.
YES. Standard.
3. Maximum Length of 17ft
Storage space at home under the carport is a bit limited.
YES. Standard.
4. Full Ensuite
We wanted a full ensuite as the combo ensuite we had in the Supreme Getaway wasn’t very practical for us.
YES. Standard.
5. Independent Suspension
A lot of our travel is offroad and we go in to a lot of camp sites that are hard to get in to. Common consensus is that independent suspension is more suited.
YES. Standard.
6. Single Axle
I find a single axle caravan to be more manoeuvrable when parking or navigating obstacles on tracks than dual axle. Also where the van is kept at home requires some very tight reversing to get it in.
NO. Comes as a dual axle van. despite wanting a single axle van I have found the dual axle to tow better than our old single axle.
7. Single Beds
We had single beds in the Getaway – never intended getting them until we saw a van with them. The extra space they give between them for getting dressed and for the dog to sleep is the reason we like them.
YES. Standard.
8. No Microwave
As we are rarely camped in a caravan park 240v power is not available. The option to delete the microwave and have a drawer or cupboard fitted in place was desirable to us.
YES. As a no charge option. Factory fitted an additional large pot drawer and gave us a refund of $121.
9. No Oven
All of our cooking is done outside on a BBQ or in a camp oven so an oven is of no use to us. The option to not have one and have a drawer or cupboard for more storage was of more use.
YES. As a no charge option. Factory fitted an additional storage drawer.
10. Cafe Seating
Cafe seating is our preferred option. There is only ever the two of us so a compact seating arrangement suits. We play a lot of board games and cards at night or if it’s raining and miserable outside so cafe seating is better as you sit face to face. Amanda is a terrible cheat when it comes to games and I don’t want her peeking at my cards!
NO. Came with “L” shaped seating cafe seating not an option. We had the dealer install a MAPA movable table at a cost of $600 but still would have preferred cafe seating.
11. Plenty Of USB CIG Outlets Inside
I use a sleep apnoea machine so need a CIG outlet to plug in to alongside the bed. Between us we have four mobile phones (personal and work) plus a couple of iPads and other rechargeable devices such as speakers and bluetooth speakers. Therefore we needed a LOT of charging points inside the van.
YES. As a factory fitted option at $200. We had additional outlets fitted alongside each bed. Van came with more than enough outlets in other places inside.
12. CIG Outlets Outside
Often we will put up extra LED lighting so external CIG outlets are useful to us. If we are camped near a river for a week we’ll heat up water in a boiler and plug a 12v shower pump in an external CIG outlet and use our shower tent to save our tank water.
YES. As a factory fitted option at $100. We wanted the additional outlet on the drivers side as there was already one on the passenger side. They got it wrong and we have ended up with two on the passenger side. Close enough.
13. Slide Out Kitchen
All of our cooking is done outside except for things like boiling a kettle. We wanted a slide out kitchen on the new van. With Supreme Getaway we had to use a cooker we carried in the ute and on a long road trip with a lot of stops you get tired of pulling it out and packing it away.
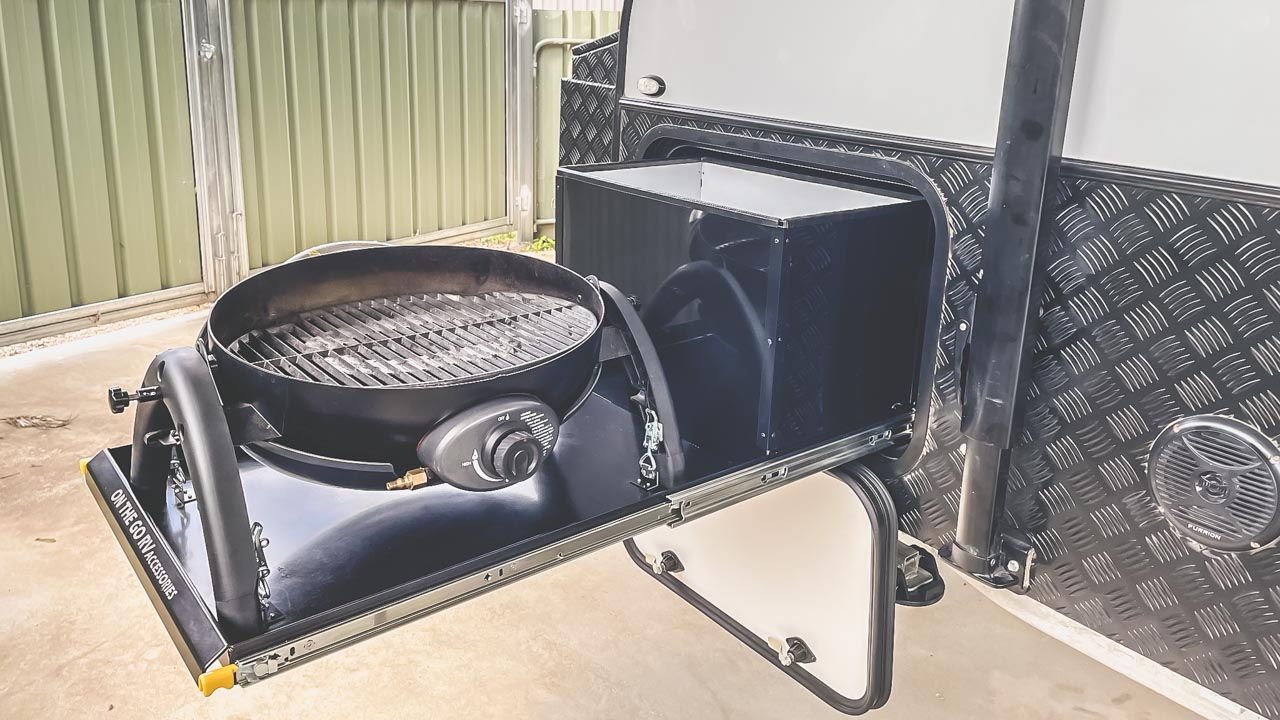
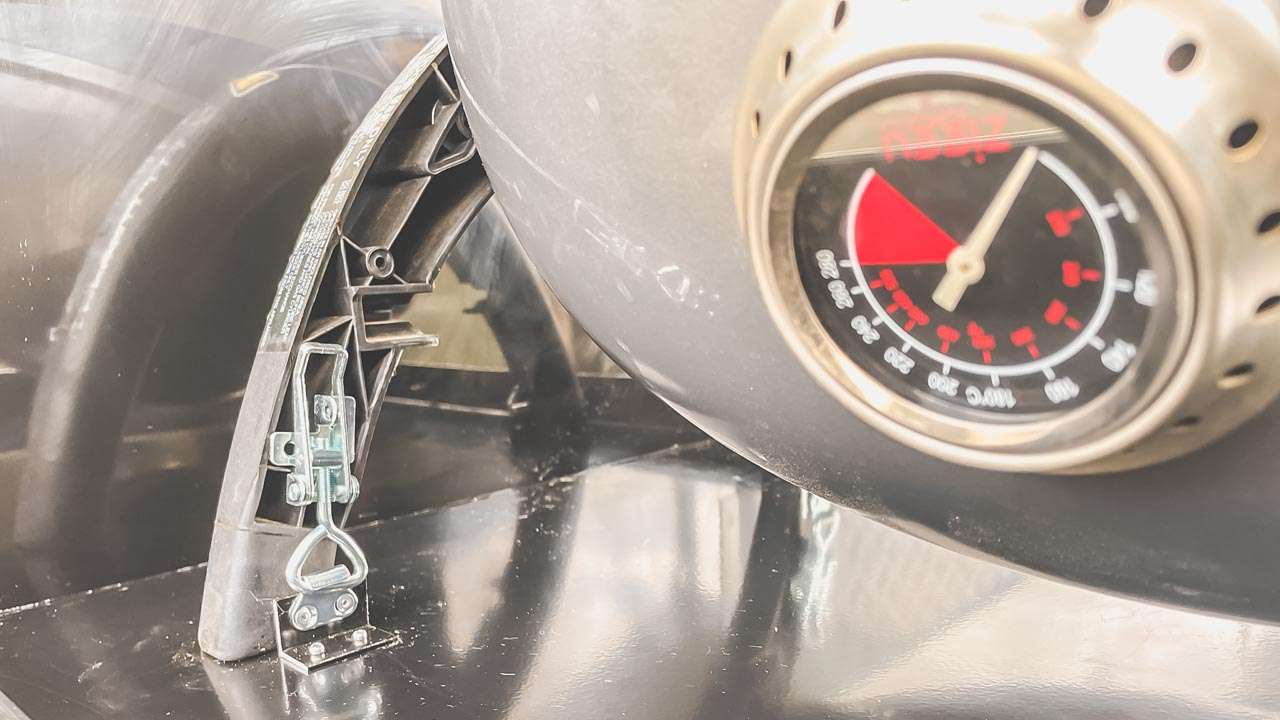
YES. As a factory fitted option at $1690. The slide out kitchen has a sink and a cooker and a spot for a BBQ that we had to modify ourselves to fit a tiny Ziggy. The cooker was all but useless so we aren’t happy with the slide out kitchen provided. We have since removed the slideout kitchen and replaced it with a pullout BBQ and box – much more impressed with that.
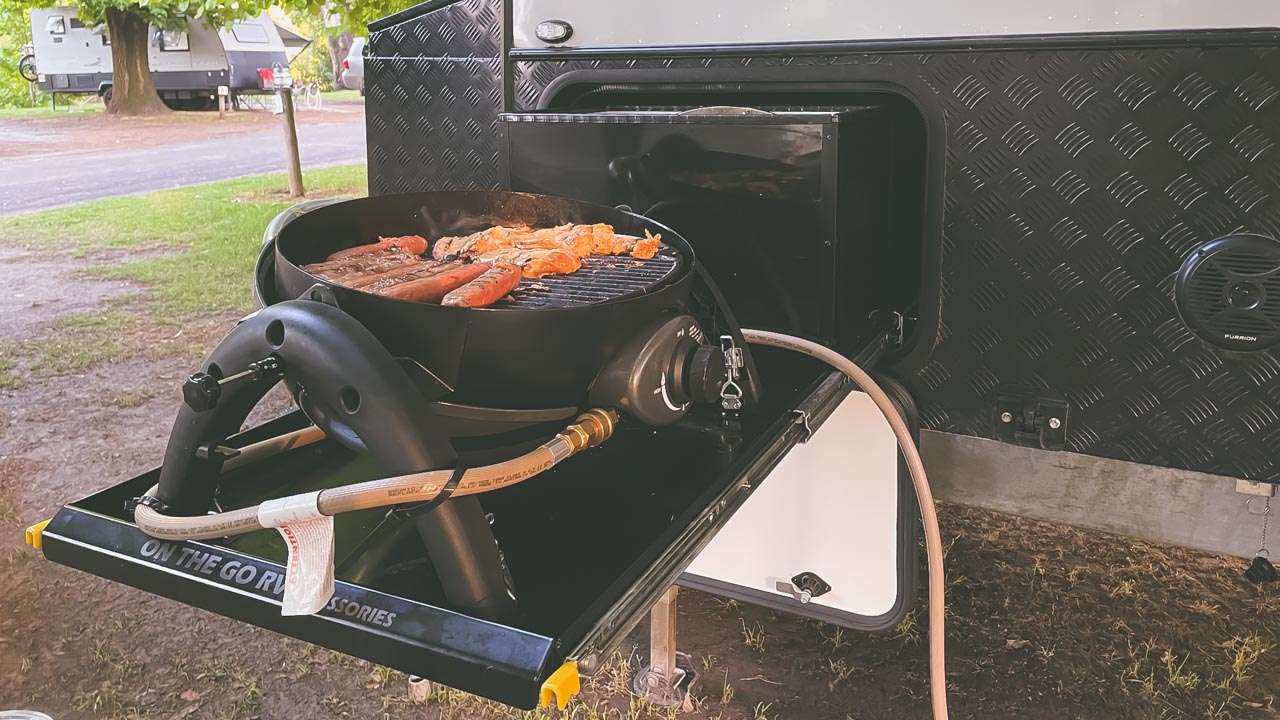
Ziggy BBQ Slide Jayco All Terrain
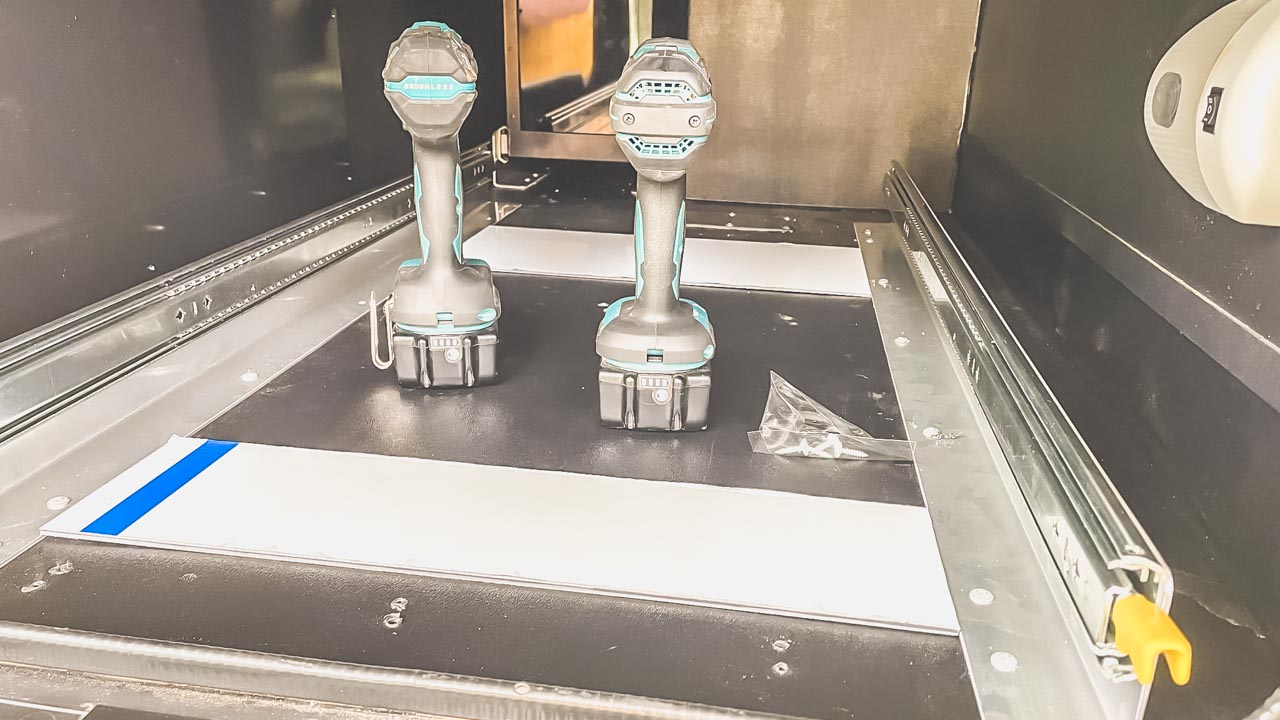
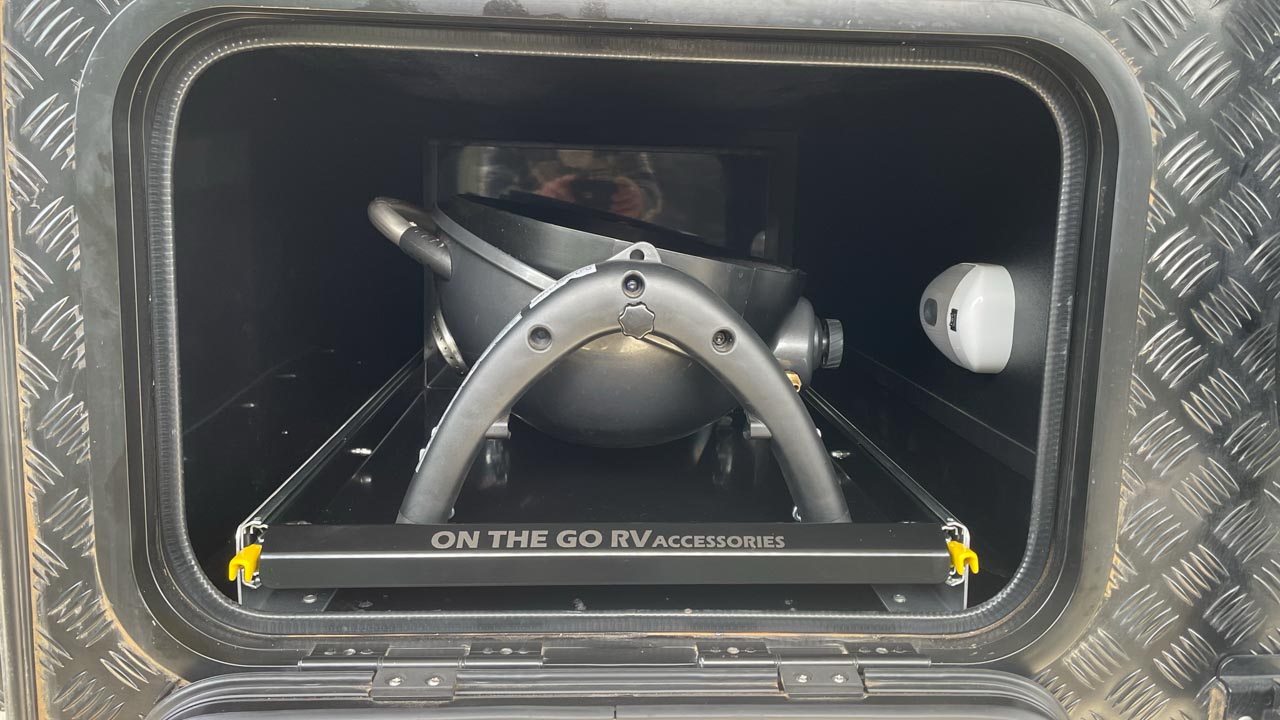
14. Generator Storage
We had never owned a generator before but seeing as we wanted a large compressor fridge in this van we thought it a good option to carry one for those times where you get a lot of cloudy days in a row while camped in one place. So we needed a place to store it in the van when not in use.
YES. Standard. In the large front toolbox – it even has a slide.
15. Good Ground Clearance
Getting in to a lot of the places we camp requires good ground clearance. We don’t do any extreme type offroading however most free camps we have been to have humps and hollows and obstacles you need to be able to get over. Good ground clearance is a must have item.
YES. Standard.
16. Big Compressor Fridge
Three way fridges. We don’t like them. The ones we have owned struggled in high heat and basically didn’t do much at all when the van was being towed and they were set to “12v”. We swapped out the 3way fridge in our Supreme Getaway for a Bushman 12v upright and the performance and usability was in a different dimension. The Bushman we installed was a direct replacement size wise and we found it a bit small for remote area travel. A big compressor fridge was a non negotiable item for us – we had to have one.
YES. As a factory fitted option. We had a Dometic RUC6 188 litre compressor fridge fitted an additional cost of $990.
17. Lithium Battery Setup
When we were looking at vans it was 2021 and lithium batteries had come down in price from a few years earlier. Being able to deplete them safely to 20% as opposed to 50% for AGM batteries coupled with the weight saving made them an attractive proposition. Throw in a big compressor fridge and a lithium battery setup became a must have item for us.
YES. Comes standard with 1 x 100ah lithium battery. We had 2 x 12ah lithium batteries as a factory fitted option for an additional cost of $1290.
18. DCDC Charger
Installation of a DCDC charger on our old van transformed the way our batteries were charged and maintained while driving. It made that much of a difference that the new van had to have one factory fitted.
YES. As a factory fitted option. Originally I asked for an Enerdrive 12V 40A DC2DC+ Battery Charger to be fitted by the dealer and was told that yes it was an option for $750 and I said go for it thanks. That’s the one we had in our previous van and it was awesome. When the van was delivered to the dealer it had a Projecta PMDC-30 DC-DC Charger (Intelli-Jay Integration) already fitted – I was charged an additional $600 for the Projecta unit.
19. Decent Amount Of Solar On Roof
A good amount of solar on the roof was important. With the compressor fridge and my sleep apnoea machine running there is a fair bit going out. Factor in cloudy days and a good quantity of solar plus room to install more became an important item.
YES. Standard with 2 x 200watt solar panels mounted on the roof. There’s plenty of room to fit at least another two if required.
20. External Solar Input For Portable Solar Panel
As above we wanted to be able to plug in an external unregulated panel for cloudy days.
YES. Standard.
21. Minimum 200 Litre Water Tanks
Water carrying capability is important to us. We do a lot of travel in areas where potable water can be many days between fills.
YES. As a factory fitted option. As standard originally it came with 2 x 160 litre tanks so we asked for third to be fitted as a factory option at a cost of $600. A few months before the build was to commence we were told that the van now came with 2 x 160 litre tanks and a grey water tank and a third water tank wasn’t an option. I told the dealer to cancel our order and the dealer agreed to remove the grey water tank and install a third 80 litre tank as originally agreed upon.

Jayco All Terrain Added Water Tank Plumbing Protection
22. Good Underbody Protection
Dirt road travel is one of our favourite things. The underside of a van cops an absolute hammering from stones on this kind of road so it’s important that a van has plumbing and wiring protected.
NO. The underbody protection isn’t good as delivered. I had to spend a lot of time getting it sorted. We chucked the stoneguard on the front and fitted a StoneStomper and that’s the front of the van and back of our vehicle protected. I then bought a pile of saddle clamps and screws and a few bags of STRONG cable ties and got underneath and secured all wiring and plumbing properly. I had to replace a load of the Jayco cable ties as the ones they use are useless. While under there I looked at the flap they have installed across the front and had a good think. I was looking at what stones travelling front to back can hit. I ended up moving the factory fitted front protection flap across fully to the drivers side as it had stuff exposed on that side. Then I bought some two ply 6mm insertion rubber and replicated the flap underneath to protect what needed protecting. Some corrugated split tubing in a few places is good added protection. Again while I was under the van I looked at the plumbing fittings used and ordered some spares plus some straight through joiners and a few metres of pipe. I always carry a pile of different size wire and some appropriate crimps as spares. We’ve done well over 1500km on dirt including the Oodnadatta Track since we’ve had our AT and the underside tank guards and other bits have copped a hammering but nothing has been broken. We’ve been travelling offroad for years so have a bit of an understanding of what goes on. At first look underneath our AT I was not too impressed but after a bit of time thinking and a bit of time sorting things out it’s not too bad.
23. External Shower
An external shower is good to give yourself a quick hose down if you get covered in mud. It saves dragging dirt in to the van.
YES. Standard.
24. Tap On Drawbar
Amanda has always wanted to have a tap on the drawbar. I was never really sure why. Now that I have one I use it every single day when rinsing out the coffee plunger. I actually love the bloody thing and I didn’t know I needed it!
YES. Standard.
25. Dust Reduction – Scupper Vent
We wanted a way of applying positive air pressure inside the van to reduce dust ingress. Our Supreme Getaway had a scupper vent, the canopy on the ute has a scupper vent and we have found it to be very effective.
YES standard. Comes fitted with a Dometic Dust Reduction System. We have found it to work very well at reducing dust inside the van.
26. External Bayonet Fitting For BBQ
Our BBQ gets used all of the time. One of the best things we added to our last van was an external bayonet point so the new van had to have one. It’s a lot better than carrying an extra bottle.
YES. Standard.
27. Adequate Storage Inside
As a rule we travel light so don’t need a lot of storage space. The new van needed to have enough space for us to have a few weeks worth of clothing each and food for a few weeks. Massive amounts of storage weren’t needed inside.
YES. The van has more than enough inside storage for us. We did ask for the wardrobe hanging space to be replaced with shelves and this was done at no charge by the dealer. I have installed a drawer underneath the sink in what was otherwise a blank space – it looks factory fitted. I also fitted an additional shelve in the cupboard underneath the sink increasing usable storage by a large degree.
28. Dual Spare Tyres
A lot of our travel is in remote areas and an additional spare for the van is advantageous. Once you get one flat tyre you can’t fix with a plug you get a bit nervous when you still have another 500km to go to find a replacement.
NO. The van came with a single spare tyre mounted on the rear bar. Due to weight limitation on the rear bar another one can not be installed there. There might be a possibility to install an underbody spare at the back.
29. Minimum 600kg Payload (Minus Water)
We wanted a decent payload on the van. As I mentioned under the adequate storage requirement we like to travel light however we also like to do it legally. From time to time we’ll strap down some firewood or want a few jerries of water on board and the weight all adds up. We’ve always been mindful of weight and we thought a payload of 600kg would give be more than enough.
YES. Standard.
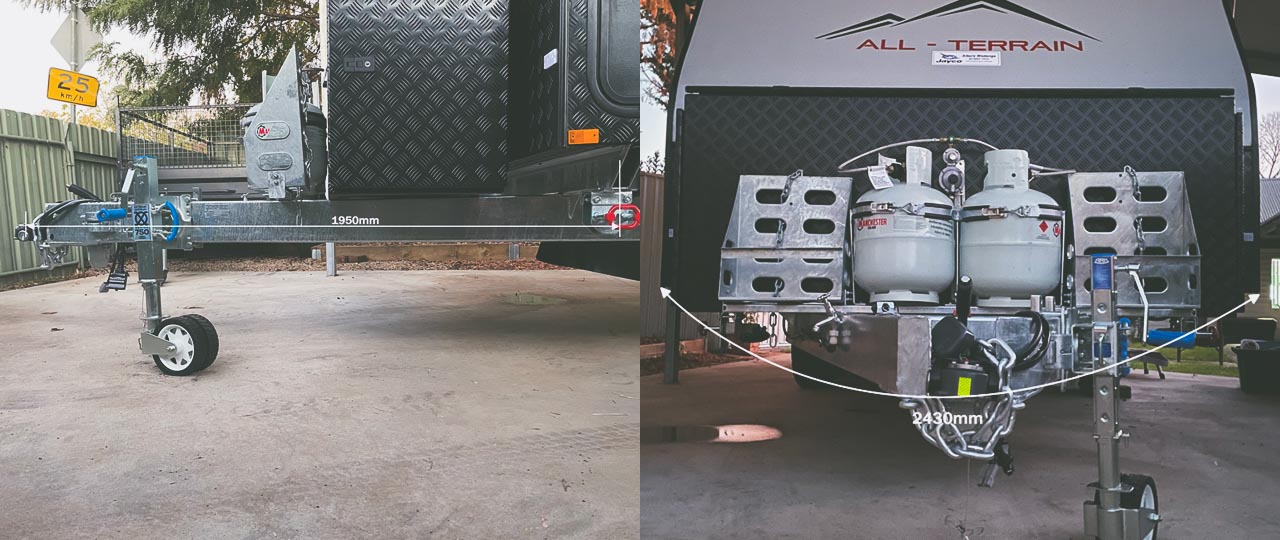
30. ATM Of Less Than 2850kg
We did the maths before buying our previous van so we know the legal towing capacity of our vehicle very well. It works out to be around 2850kg with a towball weight of 250kg. We like and trust our tow vehicle and have spent a small fortune setting it up to suit ourselves so we have no intention of replacing it.
YES. Standard. With the 600kg payload the ATM is just under 2850kg. The towball weight comes in at 290kg loaded up and ready to roll so that was a bit higher than we were after. However due to the extra storage in this van we have been able to remove some items from the back of the ute and in to the van to balance this out.
Jayco All Terrain Review Model Selection
Here’s a quick rundown of the different models in the current (Oct 2022) Jayco All Terrain Range. We purchased the 17.55-9.AT as it best suited our requirements.
| Model |
Type |
Length |
Tare |
Payload |
Bed |
Bunks |
Ensuite |
Axles |
Water Tanks (80L) |
Grey Water |
| 13.43-2.AT |
Pop Top |
13ft |
1720kg |
500kg |
East/West |
– |
Combo |
1 |
2 |
Y |
| 17.58-3.AT |
Pop Top |
17ft |
2213kg |
600kg |
East/West |
2 |
Combo |
2 |
2 or 3 |
Y |
| 17.55-8.AT |
Pop Top |
17ft |
2154kg |
600kg |
Island |
– |
Full |
2 |
2 or 3 |
Y |
| 17.55-9.AT |
Pop Top |
17ft |
2184kg |
600kg |
Singles |
– |
Full |
2 |
2 or 3 |
Y |
| 19.61-2.AT |
Full |
19ft |
2446kg |
600kg |
Island |
– |
Full |
2 |
2 or 3 |
Y |
| 19.61-3.AT |
Full |
19ft |
2436kg |
600kg |
East/West |
2 |
Full |
2 |
2 or 3 |
Y |
| 22.68-1.AT |
Full |
22ft |
2605kg |
600kg |
Island |
2 |
Full |
2 |
2 or 3 |
Y |
| 19.61-2.GX.AT |
Full |
19ft |
2436kg |
600kg |
Island |
– |
Full |
2 |
2 or 3 |
Y |
| 19.61-3.GX.AT |
Full |
19ft |
2436kg |
600kg |
East/West |
2 |
Full |
2 |
2 or 3 |
Y |
| 22.68-1.GX.AT |
Full |
22ft |
2605kg |
600kg |
Island |
2 |
Full |
2 |
2 or 3 |
Y |
Additions At Purchase
We added quite a few items to our Jayco All Terrain17.55-9.AT at time of build.
- Pull Out Kitchen +$1690
- Extra 80 Litre Water Tank +$450
- Compressor Fridge In Place Of 3way Fridge +$990
- Change 1 x 100ah Lithium Battery to 2 x 120ah Lithium Batteries +$1295
- MAPA Table +$1000
- Additional CIG Outlets Beside Both Beds +$250
- Anderson Plug On Drawbar to DCDC Charger $100
- PMDC-30 DCDC Charger +$400
- Water Filter Under Sink +$199
- Anti Flap Kit +$450
- Delete Microwave (-$121)
- Pot Drawer To Replace Microwave +$0
- Shelves Instead Of Hanging In Wardrobe +$0
- Maximum Payload Upgrade +$0
Additions After Purchase
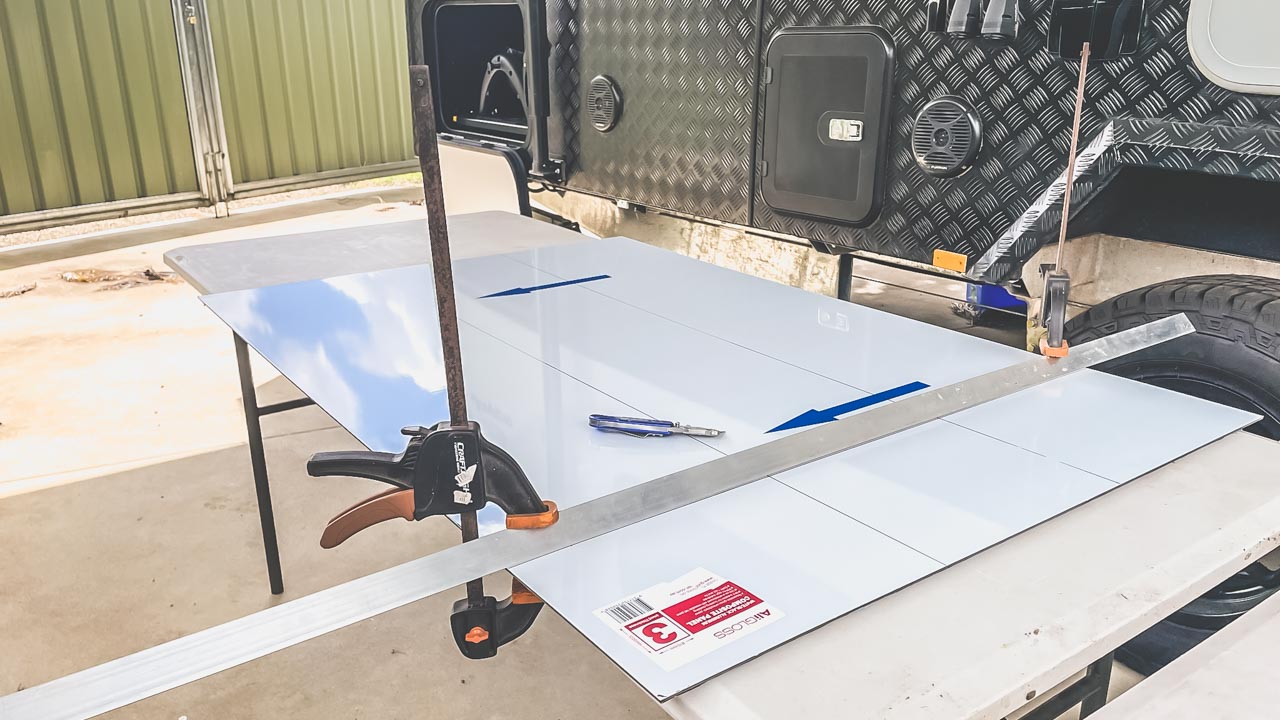
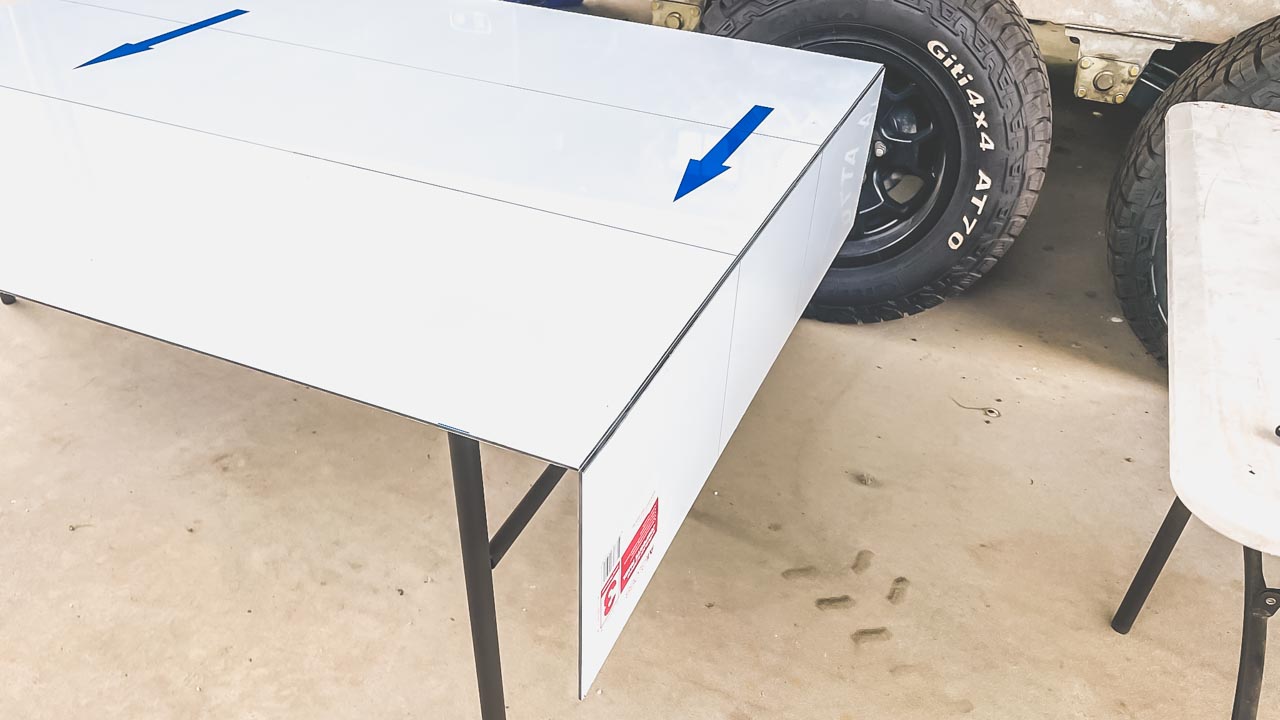
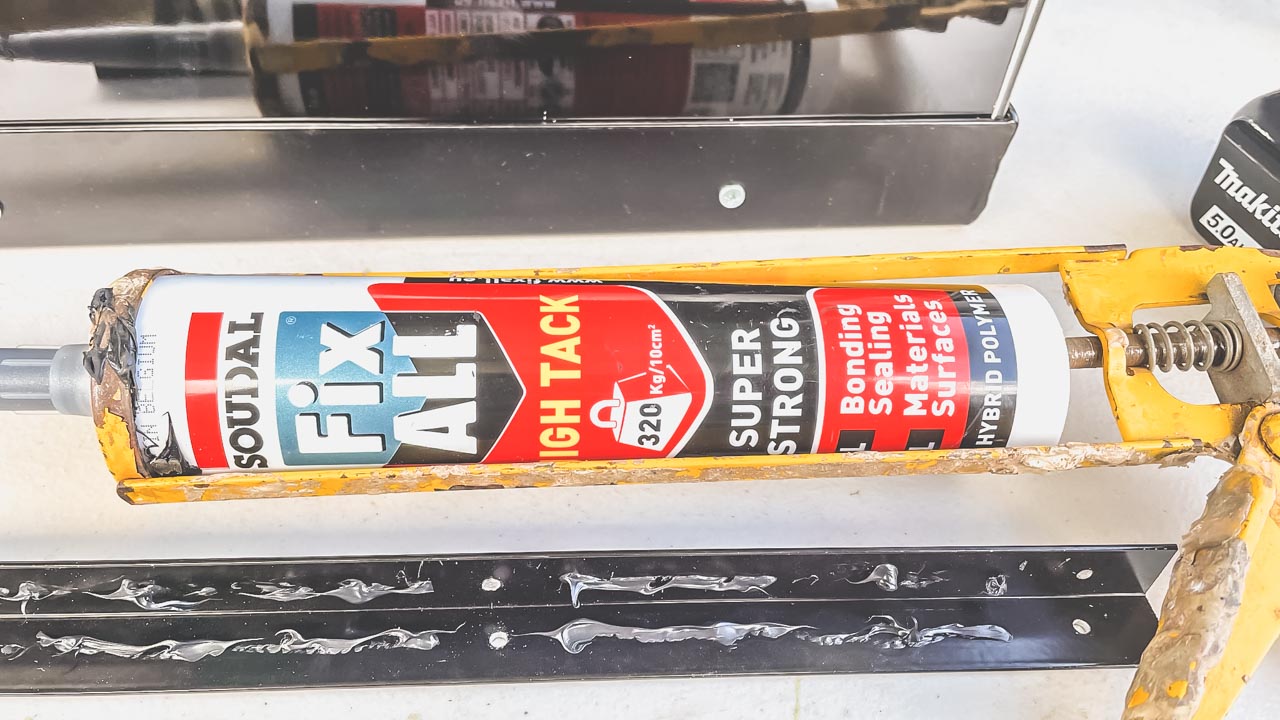
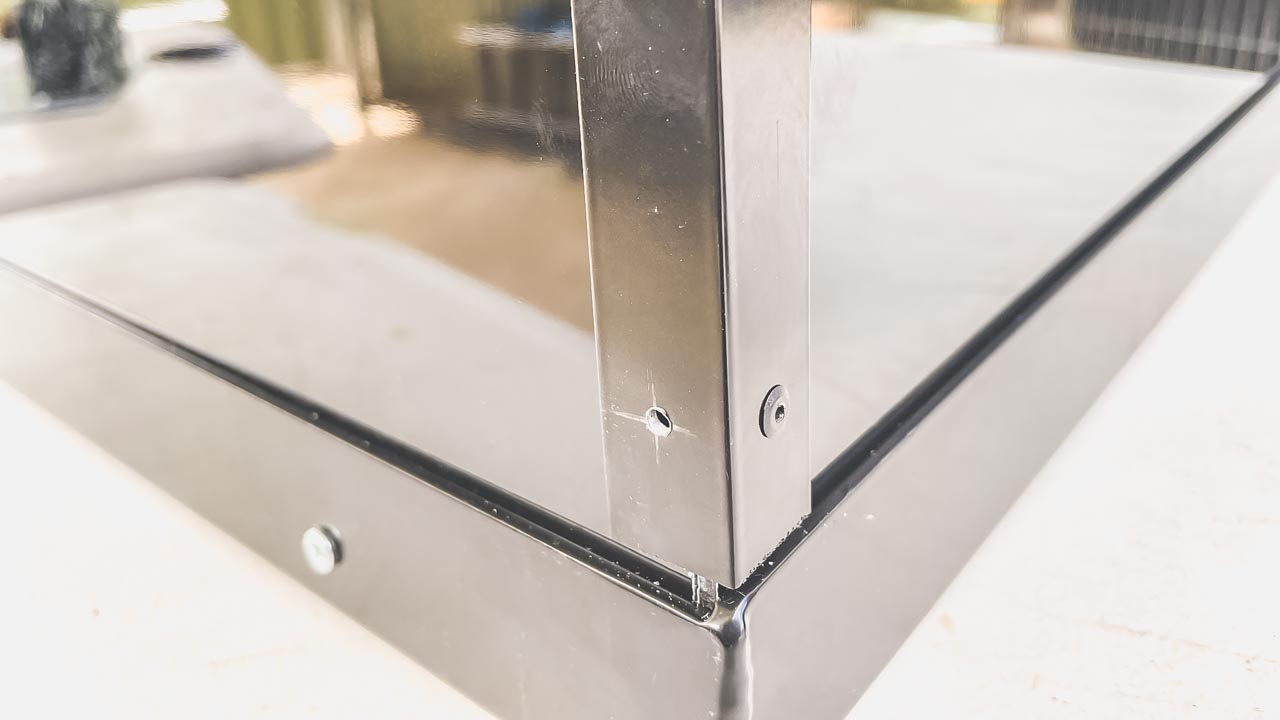
Modifications
Where We’ve Been In Our Jayco All Terrain
We have done just on 25,000km with our Jayco All Terrain since we picked it up from the dealer in May 2022. That includes over 120 nights – just about all of that has been fully off grid.
- We have done many local trips close to home. Bethungra Dam is 100% off grid with a long dirt road in and out.
- From home to Clunes VIC. About 1,200km return.
- 4 week road trip. Marree, Farina, William Creek, Coward Springs, Algebuckina Bridge, The Pink Roadhouse at Oodnadatta, Coober Pedy, Uluru, Alice Springs, Tennant Creek, Longreach and Winton. About 9,000km all up with about 1,000km on dirt.
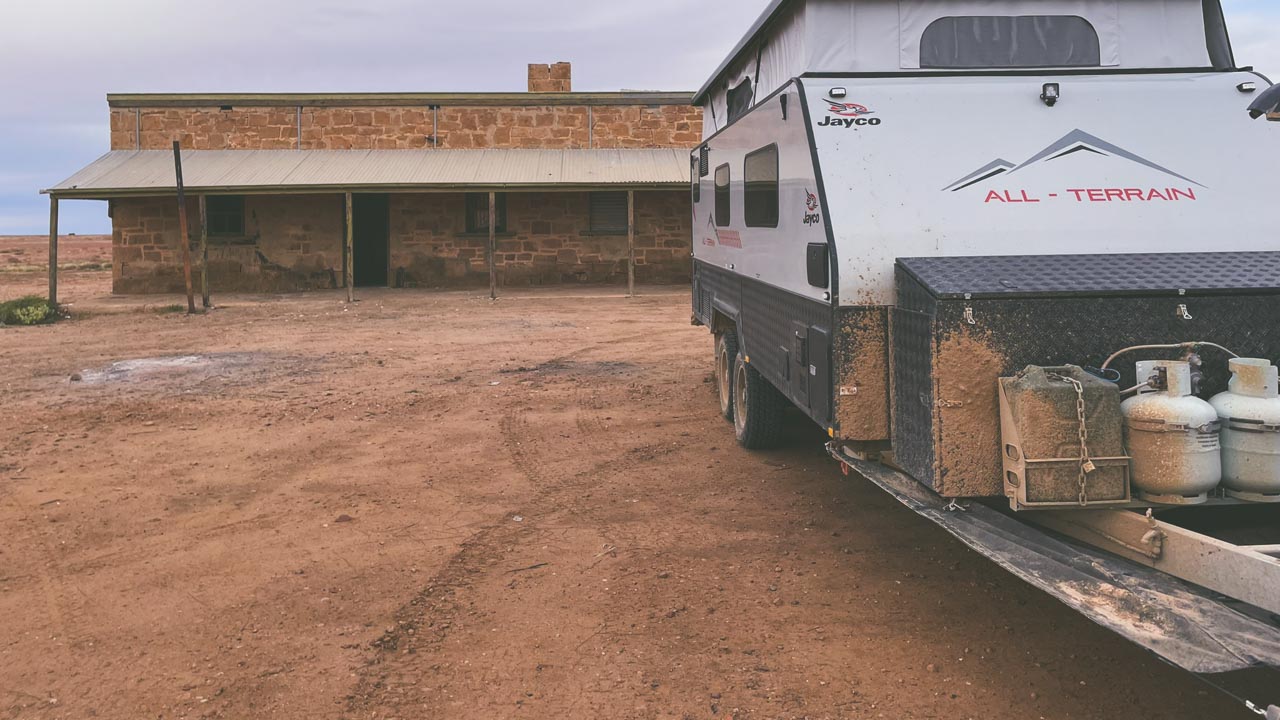
- 6 week road trip. One Tree, Menindee, Orroroo, Farina, Curdimurka, Algebuckina Waterhole, Coongra Creek, Alice Springs, Kings Canyon, Yulara (Uluru), Docker River, Great Central Road, Gwalia, Kalgoorlie, Perth, Hyden, Norseman, Caiguna, Koonalda Homestead, Bunda Cliffs, Wudinna, Burra, Robinvale, Carrathool. About 10,000km all up with about 3,500km on dirt.
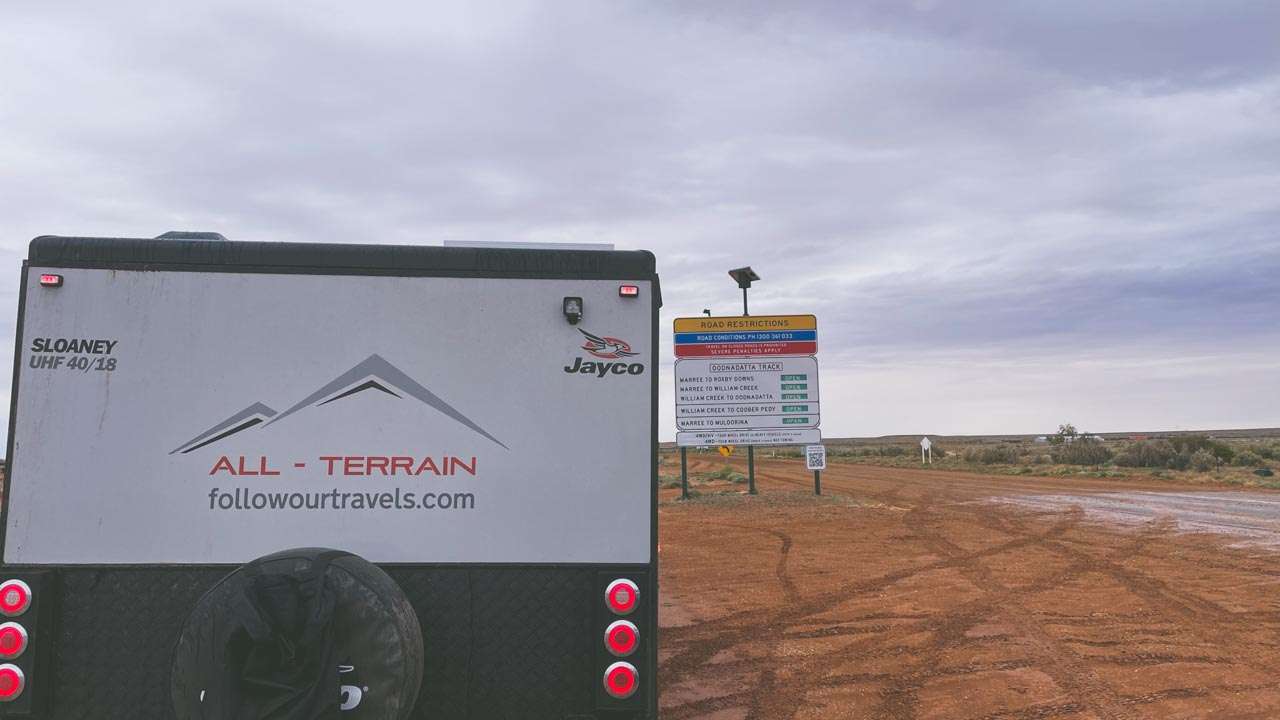
Jayco All Terrain Review – Oodnadatta Track
Overall Summary – Jayco All Terrain Review
- We are very happy with our Jayco All Terrain despite having had a few problems with it so far. The problems have all been fixed to our satisfaction under warranty by our dealer. The van has been a lot better than I was anticipating.
- It has been great offroad travelling the Oodnadatta Track. It travels very well behind our Navara and has let in no dust at all. The 240ah lithium batteries and solar set up have proved to be more than enough to run the upgraded compressor fridge we specced.
- Once you get through any warranty issues and you have sorted out the underbody protection you have yourself a very capable offroad and offgrid caravan.
- All up – if you are considering buying one then go out and do it!